Winning The Door Prize
The accuracy of this shop's five-axis gantry-type profiler helped it land the job of machining the engine-bay doors for the F/A-22.
Share


Doors are a powerful symbol of new opportunities. However, for Summit Aeronautics Group (Helena, Montana), whose principal business is designing and building large-part fixtures for the aircraft industry, they are more than a symbol; they have become a very real means to new business, diversification and growth. In this case, the doors are the engine-bay doors for the twin-engine F/A-22 Raptor, the new-generation fighter being built jointly by main contractors Lockheed Martin, Boeing and Pratt & Whitney as the replacement for the F-15 Eagle. Capacity constraints forced Boeing to outsource the machining of the doors. Summit needed to prove to Boeing that it could not only build tooling but machine engine-bay doors as well.
Boeing is responsible for supplying, among other things, the F/A-22’s aft fuselage, which is a 19-foot-long by 12-foot-wide, 5,000-pound structure that houses the fighter’s two Pratt & Whitney F119 engines. The aft fuselage includes a set of four, contoured, engine-bay doors, which together enclose the bottom third of the engines. In the early stages of the project, Boeing machined, assembled and installed the doors on the aft fuselage in house. However, when the program moved into the production phase last year, the company began a search for a vendor to machine the doors, said to be the most difficult-to-machine components that Boeing supplies for the F/A-22.
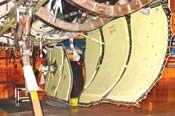
The engine-bay doors consist of right- and left-hand forward doors, each measuring about 2 ½ by 4 feet, and right- and left-hand aft doors, each measuring about 4 by 6 feet (Figure 1). The doors have a titanium exterior skin about 1/8-inch-thick, backed by an inch-thick titanium honeycomb core. (The material used for the doors is consistent with the entire aft fuselage, which is 67 percent titanium by weight.)The engine-bay doors are unique in that they are a part of the structural integrity of the airframe and require tight-tolerance machining to perform as intended.
When closed, each door is secured to the fuselage bulkheads using numerous countersunk fasteners. The fit of the engine-bay doors must facilitate fast opening and closing; one of the requirements for the F/A-22 is that mechanics must be able to access an engine, replace it, close up the fuselage and fire up the plane in 90 minutes. There’s no time to coax fasteners into misaligned holes.
Although the doors are fabrications, the fastener holes must be located and machined to tolerances that are more typical of much smaller machined components. And because the holes must be drilled at many different angles in the contoured door surface, the job is best handled on a five-axis machining center.
The Search
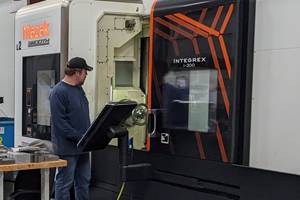
To find a vendor capable of machining the engine-bay doors to the precision required, Boeing representatives visited 12 potential suppliers across the country to evaluate the accuracy of their five-axis gantry mills. Summit’s PS-6A, five-axis, gantry-type profiler, made by SNK America Inc. (Elk Grove, Illinois), proved to be the most accurate of the machines tested. Because of the performance of the machine, Summit was allowed to bid on the machining of the engine-bay doors and then won the job. To provide the additional capacity needed to handle the engine-bay door machining program, the shop purchased an RB-150F, five-axis, bridge-type machining center, which it dedicated to the job.
The biggest challenge in machining the doors is to drill, ream and countersink numerous fastener holes in the doors, primarily along their edges. The left- and right-hand forward doors each require about 120 holes, and the larger left- and right-hand aft doors require about 200 holes.
The starting point for the door is a blank, which Summit receives from another Boeing vendor, that consists of a piece of 1/8-inch-thick titanium sheet that has been cut to the approximate size and shape of the door and superplastic-formed to the required contour. The blank also has a titanium honeycomb core, approximately 1-inch-thick, bonded to the inside face.
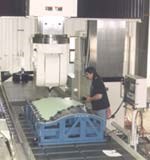
The door blank is mounted, exterior face up, on a machining fixture and secured by clamps around its perimeter. The fixture, which can weigh as much as 5,000 pounds, is then loaded on the 59-inch-wide by 158-inch-long table of the bridge-type five-axis machining center.
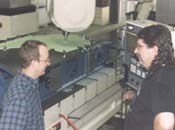
Jeff Watts, the machine operator, explains some of the considerations involved in machining the doors: “First of all, each hole in the door must be drilled to within 0.007 inch of true position. Boeing used an elaborate software program and a laser tracker to guide the drill hole by hole to ensure true position when they machined the doors in-house. Instead, we rely on the inherent accuracy of our bridge-type machining center to meet Boeing’s true positioning requirements. We are able to hold the holes to within 0.005-0.006 inch of true position without using a separate, independent inspection system, helping to hold down costs.”
In addition to accurately locating the holes on the door, however, most of the holes must also be countersunk. The depth of the countersink must be such that the head of a master fastener, when inserted in the hole, is flush with the exterior skin or recessed no more than 0.0035 inch. Normally, keeping within specifications on the countersink depth would not be that much of a challenge. Holding those specifications on the contoured engine-bay doors is something else again.
“We just can’t put a door on the fixture, load the machining program and push the start button,” Mr. Watts explains. “Each door blank is unique. First of all, the thickness of the exterior skin can vary as much as 0.010 inch. Then, too, there are minor variations in the contours from door to door. Even though the door is securely clamped to the fixture for machining, some contoured surfaces may not conform precisely to the contour of the fixture. Either situation can affect the depth of the countersink, and if the countersink is too deep—which could reduce the holding surface for the fastener—we’d have to scrap the door.
“To ensure that we keep the countersink depth relative to the surface of the door within specifications, we use the RB-150F as a CMM,” Mr. Watts continues. “Using a Renishaw MP700 probe, we probe all of the hole locations on the surface of the door. The probe data gives us the actual locations for the starting points for the holes, which we compare to the nominal starting points in the machining program. We then use a software program that we developed to adjust the machining program to begin drilling at the actual surface for each hole location. In every case, the orientation of the tool stays the same; it’s just a matter of adjusting the tool forward or backward along that vector to start the hole right precisely at the surface of the door.”
One More Thing
There is still one more factor that Summit must deal with in the machining of the holes. Once the machining program has been adjusted for the actual position of the door surface, the machine should be able to proceed from hole location to hole location, drilling each hole and countersinking it to the proper depth. However, when the drill penetrates the material, the exterior skin flexes as much as 0.002-0.003 inch. Compounding the problem, the amount of flex can vary from door to door and from hole location to hole location on the same door. To keep the countersink depth within specifications, this variation must be compensated for on a hole-by-hole basis.
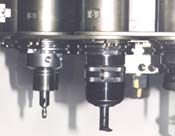
To compensate for the flexing during the drilling of the hole, the operator drills and countersinks a hole—the operations are performed by a solid carbide combination tool that drills, reams and countersinks the hole in one pass. The operator then retracts the tool, inserts a master fastener in the hole and measures the amount that the head of the fastener is recessed using a dial indicator. If the countersink depth is approaching the lower limit, the operator invokes a second macro, which adjusts the machining depth along the hole vector by the desired amount.
The operator drills and checks the holes one at a time. It’s a time-consuming procedure, but it’s necessary to avoid exceeding the allowable countersink depth. The operator may drill 10 to 20 holes without having to change the macro, but as the contour changes the amount of flex changes and the operator may have to make a corresponding change in the macro to keep the countersink depth within tolerances.
Once drilling of the door begins, it does not stop until the door is completely drilled. After the door is drilled, it is transferred, still clamped to the fixture, to the quality assurance department for inspection. The fixture is loaded on a large CMM that automatically inspects the hole pattern in the doors. After the door has been approved, it is returned to the SNK machine for additional machining.
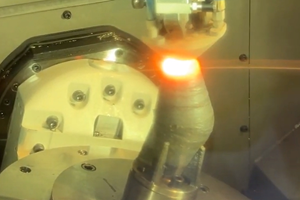
When the door is returned to the five-axis machining center, the clamps securing it to the fixture are removed and bolts are inserted through some of the drilled holes so that the door does not move relative to the fixture. After the clamps are removed, the edges of the door are trimmed using a ¾-inch-diameter, 5-flute end mill, and then they are chamfered on the inside edge using a custom insert-type chamfer cutter that reaches in beneath the edge of the door on the fixture.
In the photo that shows the forward door being machined (Figure 4), the door is being drilled well in from the edge. In this case, fasteners will be inserted in the holes to secure a cutout milled in the door to prevent it from damaging the door and/or cutting tool. The left-hand forward door requires three diamond-shaped cutouts, and the right-hand forward door requires two, for various doors and access panels. (The hatches can be seen on the forward door in the background in Figure 1.) The openings are rebated (stepped down) 0.070 inch around their perimeters to permit the hatches to fit flush with the exterior skin.
When a door has been completely machined, a Boeing representative is called in to review the inspection results and formally accept it. Once approved, the door is packed in the specially-made shipping container it came in and shipped to Boeing’s Seattle assembly plant. The door is carefully nested in the container, and there is little concern about subtle changes to the contour in transit. When the engine-bay door is closed and fastened to the fuselage bulkheads, its proper contour is restored. At Boeing, the door bypasses incoming inspection and goes directly to the appropriate assembly area.
Opening The Door
Tom Hoffman, Summit’s president, is proud of the fact that his five-axis gantry was judged the most accurate of the five-axis machines that Boeing tested. The machine is the shop’s third SNK five-axis machine, and Mr. Hoffman credits it with enabling his shop to bid on the engine-bay door machining program and win.
In addition to winning the job of machining the F/A-22 engine-bay doors, Summit also was selected to participate in a mentor-protégé program in which Boeing analyzes its vendors’ capabilities and makes recommendations on ways to improve and expand operations. The close relationship has provided Summit with a potential opportunity to bid on the assembly of the doors in addition to the machining—a diversification that Mr. Hoffman is very interested in pursuing.
“The trend in aircraft industry is increasingly for the builders to outsource more and more subassembly work, and we want to take advantage of those opportunities,” Mr. Hoffman notes. “We have demonstrated time and again that we can design and build high quality tools. We have expanded our capabilities in the past year and have successfully demonstrated to Boeing that we can sustain complex, production machining jobs. We will continue to diversify our capabilities to ensure that we are in line with the aerospace industry’s need for sources capable of supplying assembled structural components.”
Mr. Hoffman gives a lot of the credit for Summit’s success to the company’s SNK machines. “We’ve invested millions in the machines and have essentially based our company’s future on them.” It looks like the investment is paying off. Another measure of the company’s success is that Mr. Hoffman was at IMTS 2002 to discuss the purchase of two more machines.
Related Content
Additive/Subtractive Hybrid CNC Machine Tools Continue to Make Gains (Includes Video)
The hybrid machine tool is an idea that continues to advance. Two important developments of recent years expand the possibilities for this platform.
Read MoreTsugami Lathe, Vertical Machining Center Boost Machining Efficiency
IMTS 2024: Tsugami America showcases a multifunction sliding headstock lathe with a B-axis tool spindle, as well as a universal vertical machining center for rapid facing, drilling and tapping.
Read More5 Tips for Running a Profitable Aerospace Shop
Aerospace machining is a demanding and competitive sector of manufacturing, but this shop demonstrates five ways to find aerospace success.
Read MoreThe Benefits of In-House Toolmaking
The addition of two larger gantry routers has enabled a maker of rubber belting products to produce more tooling in-house, reducing lead times and costs for itself and its sister facilities.
Read MoreRead Next
Building Out a Foundation for Student Machinists
Autodesk and Haas have teamed up to produce an introductory course for students that covers the basics of CAD, CAM and CNC while providing them with a portfolio part.
Read More5 Rules of Thumb for Buying CNC Machine Tools
Use these tips to carefully plan your machine tool purchases and to avoid regretting your decision later.
Read MoreSetting Up the Building Blocks for a Digital Factory
Woodward Inc. spent over a year developing an API to connect machines to its digital factory. Caron Engineering’s MiConnect has cut most of this process while also granting the shop greater access to machine information.
Read More


