Digital Part Inspection Software Creates New Business Opportunities
Chick Machine overhauled its decades-old inspection process and landed new clients that have propelled the growth of the company.
Share


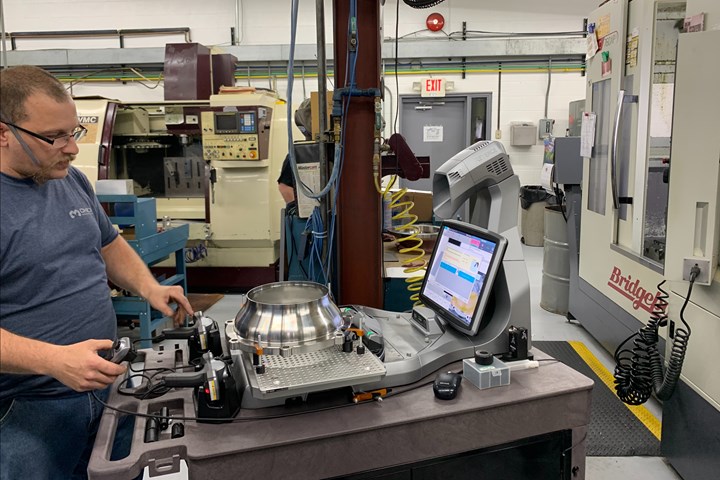
Every machinist at Chick Machine is an inspector. Machinist, Andrew Burd, completes his part of the inspection process on the shop floor using one of the mobile CMMs that the shop has added to its workflow.
When Chick Machine landed a new aerospace contract that required inspection documentation the shop had never produced before, it had little time to overhaul its inspection department and put an end to handwritten inspection reports.
For over 50 years, Chick Machine of Butler, Pennsylvania, has provided parts for an industrial laser company. The strength of the relationship meant that the shop saw the same parts over and over for decades. This work built a healthy business for the founder, Jim Chick, but ultimately meant that the machinists internalized many inspection processes and were able to get by with rudimentary checks as parts passed through their stations. This was until the ownership of the shop changed hands.
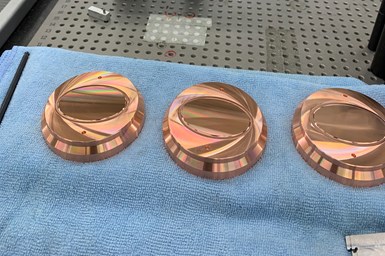
Chick Machine is a large buyer of oxygen free copper for its laser parts. The shop has produced these parts for decades and they are the foundation of its business.
In 2017 Bob Petrini became the majority owner of the shop following a a career in finance and with experience as a minority owner of his employers in more recent years. He decided it was time to gain controlling interest this time around and purchased the shop when its founder, Jim Chick, retired. His business experience and fresh eyes were a new start for Chick Machine, and he homed in on a new focus, to grow and diversify the company. It wasn’t long before Bob invited his son, Bobby Petrini, to join the team as the shop’s first salesperson. Bobby had spent his career consulting for several different manufacturing companies and leveraged his network to bring in new work soon after he joined.
Everything appeared to be going well and the shop was growing quickly. However, with every yes to a new job, the shop was wading deeper into advanced aerospace work, something it had never done before. The parts started piling up and it became evident that the quality control department was turning into a bottleneck as the team there learned new certifications, inspection requirements and documentation. The situation came to a head when one of the shop’s new clients nearly walked away after a bad part run due to inspection problems. Chick Machine had to overhaul the quality control department and its processes.
Assembling the Team
Finding the right leader to lead change can be difficult. “I was going after capabilities almost as hard as customers because we needed both,” Bobby says in reference to his search for a quality manager. By fall of 2020, Bobby had a new quality manager in place to manage the implementation of a new quality control program at Chick Machine. The opportunity was built on a foundation of software that the shop had already purchased, including a new ERP system from eci JobBoss2 in 2019 and High QA quality management software in June of 2020. The new manager was responsible for sorting out how to implement High QA's Inspection Manager software and was given the runway to build out the quality department as he saw fit.
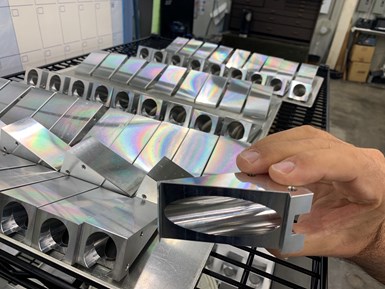
The challenge the shop faced was not whether or not it could make good parts, but whether or not it could document its work.
The road ahead was laden with challenges as the shop shook off many of the inspection practices that the shop had developed and maintained over the years. Some of the infrastructure was eliminated altogether, like the in-house database that captured some information from some jobs. But other components involved long-time employees. With the new inspection management software, the quality control department was trained to create quality plans in High QA, a new and very different process for some employees. And for many of the machinists on the floor, inspection was no longer paper documentation with risk of inconsistency, errors or missing measurements altogether if a machinist was confident in the part. After all, “There are some legacy parts here that machinists have been holding tolerances for since 1971 and those tolerances don’t appear on a drawing.” a machinists says. Moving forward, all machinists will be directly responsible for inspection through a living database that time stamps every measurement. In a few short months, there were enough changes to inspection procedures that a few employees even left the company.
The last piece of the staffing puzzle was to hire somebody to balance the ambitious inspection goals the shop set out for itself and the hours the quality assurance department would be able to give to the sales team.
Moving forward, a new mantra was carried into every interview as the shop filled vacant positions: “Machinists are inspectors first and machinists second.” And to the surprise of some at the shop, many of the new recruits that joined the company did so because they appreciated the highly integrated processes that the shop created with High QA Inspection Manager. They were attracting seasoned machinists that wanted to make quality parts and were already accustomed to inspecting their work.
The last piece of the staffing puzzle was to hire somebody to balance the ambitious inspection goals that the shop set out for itself and the hours that the quality assurance department would be able to give to the sales team. The solution was to hire the shop’s first engineer to work alongside the quality and sales departments. Bobby quickly realized that with each contract he was trying to win, the demands for inspection procedures were increasing as he moved deeper and deeper into the aircraft and space contracts he was pursuing. With an engineer on staff, the shop could analyze the parts, dive into the reference documents and understand what would be required of the quality control department before the shop took on a job. In the words of Bob and Bobby, this was all part of “Winning the job before the job begins.”
Converting the shop to a digital inspection management system didn’t feel like an option but a necessity. “We have to evolve this capability or we will be left behind,” Bobby says.
Data Entry for All
Converting the shop to a digital inspection management system didn’t feel like an option but a necessity. “We have to evolve this capability or we will be left behind,” Bobby says. He knew that other shops had solved the inspection equation and felt confident that digital management was the solution to the shop’s bottlenecks. When speaking about the decision to purchase the shop's first seat of the software, Bob says, “We liked auto ballooning and we also liked the data capture and reporting.” But these features were just the beginning; the capabilities of the software were far reaching and changed the culture of the shop.
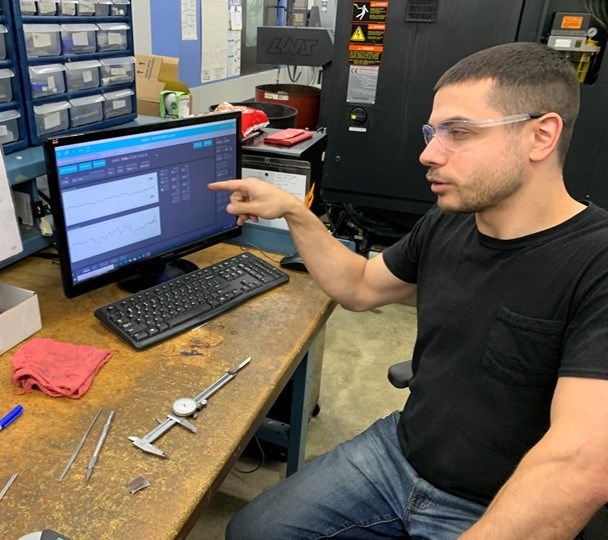
IM Explorer is the data entry module of High QA. At Chick Machine, every workstation has a desktop computer that interfaces with the software for inputting inspection data, as shown here by Koby Woods, machinist.
In the past, the quality department was the last stop for parts before they shipped to the customer. Leaving inspection to the very end of production meant that too often entire runs of parts were scrapped because of a single feature that fell out of tolerance. It was obvious to many stakeholders that this could be solved by increasing the number of checks that occurred during the various machining and finishing operations, but in the past the shop didn’t have detailed, formal inspection plans to handle that kind of process.
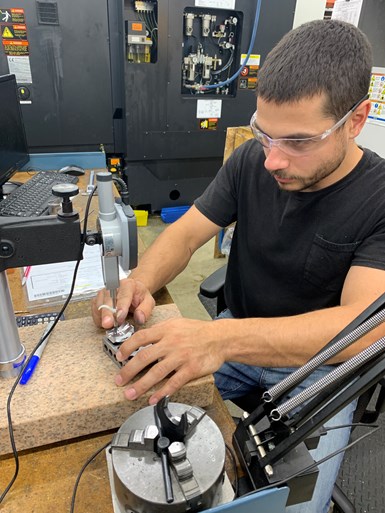
Every machinist is an inspector. The expectation is that if you are making parts, you’re capturing inspection data.
Now, with High QA Inspection Manager, every job has an inspection plan and every machinist has a workstation equipped with a computer that interfaces with that plan so that the part follows the plan through every operation. On the shop floor, the interface is called IM Explorer and acts as the data entry application for machinists. This part of the software runs across the shop’s network and can be used on an inexpensive desktop computer or tablet with a touch interface. At Chick Machine, most users have a keyboard and mouse to interact with IM Explorer. This interface accepts data from connected gages, calipers and other measuring tools once they are properly assigned.
Many of the machinists use the interface constantly as they refer to the print and inspection operations for their assigned jobs. The convenience of a computer at the bench meets the needs of operators in unexpected ways as well. Everyone in the shop is working from the same drawing from the same source, so there is no longer worry about notes scribbled on the side of drawings or operators hanging on to old revisions that have outdated instructions. As one operator put it, “On paper, a lot of fine print becomes illegible after its been handled, so I’m able to zoom in on a drawing now and see every detail.”
Stick to the Plan
Once a part drawing leaves the engineering room, the quality department imports it into the software. The automatic ballooning feature identifies dimensions and their associated tolerance and prompts the programmer to start building out the inspection plan. In the shop, an employee dedicated to the role interprets the automatic ballooning to make decisions as to when the dimension will be checked, how it will be checked and how often the part run will be sampled. “From a machinist’s perspective, there’s less thought in the figuring out of these details and instead they are focusing on making the part,” Bobby says. All of this work is done in the Inspection Manager module of High QA.
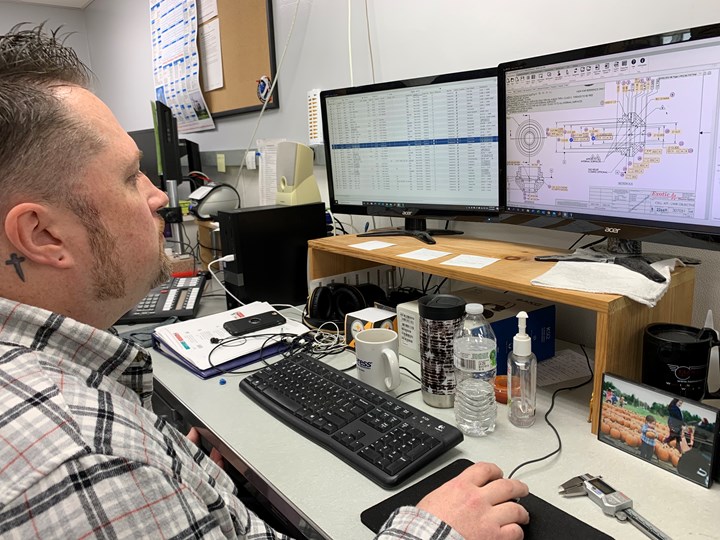
Once a drawing is imported into Inspection Manager, the software will automatically read the drawing and David McPherson, a Quality Engineer, can start assigning inspection instructions to the machinists on the shop floor.
When speaking with machinists on the floor, it was clear that the inspection plan can have layers of checks that prove to be useful. If a feature is assigned to one machining process, the machining process that comes after it might affect the previous, so the plan provides instructions to the operator to take the measurement again. This in turn unites machinists in different areas of the shop and ties their work together in real time, as measurements are recorded.
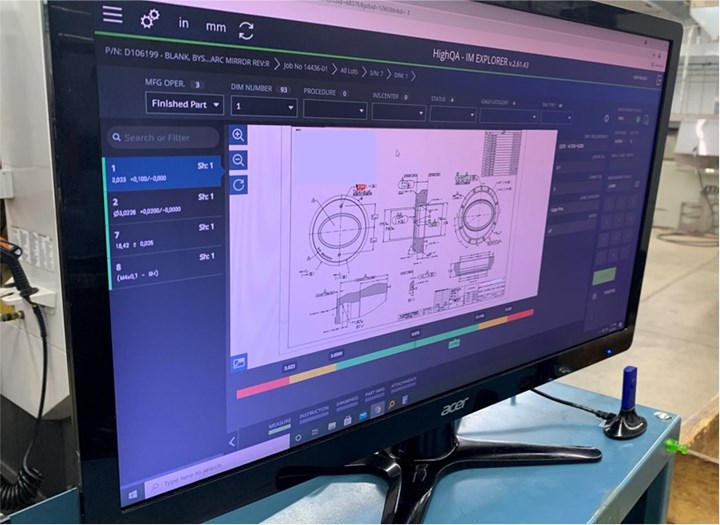
On the shop floor, a machinist follows the inspection plan that the quality control department created by working through a list of measurements. The data can be keyed in manually or input through a connected measuring device.
This has created a culture where the concept of peer review is intuitive and practiced often for first article inspections (FAI) on items like tooling that can be checked with equipment at the bench. The shop does send aerospace and other complex parts to the quality control department for FAI. This is a major shift from the days when parts and inspection documents would land on the desk in the quality control department and the shop would discover out-of-spec parts far too late in the process.
Leverage the Data
Now that the shop has used the inspection software for almost a year, it has found that the reporting it offers to customers is becoming ingrained in the culture of the shop. “The standardization has helped every customer. We tried offering reporting to some customers and not others, but it got too confusing on the floor. Full reporting is good for everybody, so that’s what we deliver,” Bob Petrini says. In providing a full inspection report for every customer and running every project through Inspection Manager, the shop is creating a single database that is home to every project. So if the parts are ordered again, the shop can leverage their past work and reuse the quality assurance plan.
It was a single customer that drove Chick Machine to overhaul its entire inspection process. The solution involved changes to every aspect of manufacturing inside the shop — every employee, every workstation, every piece of documentation had to be overhauled. The result is a shop that is better prepared to tackle new work. “We built a quality system and a production system to serve this project and now we are capable of a lot more.” Bobby says. Because the shop has documentation to prove its success with inspection, the company now finds it easier than ever to make new sales. “Bringing real inspection reports instead of PowerPoint slides makes selling to new customers much easier,” Bobby says.
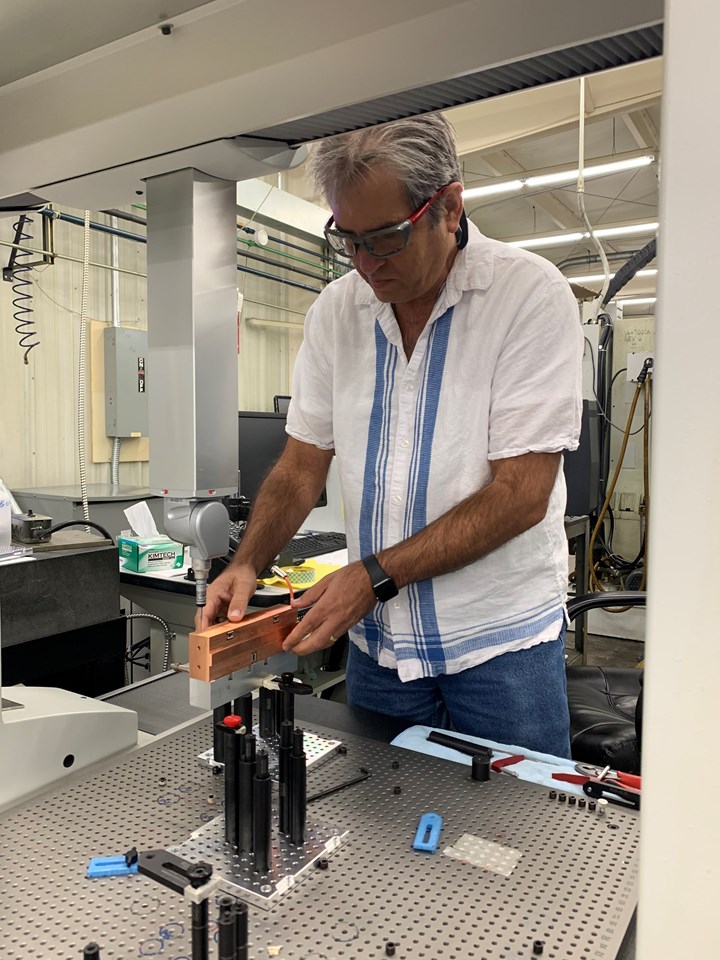
For aerospace parts, the quality control department will perform first article inspection in the climate controlled office on a large bed CMM. Jeff Sauers, CMM Programmer, makes adjustments to a part he has worked on.
Related Content
Ballbar Testing Benefits Low-Volume Manufacturing
Thanks to ballbar testing with a Renishaw QC20-W, the Autodesk Technology Centers now have more confidence in their machine tools.
Read MoreThe Link Between CNC Process Control and Powertrain Warranties
Ever since inventing the touch-trigger probe in 1972, Sir David McMurtry and his company Renishaw have been focused on achieving process control over its own manufacturing operations. That journey has had sweeping consequences for manufacturing at large.
Read More6 Machine Shop Essentials to Stay Competitive
If you want to streamline production and be competitive in the industry, you will need far more than a standard three-axis CNC mill or two-axis CNC lathe and a few measuring tools.
Read MoreChoosing the Correct Gage Type for Groove Inspection
Grooves play a critical functional role for seal rings and retainer rings, so good gaging practices are a must.
Read MoreRead Next
Is Wireless Data Collection a Cultural Choice?
Untethered digital inspection tools are easier to justify for those who are willing to hold themselves accountable and improve for improvement’s sake.
Read MoreImproving Workflows in Small Shops with Custom ERP
Small shops might not be ready for all of the functionality of an off-the-shelf ERP system, but modular, custom ERP programs can help improve workflow while providing the flexibility to change as shops grow.
Read MoreImplementing Digital Shop Floor Metrology
In a recent webinar with MMS, Michael Creney, Mitutoyo America’s vice president of product management, outlined the benefits of digital shop floor metrology and delivered tips for adopting it.
Read More


.jpg;maxWidth=300;quality=90)


