Implementing Digital Shop Floor Metrology
In a recent webinar with MMS, Michael Creney, Mitutoyo America’s vice president of product management, outlined the benefits of digital shop floor metrology and delivered tips for adopting it.
Share


Transcription of manually recorded measurement data is prone to errors, stemming from everything from typos to the legibility of handwriting. All images in this article are screenshots from a webinar hosted by MMS and Mitutoyo America that took place March 30, 2021.
The ability to collect and store data electronically is increasingly a requirement for shop measurement systems — and looking at the problems of collecting and inputting data by hand, it’s not hard to see why. Both writing the information down and inputting it in the computer take time, are tedious tasks and risk errors due to sloppy handwriting or typos. As Michael Creney, vice president of product management at Mitutoyo, puts it, “manual data equals trouble.”
Electronic data collection solves these issues, as users can upload data saved onboard the measurement tool through simple pushbutton operation. Creney says this process improves work efficiency by eliminating errors in data, reducing time wasted during the inspection process and increasing the process’ ease of use for operators.
Just as important, electronic processes speed the rate at which users can sort data and leverage it to improve shop floor operations. If readings detect a machine running out of tolerance, the user can stop the machine and troubleshoot. A reliable record of critical measurements and trends of key features enables operators to adjust their machine tool offsets and corrections accordingly. Even communications with other organizations improve, as collection of data supports the part traceability efforts that increasing numbers of customers desire for their internal process controls.
Process Considerations
Creating a process that successfully improves work efficiency in measurement and inspection requires clever planning.
What are the environmental conditions of the proposed metrology setup? The temperature of the room (and of the part, when measuring inline or near-line) will play a large role in the results, and measuring on the shop floor instead of a dedicated inspection lab requires protection from debris and excess vibrations.
If the measurement process is being changed, do all the stakeholders for inspection understand the revised process? If not, personnel assigned to inspection will require training — how much training depends on the system, with some icon-based control systems proving simpler to understand than other controls.
At which stage in the production process will measurement take place? An in-process or operation check will not require as stringent precision as a check on finished goods.
Which measurements will the process examine? Different gages and measuring tools are better suited for different types of measurement. Considering all the above issues and taking steps to address them helps ensure the successful implementation of a new shop floor metrology plan.
Types of Measurement Tools
In a webinar Mitutoyo conducted with MMS, Creney guided listeners through various measuring tools and their specializations.
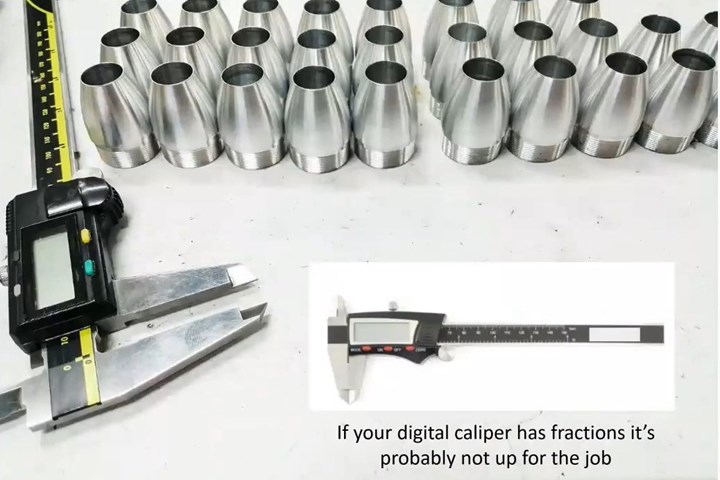
Creney first addressed calipers, complimenting their versatility and inexpensive price points, but noting their 0.001-inch tolerance level is relatively imprecise, and operators can have repeatability issues based on their experience with them. All the same, given a caliper that supports calibration, Creney recommends caliper measurement for OD/ID, length, height and thickness measurements. When purchasing a caliper, Creney recommends taking a look at the measurement increments — calipers using fractions will likely fail to meet the resolutions and tolerances needed for most work.

Calipers are one of the least expensive and most versatile metrology tools on the market. Digital models come in all sorts of forms, though Creney cautions against models that use fractions instead of decimals.
Micrometers also met Creney’s approval for versatility and inexpensiveness, and he recommends them for OD, width and thickness measurements — especially for round, turned parts. Good micrometers come with reference setting standards and tools to calibrate, but as a field gage, micrometers do take some time for a user to become proficient enough to achieve repeatability. Micrometers support medium-to-high-tolerance applications, with a tolerance level of 0.0005 inch.
Digital indicators met the tightest tolerance levels of the tools Creney covered, at 0.0001 inch. Digital types are more expensive than their analog dial cousins, but make up for it by including output methods and the ability to perform calculations with the data. Users must mount indicators to a height gage stand or base, making them less versatile for handling hard-to-reach part features. Digital indicators can measure thickness, flatness, total indicated reading (TIR), runout and height (this last measurement when the indicator is mounted on a height gage stand).
Bore gages are more versatile than pin gages and can reach deep into holes, but electronic versions tend to be expensive. Once set to a master, these gages can measure ID, TIR and ovality to a tolerance level of 0.0002 inch. Bore gages enjoy some flexibility by being handheld devices, but they are also relatively fragile and can suffer damage if dropped.
Height gages are versatile, with Creney saying they can easily rezero and be used for incremental measurement, but they require a stable base — Creney recommends a granite table. Users should calibrate or pre-check these gages for accuracy to enable them to function at their tolerance level of 0.0005 inch. Height gages can measure height, width, thickness, part scribing and hole centerlines, with digital versions also measuring hole diameters.

Applications like Microsoft Excel enable users to organize and sort measurement data anytime, and give quick insight into whether parts pass or fail.
Utilizing the Data
While the ultimate goal of the digital system is to transfer metrology data at the press of a button, users will need to connect the measurement tool to a computer system first. At the time of the presentation, Creney said he was able to find a high-quality caliper with SPC output for about $165, and a USB direct cable for about the same price — making a full, portable direct-to-PC inspection station for about $330. Wireless digital systems are more portable, but also more expensive, with Creney saying he found a high-quality digital caliper selling for about $450. He also says some vendors offer wireless modules. Users without a dedicated PC on the shop floor can look into edge computing, but Creney was quick to point out the power of mobile devices, saying “the world of the phone has conquered the world of the shop floor.” Tablets or smartphones can receive metrology data, and with the right software, can upload it into a cloud environment.
With the data uploaded, users will then need to complete the metrology process by analyzing the data. Creney compliments the simplicity of Microsoft’s Notepad and Word applications, but recommends Microsoft Excel for its built-in tools for data analysis, histogram and ability to display advanced statistics. Elements that are particularly important to metrology include minimum measurements, maximum measurements, the range (the maximum minus the minimum) and the standard deviation.
Related Content
Turning Fixed-Body Plug Gages Inside Out
Fixed-body mechanical plug gages provide fast, high-performance measurement for tight-tolerance holes.
Read MoreRethink Quality Control to Increase Productivity, Decrease Scrap
Verifying parts is essential to documenting quality, and there are a few best practices that can make the quality control process more efficient.
Read More4 Ways to Establish Machine Accuracy
Understanding all the things that contribute to a machine’s full potential accuracy will inform what to prioritize when fine-tuning the machine.
Read MoreBallbar Testing Benefits Low-Volume Manufacturing
Thanks to ballbar testing with a Renishaw QC20-W, the Autodesk Technology Centers now have more confidence in their machine tools.
Read MoreRead Next
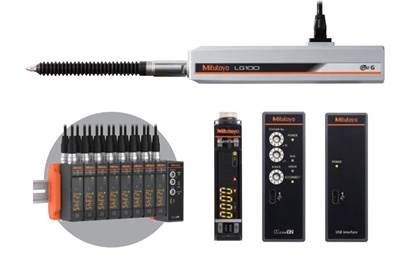
Mitutoyo Launches EJ Counters, LG100 Linear Gages
New EJ Counters and LG100 Series Linear Gages are designed to be compact and easy to use, offering reference point detection, environmental resistance and more.
Read MoreMetrology Data in the Loop
Where will metrology fit in as the manufacturing industry moves quickly toward an environment that is driven by data and connected across the entire supply chain by a single “digital thread?” A good answer emerged at the recent HxGN Live event, which is the annual international conference sponsored by Hexagon, the global company best known in the manufacturing industry for its broad range of metrology equipment.
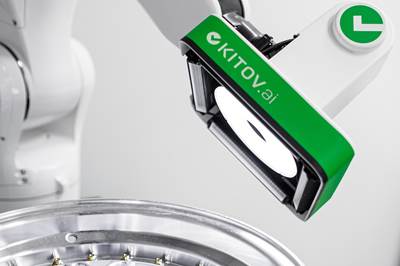
Read MoreMitutoyo and Kitov Partnering, Developing Combined Solutions
Mitutoyo and Kitov have partnered to combine the innovations of Mitutoyo’s metrology solutions and Kitov’s AI, robotics and computer vision technologies.
Read More.png;maxWidth=970;quality=90)


.png;maxWidth=300;quality=90)


