CMM Removes Bottleneck in Automated Cell
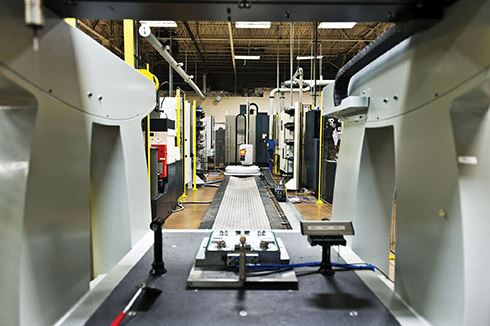
By adding a Brown & Sharpe One CMM from Hexagon Metrology, Strattec was able to eliminate a production bottleneck in its automated cell and improve efficiency in other departments throughout the facility.
Share


Creating high-precision multi-cavity automotive components requires complicated tooling. To manufacture these components more efficiently, Strattec Security Corp. incorporated automation into its production process. However, automation alone wasn’t enough to increase capacity, as on-machine measurement within the cell created a bottleneck. By incorporating a CMM within the automated cell, the company was able to eliminate the backlog that frequently occurred in the tooling department.
Although it is part of the vehicle access systems technology (VAST) alliance, which supplies automotive OEMs worldwide, the main focus of Strattec’s Milwaukee, Wis., headquarters is die casting and stamping. The company formed as a division of Briggs and Stratton more than 100 years ago, but today, Strattec designs, develops, manufactures and markets mechanical locks, electronically enhanced locks and keys, and ignition lock housings. Some of the design features on the locks and housings must be held to within ±0.0002 inch; otherwise the material on the finished product flashes. To produce these complex parts efficiently, the company needed an upgrade.
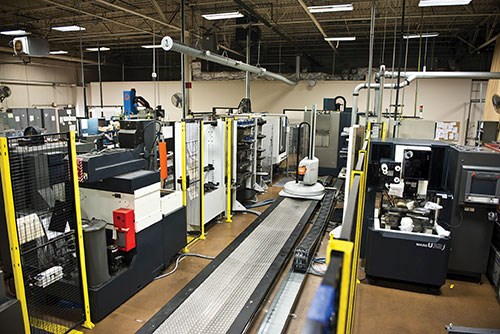
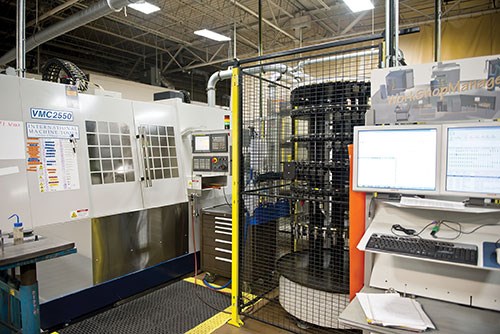
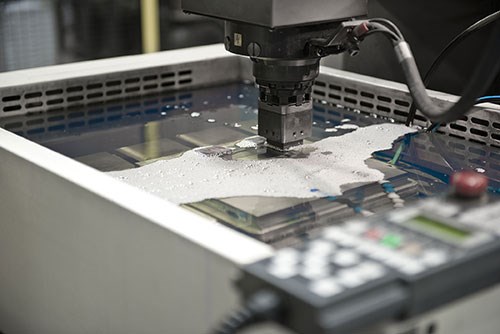
Working with Premier Machine Tool Midwest (Hartland, Wis.), Strattec installed the Work-master linear automation solution from System 3R (Elk Grove Village, Ill.). This automation solution travels down a rail to feed multiple machines and uses the company’s WorkShopManager software, which links all machining and measuring processes together. To complete the cell, Strattec also added a three-axis Makino F5 for hard milling and a second Makino sinker EDM. A Makino U32J wire EDM was installed at a later date.
The cell was designed to run 24/7 in a lights-out operation. However, once it was up and running, Strattec was unsatisfied with the time needed to complete a batch. Although it was configured to probe the workpieces and electrodes on the CNCs to determine their orientation, the team found the process to be labor-intensive, creating a bottleneck. The CNC machines had to focus on finding the component rather than machining it, and operators spent a large part of their days setting up pieces for the overnight run. Strattec was not taking full advantage of the
cell’s capacity.
An additional problem surfaced once electrodes were cut: The toolmaker would check them with manual instruments, such as micrometers and gage blocks, but the complex 3D surfaces of the electrodes allowed only limited part features to be measured manually.
To alleviate the bottleneck and improve inspection quality, the company installed a Brown & Sharpe One shopfloor CMM by Hexagon Metrology (North Kingstown, R.I.) within the cell to free the machines to cut parts rather than measure them. After installation, Strattec discovered that workpiece inspection is the secondary function of the cell’s CMM. Its primary function is to locate electrodes and workpieces on their pallets before they are fed to the EDMs.
The process begins when a palletized workpiece or electrode is picked up by the robot from the milling machine. It is too dirty to go directly to the CMM, so it is first cleaned to remove dirt and lubrication. The robot then brings the part to the CMM to evaluate the compensation needed for spark gaps and the offsets for the X, Y, Z and C (rotation in the X-Y plane) coordinates on electrodes. Workpieces are evaluated for their X, Y, Z and C offsets. The offsets or offsets and spark gaps are sent to the machine tool seamlessly via WorkShopManager while the component is automatically delivered to the sinking machine. When complete, it is returned to the CMM for inspection.
The data gathered by the CMM is imported into PC-DMIS, Hexagon Metrology’s flagship software, which includes an extensive library of macros geared to the die-making industry. The software is composed of a full suite of online and offline tools to streamline the offset process for electrodes and workpieces. The offline toolset for electrodes measures their true burning geometry rather than relying on the witness (the electrode’s base) measurement. In only a few minutes, these complex measurements are completed with a higher degree of precision than the traditional witness method of inspection. Online tools are commonly used for general shapes and locating multiple workpieces on a single pallet.
After integrating the CMM into the automated cell, Strattec eliminated the backlog that frequently occurred in its tooling department, because the CNCs are now dedicated to machining parts instead of functioning as CMMs. Programming is no longer a long and tedious process in which electrodes are measured on the sinking machine. Instead, programming is performed offline at a fraction of the time. For example, it once took 2 to 3 hours to program and measure a job with 40 electrodes. After the CMM’s installation, the same batch of electrodes can be inspected at least 50 percent faster while the EDM is processing other parts.
Additionally, the current method of toolmaking takes the manual element out of data input. When a run is set up, there is minimal data input, which frees the operator to run other machines while the cell remains active. Also, with the CMM supplying the offsets and overburn, everything is automatically calculated and human error is no longer an issue when entering data.
Now, with improved quality, the tooling department knows electrodes are good before they are sunk into the steel, the company says. This saves both time and money by not having to rework rejected parts. Also, with the precision of a CMM, every part leaving the cell is checked more accurately and without the operator needing to be present.
To put values on the benefits, Tooling Work Group Leader Reinhard Kindler explains, “We are starting to approach a 20-percent reduction in scrap. The time we have saved with the CMM integration is even higher—probably in the range of 30 to 40 percent. That is due to the effect it had on all the other machines in the cell. By implementing our Brown & Sharpe One CMM we were able to deliver added efficiency to all the others.”
To further illustrate the impact, Strattec went through an extremely busy fourth quarter in 2012 with more work going through the department than ever before. Although the team was still trying to optimize production with this new arrangement, it was able to build all the required tooling on time and, for the most part, on or under budget.
Craig Broetzmann, Strattec’s CNC team leader, says he is confident that without the current configuration of the cell, it would have been impossible to accomplish that feat. “In the past, a rush job would force us to drop everything and shift to that project,” he says. “Now we’re able to prepare a rush job in the background while the day-to-day operations continue to move smoothly. When the background work is complete, we simply push the rush job through. The jobs taking two to four days to complete are now typically finished in the same day.”
Strattec anticipates more uses for the automated cell in the future. For example, the tooling department can pull parts from the stamping area to inspect on the CMM instead of waiting for them to go through quality control. The team can make adjustments on the tool and almost immediately sample again without waiting on a response from another department. The automated cell has opened new possibilities for the facility.
Related Content
How to Choose the Correct Fixed-Body Plug Gaging Solution
The two types of fixed-body plug gages are both accurate, fast and easy to use. Consider these factors when selecting one for your gaging application.
Read More4 Ways to Establish Machine Accuracy
Understanding all the things that contribute to a machine’s full potential accuracy will inform what to prioritize when fine-tuning the machine.
Read MoreChoosing the Correct Gage Type for Groove Inspection
Grooves play a critical functional role for seal rings and retainer rings, so good gaging practices are a must.
Read MoreTurning Fixed-Body Plug Gages Inside Out
Fixed-body mechanical plug gages provide fast, high-performance measurement for tight-tolerance holes.
Read MoreRead Next
5 Rules of Thumb for Buying CNC Machine Tools
Use these tips to carefully plan your machine tool purchases and to avoid regretting your decision later.
Read MoreSetting Up the Building Blocks for a Digital Factory
Woodward Inc. spent over a year developing an API to connect machines to its digital factory. Caron Engineering’s MiConnect has cut most of this process while also granting the shop greater access to machine information.
Read MoreRegistration Now Open for the Precision Machining Technology Show (PMTS) 2025
The precision machining industry’s premier event returns to Cleveland, OH, April 1-3.
Read More


.jpg;maxWidth=300;quality=90)


