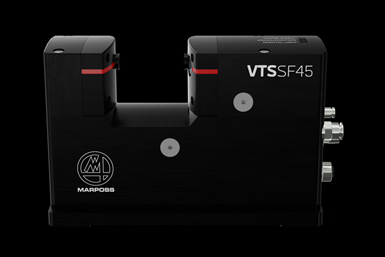
Marposs Optical Tool Setter Measures in Constrained Spaces
The VTS SF-45 is designed for non-contact, optical measurement of small, complex-shaped tools in micromachining, semiconductor or moldmaking applications.
Share


Marposs, a manufacturer of measurement, test and inspection technologies, has expanded its VTS (visual tool setter) family with the new VTS SF-45 Compact.
The VTS SF-45 is designed for non-contact, optical measurement of small, complex-shaped tools in constrained working spaces such as micromachining, semiconductor or moldmaking applications. The VTS SF-45 units are installed inside the machine working area to monitor actual tool working conditions without any contact while the tool is able to rotate at full spindle speed (up to 80,000 rpm) during data acquisition. Since there is no need to slow the spindle, pre-setting time can be reduced and measurement accuracy is increased to better eliminate collision hazards.
The VTS SF-45 acquires a variety of tool dimensions in a single instant using the principle of shadow projection where an illuminated objects projects its shadow onto the camera. These measurements include tool length, static and dynamic tool diameter, the tool runout and cutting-edge radius. With a resolution of 0.1 µm, the VTS reportedly enables measurement of tools with diameters as small as 10 µm with repeatability of 0.2 µm, providing a higher level of accuracy than touch probes or lasers in small applications.
Additionally, the VTS SF-45 uses a frontal light to analyze the tool surface, displaying the illuminated surface on a PC monitor where the integrity of the cutting edges can be evaluated. The graphical user interface (GUI) software for VTS simplifies the measuring cycle process and documents the tool history, helping to quickly reveal damage in advance of the machining operation. The software can be fully integrated into Marposs touchscreen PCs (Nemo or Merlin+) or in a stand-alone version for PCs with Windows or Linux operating systems.
One of the main features of the VTS is its protection system, which Marposs says enables excellent measurement performance even in the presence of coolant or dust. Pneumatic shutters cover and protect the optical lens when VTS is not working, plus a patented air flow solution rejects chips and coolant drops, keeping the shutter side clean and protecting the optical lens when the shutter is open.
Related Content
-
Help Operators Understand Sizing Adjustments
Even when CNCs are equipped with automatic post-process gaging systems, there are always a few important adjustments that must be done manually. Don’t take operators understanding these adjustments for granted.
-
How to Calibrate Gages and Certify Calibration Programs
Tips for establishing and maintaining a regular gage calibration program.
-
How to Choose the Correct Fixed-Body Plug Gaging Solution
The two types of fixed-body plug gages are both accurate, fast and easy to use. Consider these factors when selecting one for your gaging application.


.jpg;maxWidth=300;quality=90)


