Know the Performance Levels of Your Gages
By understanding the characteristics of three types of gages, you can choose the correct one for your application.
Share


Hwacheon Machinery America, Inc.
Featured Content
View More


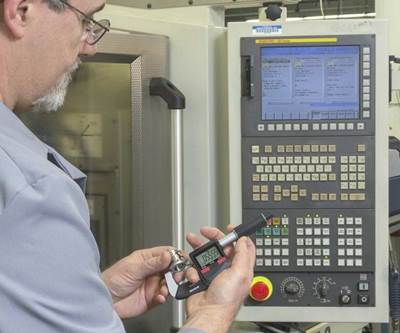
Micrometers and calipers are essential tools in the manufacturing world. They are versatile and cost effective. For many applications, especially those at inspection stations where variety outweighs volume, they are the tool of choice. They also have kept up with technology and the growing needs of data collection, in so far as they have the means to share data wirelessly for collection and part variation.
However, it is not uncommon for part tolerances and the speed of manufacturing to begin showing the limitations of relatively slow measuring speed and operator-intensive needs. Soon it is obvious that other means are needed to ensure part adherence to specification. At that point, it becomes time to stop measuring and start gaging your parts.
Measuring is the slow process of using a tool with a built-in scale to compare the part size to its internal scale. Think micrometers and calipers, which have the measuring system built in. On the other hand, gages compare the part dimension on an instrument that uses an external master as a reference and tells us whether the part is smaller or larger than the master.
Depending on gage characteristics, there is probably one that will meet the versatility, speed and performance required for the dimensional challenge. There are different classes of gages that, based on some of their design characteristics, determine the level of performance of which the gage is capable.
In general, this refers to variable gaging. There are nuances, however, that can really increase a gage’s capabilities.
Let’s start with a variable gage that has been around practically since the invention of the dial indicator. The adjustable bore gage, just as the name notes, can be adjusted to measure different sizes. This gage requires an external master to set its reference against which it compares the part. Once set to its size, a user needs a little skill to rock the gage to find the bore diameter. This skill, combined with today’s digital dial indicators with dynamics, makes the job an easy one to perform. With practice, repeatability to a couple of microns can be achieved.
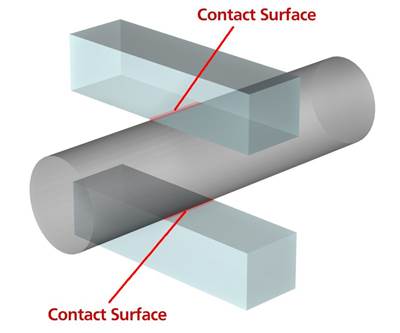
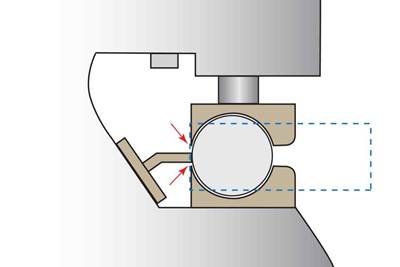
It is amazing how a simple addition can make a significant improvement to the performance capabilities of a comparative gage. The next step up is an adjustable gage that incorporates a reference stop: an adjustable snap gage. Here again, the name says it all. It is adjustable, and it snaps into place. While the adjustable bore gage requires the user to rock the gage to find the size, a snap gage’s reference stop enables the user to place the gage on the outside diameter and the backstop essentially helps lock it into place. Now there is virtually no operator involvement or influence, and the speed and performance of the measurement increases dramatically. Therefore, a snap gage with its fixed backstop halves the level of performance compared to the adjustable bore gage, and we can be assured that we can gage to 1 micron.
We can then move to the ultimate performer, the fixed variable gage, to make the measuring process even faster and more accurate. It sounds like an oxymoron, but it really is a fixed gage that is manufactured to measure one size, yet still have the ability to make a comparative measurement between a master and the part. These gages include air gaging or mechanical plug gages. Their bodies are made very close to the part size, but they also allow for easy entry to the part while providing enough clearance to minimize centralization error with relatively long comparative range.
These gages are designed for speed and performance. Because of the tight clearance, there is no chance for operator influence because the gage can only go in to the part one way, and there cannot be any rocking. Once the gage is in the part, the reading is instantaneous and to a very high degree of accuracy. For high-volume, tight-tolerance applications, a fixed variable gage is the gold standard of submicron comparative performance.
The chart above helps to explain the characteristics of the gaging systems highlighted in the column above. By understanding the needs of the measurement and the performance characteristics of the gaging, it becomes apparent which may be the best for your application.
Related Content
Orthopedic Event Discusses Manufacturing Strategies
At the seminar, representatives from multiple companies discussed strategies for making orthopedic devices accurately and efficiently.
Read MoreRethink Quality Control to Increase Productivity, Decrease Scrap
Verifying parts is essential to documenting quality, and there are a few best practices that can make the quality control process more efficient.
Read MoreHow to Calibrate Gages and Certify Calibration Programs
Tips for establishing and maintaining a regular gage calibration program.
Read MoreThe Many Ways of Measuring Thickness
While it may seem to be a straightforward check, there are many approaches to measuring thickness that are determined by the requirements of the part.
Read MoreRead Next
Measuring Tools Basics: Faster and Better
In a high-volume production environment, the cost of inspection is related to the speed with which measurements can be made and interpreted.
Read MoreThe Versatility of Snap Gages
The many design modifications available in snap gages enables them to measure some of the most difficult dimensions, right at the point of manufacture.
Read MoreJust This Once, You Can Blame the Gage
Even the old, reliable gage is subject to wear. George Schuetz, director of precision gages at Mahr inc., gives guidance for machinists to maintain their gages.
Read More


.png;maxWidth=150)


.jpg;maxWidth=300;quality=90)


