Preparing SQC For Machinists and Future Requirements
The current complexity of machines means machinists are already busy — assigning them new, expanded SQL duties (such as gage identification) will require gages and processes to prioritize accessibility.
Share


Takumi USA
Featured Content
View More
Autodesk, Inc.
Featured Content
View More


As manufacturing’s complexity increases, so too does the total number of variables SQC must track. Recent advancements have begun requesting identification information about the gage performing measurements.
Photo Credit: Mahr Inc.
Statistical quality control (SQC) has been in use since the 1930s, when performing it required paper, pencil and the occasional slide rule. This made it somewhat time-consuming, and it required a fairly high level of care and understanding from its practitioners. SQC got a big boost in the 1970s and 80s with the proliferation of electronic gages, data loggers and PCs. Suddenly, untrained line inspectors could easily perform the necessary calculations without fully understanding the process.
Many instructors using SQC as part of the measuring process insisted that inspectors and machine operators should learn to do SQC manually before plugging in their data loggers. This was under the general principle that people who understand what they are doing tend to do a better job. This is a totally understandable concept — until the production manager gets involved.
Today’s machinists are often skilled and highly trained users of complex, powerful machine tools. These machine tools are far more powerful and complex than they were a generation ago. In many cases, the machines can be more brain than brawn, and the users are often partially CNC programmers as well as production machinists. It can be a stretch to try and train these same skilled machinists to also be quality control inspectors and SPC analysts. Their job is to produce parts as quickly as possible and ensure that the parts coming off their machines are good. They focus on production — when the process is running well, the goal is that quality is built-in.
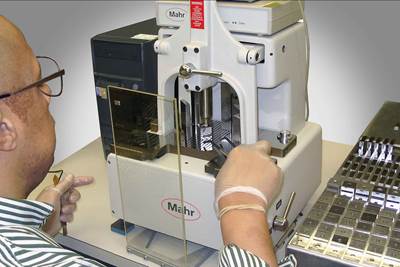
However, many industries require verification that the process is under control and that the parts coming off machines are within design tolerances. Thus, many machinists must carry out some inspection to verify their process. Any final-part inspection should therefore be easy and fast for the machinist. It should require few added skills or processes and should not take time from production. In effect, the inspection of the part needs to be simple and data collection must be reliable, accurate and transparent for proper documentation of the results.
As data collection techniques have advanced, users have implemented more steps into the process — and sometimes even into the gaging equipment — to ensure correct data. But these reliability benefits are wasted if the gages are difficult to use.
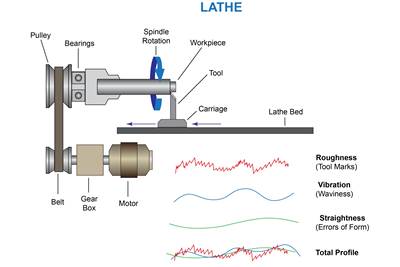
Thus, one of the first steps in implementing machinist-conducted transparent data collection is making the tools as simple as possible for the user. A machinist doesn’t need to be a full-fledged surface finish inspector. Rather, the goal is to design surface finish tools to be as simple to use as possible, with automatic sensing of setup parameters and simple, one-button operation. The user should not be doing complex setup alignments that take up production time or potentially damage sensitive equipment. Special featuring can streamline the actual measuring process and encourage one-button operation.
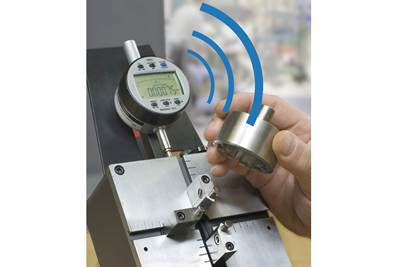
The same goes for many of today’s hand tools. With the integration of wireless data transmission, the act of collecting data for documentation or SQC is as simple as measuring the part — the hassle of add-on boxes and cables is gone.
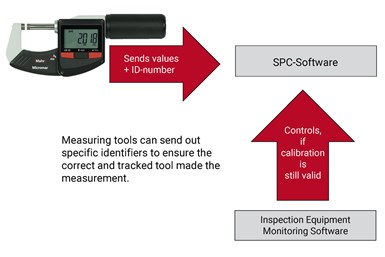
Most SQC programs also have built-in features that collect and record data. They will inherently record the date and time — to the second— at which the gage made the measurement. But there is one bit of information during this measurement process that is often overlooked and which, in the end, could be one of the most important: the instrument making the measurement.
Certainly, most facilities have a gage-tracking system that identifies the gage making the measurement and its calibration status. But very rarely is this information tracked in the part-specific measuring process.
This seems like a critical piece of information. There are new standards that require not only the records of the measurements and the time of their collection, but also a gage serial number identifier. In an effort to meet this demand, gages are starting to include the ability to send out a unique gage identifier with measurement data.
With this piece of information, data collection and documentation processing are complete. Quality analysts should be satisfied because they have the complete story of the part dimension — the measurement data, when it was taken and by what measuring device, with the unique identifier of the measuring device tagged. Not only does this information complete the gaging data, it makes the data traceable.
Related Content
How to Evaluate Measurement Uncertainty
Manufacturing and measurement are closely coupled. An important consideration for the use of measurement results is the associated measurement uncertainty. This article describes common metrology terms and provides an example uncertainty analysis.
Read MoreOrthopedic Event Discusses Manufacturing Strategies
At the seminar, representatives from multiple companies discussed strategies for making orthopedic devices accurately and efficiently.
Read MoreThe Link Between CNC Process Control and Powertrain Warranties
Ever since inventing the touch-trigger probe in 1972, Sir David McMurtry and his company Renishaw have been focused on achieving process control over its own manufacturing operations. That journey has had sweeping consequences for manufacturing at large.
Read More6 Machine Shop Essentials to Stay Competitive
If you want to streamline production and be competitive in the industry, you will need far more than a standard three-axis CNC mill or two-axis CNC lathe and a few measuring tools.
Read MoreRead Next
What to Know About Decoding Surface Finish Gages and Parameters
Long-wavelength waviness and short-wavelength roughness require a wide variety of instruments and parameters for proper measurement — and lower numbers aren’t always better.
Read MoreHow to Successfully Transition from Dial Indicators to Digital
Digital indicators bring a wealth of benefits over dial indicators, but simply swapping one for the other can lead to problems in repeatability and process durability.
Read MoreHow to Match Thickness Gage Types to Proper Applications
Different thicknesses require different gage types during inspection — four common ones are handheld indicators, handheld micrometers, opposed air streams and gage blocks.
Read More


.jpg;maxWidth=300;quality=90)


