How to Match Thickness Gage Types to Proper Applications
Different thicknesses require different gage types during inspection — four common ones are handheld indicators, handheld micrometers, opposed air streams and gage blocks.
Share


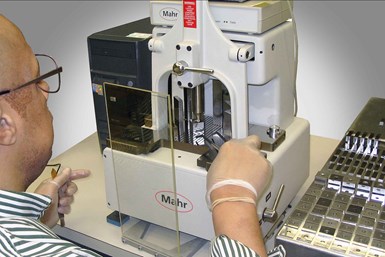
Measuring thickness standards requires special application gages, such as this gage block.
Thickness is one of the most important dimensions to measure, after inside diameters (IDs) and outside diameters (ODs). As with any dimensional check, there are as many different gaging approaches as there are thicknesses, and the best solution depends on the specified requirements.
Four different gage types for measuring thickness stand out, ranging from the simplest to those that can measure to a millionth of an inch. When paired with the right task, each can successfully simplify and speed up the inspection process.
What are four types of gages for measuring thickness?
The two most common portable hand tools have been around for a hundred or more years: the dial indicator-based handheld thickness gage and the handheld micrometer.
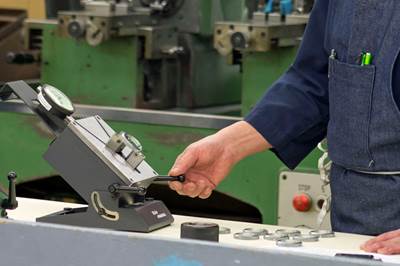
A simple handheld indicator thickness gage is best for fast, general-purpose thickness checks. Typical applications include in-process verification checks of items undergoing manufacturing, such as films, sheet metal or even small parts like washers. This type of gage “calipers” the film between its flat reference and sensitive anvils, providing a continuous and direct reading of part size compared to the reference anvil. A lifting lever provides large retraction so that the gage is easily positioned on the part and provides wide-use application.
Micrometers can provide a similar form of thickness check, though there are some differences. Micrometers have flat contacts, but operators conduct the retraction and gaging by rotating the thimble. Thus, retraction and gaging takes longer and going to various sizes can take some time. There is also the issue of the rotating sensitive spindle. As the user rotates the sensitive contact down onto the part — a film, for example — the rotating anvil can grab and twist the material. However, recent micrometer designs can prevent this twisting and increase the speed of retraction and measuring. These new micrometers include a sliding measuring spindle and quicker threading to the thimble. This provides retraction speed five times faster than most micrometers. Though not as fast as an indicating thickness gage with its lifting lever, this type of thickness gage can provide better performance.
While some films are durable, there are parts and materials where touching them might be prohibitive. For example, silicon wafers and precision components may require non-contact measuring. Due to the delicacy of the parts, operators can use two opposed air jets to carry out this non-contact measurement. Because of the differential characteristics of measuring thickness without regard to position, this air-gaging solution offers the protection and the performances needed for this thickness requirement.
Inspectors must also consider compressibility when measuring thickness. Imagine a number of sister plants making the same compressible film, all using different gages with separate gaging forces and contact shapes. It is unlikely there would be any correlation between these diverse gaging operations. However, the industry has established a set of standards for thickness gages that define gaging force and contact/anvil shapes and sizes. By having all the plants use the same standard for their gages, all parts have identical inspections and the chances of correlation between plants increases.
One can imagine that gage blocks are also thickness standards. As standards, the blocks must be measured in very precise thickness gages, following research and standards to find the proper and most exact ways to verify them. Being millionth-class measuring instruments, these thickness gages must take into account and squeeze out any potential errors. Therefore, the thickness gages must be bench-mounted, robust, used in environments consistent with millionth measurements, using differential gaging for point-to-point measurement and factoring in contact radius and gaging pressure as part of the process.
While thickness gages can range from portable, pocket-carried tools to precision lab systems, they are still used for one of the most common checks required today. It all comes down to matching the measuring tool to the measurement requirements — something that requires consideration in any measurement task.
Related Content
Orthopedic Event Discusses Manufacturing Strategies
At the seminar, representatives from multiple companies discussed strategies for making orthopedic devices accurately and efficiently.
Read MoreThe Many Ways of Measuring Thickness
While it may seem to be a straightforward check, there are many approaches to measuring thickness that are determined by the requirements of the part.
Read MoreThe Link Between CNC Process Control and Powertrain Warranties
Ever since inventing the touch-trigger probe in 1972, Sir David McMurtry and his company Renishaw have been focused on achieving process control over its own manufacturing operations. That journey has had sweeping consequences for manufacturing at large.
Read MoreTurning Fixed-Body Plug Gages Inside Out
Fixed-body mechanical plug gages provide fast, high-performance measurement for tight-tolerance holes.
Read MoreRead Next
When to Use 2D or 3D Surface Measurement
Instead of committing exclusively to 2D or 3D surface measurement, shops should consider their use cases.
Read MoreConfirming Dimensional Accuracy of a Precision Ball
A single diameter isn’t the only measurement parameter that can be used to ensure accuracy.
Read MoreChoose the Correct ID/OD Gage for the Task
Benchtop and portable comparator gages each have their place, but the differences are more than surface deep.
Read More


.png;maxWidth=300;quality=90)


