Machined workpieces are inherently squishy. Those are my words, not the words of Andrew Tool & Machining in Plymouth, Minnesota. However, a sense of microscopic “squishiness” is what comes across when the staff of this 30-employee contract shop describes the care the company applies to holding tiny tolerances on production parts that are far from tiny themselves.
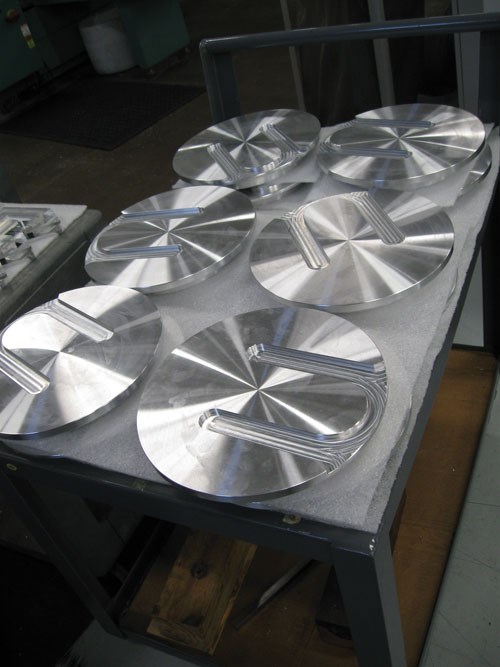
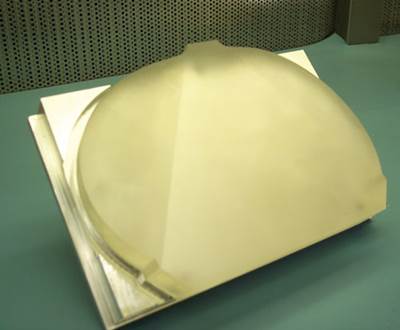
For example, the shop routinely machines aluminum test fixture parts used in semiconductor manufacturing. Parts larger than 1 foot in diameter might require a flatness tolerance as small as 0.00005 inch across the entire surface. The way to hold tolerances this narrow, says company Project Engineer Jim Breth, is to anticipate stresses. The way to do that, he says, is to think.
Considerable forethought is an aspect of every precision part the shop produces. In the case of any such part, the workpiece is flexible enough and malleable enough that any cut or clamping might affect the dimensions in an unpredictable way—because of either stresses induced or stresses relieved. At tolerances measured in thousandths of an inch, many of these stress responses can be ignored. But at tolerances measured in ten-thousandths or less, these effects have to be respected.
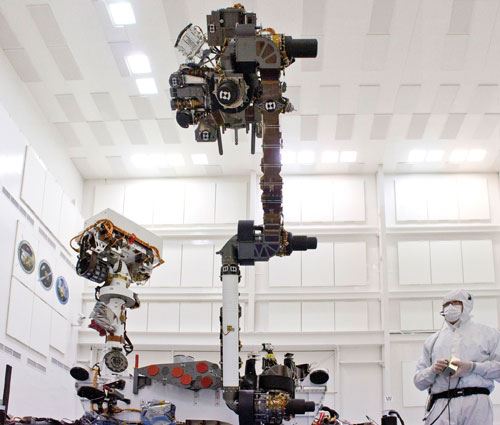
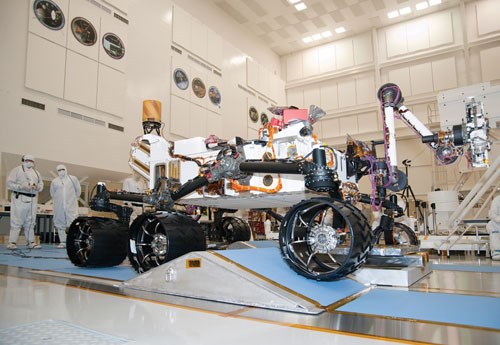
Andrew Tool has no set formula. Instead, the company has a culture of taking care to appreciate the entire process for any part. Staff members recognize at every step just how little of the tolerance band still remains and how much of that band the downstream steps might need after the seemingly tiny effects of material stresses are taken into account. One recent job that dramatically illustrates this kind of process planning involved a set of parts that ultimately will travel farther away from the shop than any components it has ever produced. The Mars rover “Curiosity,” which NASA will launch into space this year, features an arm with a 7.5-foot reach. The arm is driven by actuators built from 14 components machined by Andrew Tool.
The shop initially no-quoted this job. The work clearly would require five-axis machining, and while Andrew Tool had this capability, the shop wasn’t ready to use it yet. The company had just purchased a five-axis Hermle machining center (it now has two of these machines). Its intent was to become proficient with five-axis before applying the capability to a commercial job. However, when another supplier was unsuccessful, Andrew Tool saw these parts again. This time, the company took on the job.
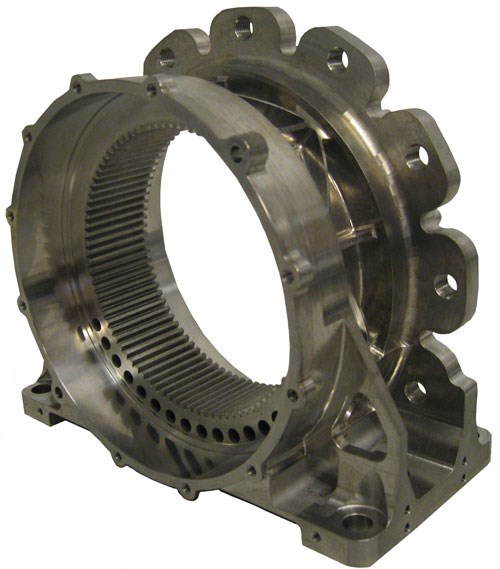
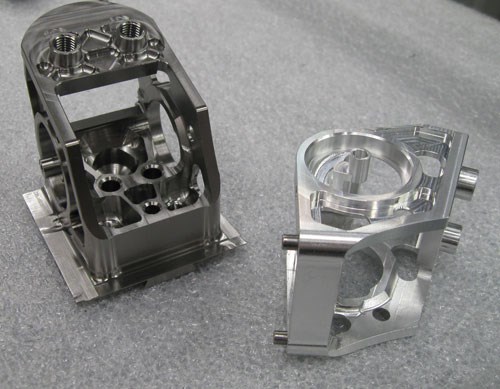
One of the more difficult parts was the housing component shown on the previous page, which involved 15 setups on various machines. Operators had to stop after each step to measure and re-measure how much stock remained at critical areas. According to Mr. Breth, “The key to this job was coordination between operations.”
Material Differences
Each actuator can be imagined as a gear-driven joint for the rover’s arm. The arm design includes three of these actuators. Because one rover will be made for the Smithsonian and another will remain with NASA as an engineering model, Andrew Tool delivered sufficient components for nine actuators total. The parts were initially conceived to be titanium, but the specification was later changed to ATI VascoMax, a high-nickel steel alloy. This change was dramatic for NASA, because it increased the weight of each actuator by a factor of 4. Nevertheless, the change proved necessary to meet the performance demands of this system—particularly with regard to stiffness. The signal delay involved in controlling the arm from Earth is so long that the actuator has to operate with no discernible backlash. This requirement, and the resulting need to eliminate the compliance that would produce even slight backlash, was the reason not only for the material change, but also why machining tolerances were so tight. Andrew Tool performed all the parts’ machining with one exception—gear teeth were machined by Forest City Gear in Rockford, Illinois.
Mr. Breth says the actuator housing component is deceptive—it looks as though it could have been machined as a hog-out in one or two setups. In fact, he says, “If all we had was the five-axis machining center, we wouldn’t have been able to make this part.” An example of the tight tolerances this component required is location accuracy of 0.0003 inch true position for the large bores on either face. Ultimately, this part required various EDM and grinding steps in addition to milling. The bores, one of the final features completed, were finished with a jig grinder.
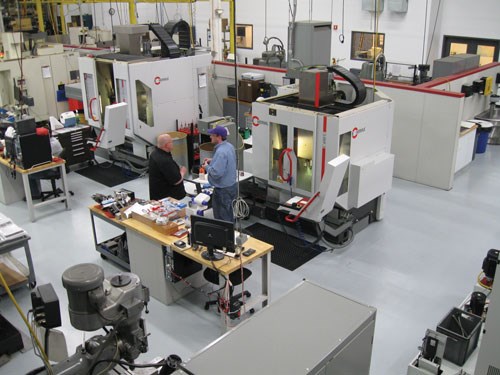
Machine tools at Andrew were busy throughout the 18 months or so that the NASA work was proceeding through the shop, but at the same time, the shop’s engineering staff was busy, too. Parts were detailed by means of both pre-heat-treat and post-heat-treat dimensioned drawings, to account for the extent to which heat treating the material would affect various features. Operations were grouped before and after heat treating, then ordered systematically to conserve the error margin throughout machining. Machining results were checked and re-checked between operations. Given the ongoing need for communication between operations, Mr. Breth says having all these machining operations under one roof—and under the same roof as engineering—was essential. He says it would be hard to imagine producing these parts successfully using a supply chain of separate shops specializing in different types of machining.
Tolerance Technique
According to company President Bruce Hanson and Vice President Randy Mattis, Andrew Tool generally is not competitive for jobs in which the principal demand is delivering the work fast. Rather, the company best succeeds when the parts are precise enough or complex enough that the way to machine them effectively is not obvious.
Much of the company’s work has been for semiconductor manufacturers. “Serving this industry has taught us a lot about holding tight tolerances,” Mr. Hanson says.
Again, there is no set formula. But according to Andrew Tool’s leaders, certain elements frequently figure into holding tolerances that are measured in ten-thousandths or less. The techniques of tight-tolerance machining often involve ideas and considerations such as these:
1. Who’s torquing the part? In cases where a tolerance that was held successfully in the past is not being held today, Mr. Hanson says the likely explanation relates to the people performing the setup. Workholding can distort a part in ways that impair the accuracy of fine machining. Chances are, the previous setups were performed by someone exercising finesse, while more recent setups involved someone clamping too tightly. A torque wrench is the simple solution to this problem.
2. Think twice before rough milling. Many shops perform practically all of their roughing the same way—usually by milling, perhaps with a tool such as a 3/4-inch end mill. The danger in this is that milling induces considerable stress. For parts with fine tolerances, Andrew Tool often prefers wire EDM. “EDM is gentle roughing,” Mr. Mattis says.
3. Calibration is not as important as you think. Whether a measuring instrument is correctly calibrated is an essential question only in cases where a single gage provides the sole validation of a feature’s accuracy. As it happens, this is the case in most manufacturing processes.
By contrast, Andrew Tool routinely inspects any given feature in two different ways, using two different types of gages. Validation comes from finding correlation between the two measurements. If there is no correlation, then it’s time to examine one or both of the gages.
Mr. Mattis says measuring this way helps to overcome a common blind spot that is endemic to manufacturing inspection. “It’s human nature that we question the gage if our measurement shows the feature out of spec, but we don’t question the gage if we get the good measurement we were expecting,” he says. By taking different measurements with different gages, Andrew Tool avoids this rose-colored bias in the inspection.
4. Avoid heat. Many common machining practices add heat to the workpiece. Andrew Tool’s staff has grown accustomed to watching for these.
For example, the shop avoids using magnetic workholding on its surface grinders. This type of workholding is common on grinders, but it adds heat to the part. The heat can be enough to swell the dimensions beyond the tolerance the shop has to hold.
5. Experiment and slow down. In addition to the considerations outlined above, Mr. Hanson says the shop relies on considerable experimentation. In certain recurring part types, the shop has learned that particular speed and feed combinations permit tighter control. Tool wear is important as well. Cutters have to be changed frequently because a dulled edge induces more stress. Finding the right tool life is valuable.
Another important factor is simply the cultural atmosphere of the shop. Compared with a more typical machining business, Andrew Tool is unhurried. For employees to feel free to plan and to take care, the culture has to be conducive to attention and contemplation.
Ironically, that culture was slightly compromised while the Mars rover parts were in process. Those parts were so critical that NASA personnel were often present to oversee production. The attention reinforced just how valuable this work was, but at the same time, the lurking presence of this oversight constituted an entirely different form of induced stress.







.jpg;maxWidth=970;quality=90)