Optical Measurement Keeps Pointe Precision Sharp
With increasing demand for strict tolerances, this manufacturer of medical and aerospace components needed a measurement system to ensure that critical part dimensions and features met customer specifications. Starrett's HD400 optical measuring system both met accuracy requirements and reduced inspection times.
Share


ECi Software Solutions, Inc.
Featured Content
View More.png;maxWidth=45)
DMG MORI - Cincinnati
Featured Content
View More
Since 1995, Pointe Precision, a one-stop machine shop in Plover, Wisconsin, has specialized in producing critical-tolerance parts for the medical and aerospace industries—parts that could endanger lives if they fail. “Our components are what we call ‘life-critical,’” observes company President Joe Kinsella. “Consequently, we take inspection very seriously.” For this reason, Mr. Kinsella likes to point out that “quality” is not a department, but an integral part of the shop’s overall process. In fact, shopfloor inspection is an essential part of its strategy.
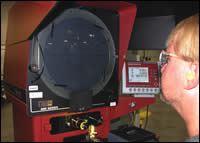
Thus, every workcenter is equipped with surface plates and the inspection equipment necessary to allow operators to perform consistent and reliable in-process inspection. One of the busiest pieces of inspection equipment is a Starrett HD400 horizontal benchtop, dual-lens measuring projector, also referred to as an optical comparator. Since purchasing the device, the shop has gained an edge by trimming time from the production cycle without compromising quality.
ISO-certified since 2000, Pointe Precision employs 110 people, 70 of whom are engineers and technicians pursuing a Six Sigma methodology aimed at zero-defects quality output in less time and at a lower cost than the competition. The company operates on a 5-day, two- and three-shift schedule with some lights-out production. The 60,000-square-foot production facility turns out 3,500 different types of products per year. It’s a mid- to low-volume contract manufacturing operation focused on parts with a high degree of precision and variation.
“Our customers’ tolerancing is becoming very stringent,” Mr. Kinsella says. “Right out of the chute, you have to deliver perfect parts.”
With such strict tolerances, the shop needed an inspection system that could repeatedly ensure that critical dimensions and features on machined parts were within customers’ specifications. The Starrett HD-400 not only met the shop’s expectations in terms of accuracy, but also reduced both in-process inspection times and change-over time between work orders.
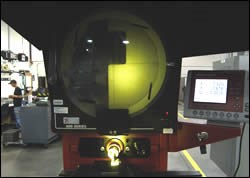
The horizontal measuring projector provides a 16-inch by 6-inch measuring range using an indexing dual-lens slide and triple-bundle, fiber-optic surface illumination with dual-intensity tungsten halogen profile illumination. The device profiles parts on a 16-inch-diameter screen with 10 to 100 times magnification. Generally, the horizontal-type optical comparator works best with parts that need to be fixtured, held in a vise or held on centers, according to manufacturer L.S. Starrett.
In addition, the comparator is equipped with a Metronics QC200 digital readout device for geometric dimensioning and tolerancing (GD&T) calculations. “The Starrett HD400 allows us to verify a wide variety of product characteristics very quickly,” explains Chris Spranger, quality assurance manager. “We measure many features, including angles, outside diameters, runout, hole sizes, corner breaks, threads, radii and shaft lengths on parts measuring 2 inches or less.”
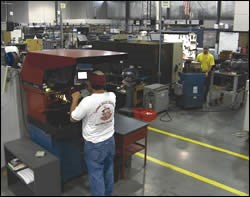
According to Mr. Spranger, minimizing setup time is a critical factor in keeping the company competitive. Some runs involve as few as 50 pieces. Others may involve a thousand. As any manager knows, setup time does not pay the bills. While the plant depends on a state-of-the-art, climate-controlled metrology lab for some measurements, placing the Starrett comparator in the turning area for visual verification has eliminated many time-consuming trips to the inspection room.
This is possible because the device can be used for some measurements that previously required a CMM, says Randy Grezenski, Pointe Precision manufacturing engineer. “We can take three hits of an arc, for example, on a half-spherical radius measuring 1/2 inch in diameter and take three points, make a circle and establish a centerline on the part,” he says.
Now, Mr. Spranger says, most inspection is done at the machine. He points out that in addition to the optical comparator, the turning department has installed Starrett surface plates and other gages for use with each lathe. Each of the shop’s 12 turning centers is set up for new jobs anywhere between two and seven times in a 24-hour period, with each setup taking between 30 minutes and 3 hours. Mr. Spranger says 10 to 25 percent of setup time is absorbed by the first-article verification process—a procedure now performed on the shop floor rather than the CMM/inspection room.
Additionally, if operators had to inspect precise parts using only micrometers, indicators and other conventional gages, inspections would take much longer than they do with the optical system. That’s because the non-contact technique can graphically display and measure parts with dimensions and shapes that would be hard to measure with regular gages. In fact, using conventional gages rather than the optical comparator would make inspection times two to four times longer, depending on the product, Mr. Spranger notes.
“You can easily see the impact of an inspection process that could take three or four times longer to complete,” Mr. Spranger says. “The Starrett HD400 helps us minimize setup time and get into production mode quickly.”
Unlike the shop’s previous system, the Starrett device enables operators to check distances and concentricity. Additionally, it has sharper, clearer optics that detect edges better, says operator Marty Cattanach. “Before the HD400, features were very fuzzy and shadowed,” he explains. “The Starrett comparator allows you to see much greater detail. It’s just more accurate and much faster.” Mr. Cattanach adds that the device’s quick-release fixture saves time compared with a manual crank handle, and the screen rotates easily for checking different angles.
Mr. Spranger estimates that the Starrett optical measuring system has reduced overall inspection time by as much as 75 percent, depending on the complexity of the part. “We have found optical, non-contact measurement to be an integral part of our turning work,” he concludes. “The Starrett HD400 provides a more reliable, repeatable and far faster method for inspecting parts, including setup and the all-important first-article inspections.”
Related Content
Help Operators Understand Sizing Adjustments
Even when CNCs are equipped with automatic post-process gaging systems, there are always a few important adjustments that must be done manually. Don’t take operators understanding these adjustments for granted.
Read MoreProcess Control — Leveraging Machine Shop Connectivity in Real Time
Renishaw Central, the company’s new end-to-end process control software, offers a new methodology for producing families of parts through actionable data.
Read MoreOrthopedic Event Discusses Manufacturing Strategies
At the seminar, representatives from multiple companies discussed strategies for making orthopedic devices accurately and efficiently.
Read MoreHow to Evaluate Measurement Uncertainty
Manufacturing and measurement are closely coupled. An important consideration for the use of measurement results is the associated measurement uncertainty. This article describes common metrology terms and provides an example uncertainty analysis.
Read MoreRead Next
Building Out a Foundation for Student Machinists
Autodesk and Haas have teamed up to produce an introductory course for students that covers the basics of CAD, CAM and CNC while providing them with a portfolio part.
Read MoreRegistration Now Open for the Precision Machining Technology Show (PMTS) 2025
The precision machining industry’s premier event returns to Cleveland, OH, April 1-3.
Read More5 Rules of Thumb for Buying CNC Machine Tools
Use these tips to carefully plan your machine tool purchases and to avoid regretting your decision later.
Read More


.jpg;maxWidth=300;quality=90)


