When to Use 2D or 3D Surface Measurement
Instead of committing exclusively to 2D or 3D surface measurement, shops should consider their use cases.
Share


Takumi USA
Featured Content
View More


Surface finish affects how a part will fit, wear, reflect light, transmit heat, distribute lubrication, accept coatings and more. Therefore, the part’s function and the application’s engineering requirements determine the required surface finish.
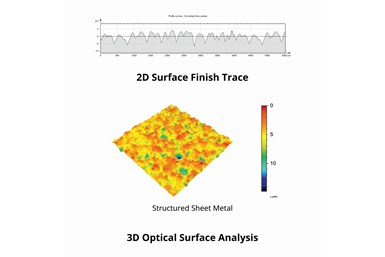
Properly analyzing a surface requires choosing the right measurement procedure. While 2D contact measurement devices like handheld skidded diamond styli are still the most common measurement solutions, 3D measurement devices offer new insights into surface structures and processes while delivering comparable results to established 2D technology.
Optical measurement of surface finish has made recent advancements in power and affordability, but the high cost prevents faster adoption. Those who do purchase these systems find the surface measurements are truly 3D instead of the 2D profile generated with a diamond-stylus-based instrument.
For some specialized surfaces, this 3D topography is critical to determining if the functional requirements of the surface are as required. In those cases, an optical measurement may be the only way to understand the surface. While it is possible to take many parallel traces with a diamond stylus and build the same type of 3D topography, the process is often too time consuming to tolerate in a production environment.
Production processes such as turning or grinding often create similar surfaces all the way around the part, making a 2D measurement acceptable. However, surfaces with non-uniform characteristics require 3D measurement for optimal inspection. In other cases, the surface can be so delicate that the risk of damaging it through contact measurement with a stylus is relatively high, making an optical system the best option.
Both contact 2D probing and 3D optical procedures have their place in surface metrology. The best approach depends on the specifics of the individual use case, the related requirements of the target application and relevant standards requirements.
For example, surface complexity is a good indicator for the complexity of the measurement analysis. As a quick rule, 2D contact is an excellent choice for quick surface finish validation of well-understood products and processes. These techniques are also easily accessible from a budgetary and technical standpoint. 3D non-contact measurements are the better choice when the surface is technically complex, additional statistical certainty is required or the material is such that non-contact is a requirement.
3D surface measurement analysis can also be more complex, going beyond typical Ra/Rz parameters. For these more complex measurements, personnel engineering the designed surface may need to review the 3D measurements to ensure the part meets the design goals.
Considering all the different options and standards, shops should develop a comprehensive understanding of both 2D and 3D measurement technology and gain experience and application knowhow. This does not come easily, but there are experts who can help.
Related Content
-
How to Choose the Correct Measuring Tool for Any Application
There are many options to choose from when deciding on a dimensional measurement tool. Consider these application-based factors when selecting a measurement solution.
-
Ballbar Testing Benefits Low-Volume Manufacturing
Thanks to ballbar testing with a Renishaw QC20-W, the Autodesk Technology Centers now have more confidence in their machine tools.
-
Turning Fixed-Body Plug Gages Inside Out
Fixed-body mechanical plug gages provide fast, high-performance measurement for tight-tolerance holes.


.png;maxWidth=150)


.jpg;maxWidth=300;quality=90)


