Laser On Multi-Sensor Inspection Systems Works In Deep Slots
A new laser system gives multi-sensor measurement equipment more flexibility. This system improves the equipment's ability to measure deep recesses and features with high walls.
Share


Takumi USA
Featured Content
View More


Autodesk, Inc.
Featured Content
View MoreDifferent types of sensors for measuring workpiece dimensions have different advantages in certain applications. Choosing the right one is a basic decision in a successful measurement strategy. Multi-sensor systems allow two or more sensor varieties to be used on the same piece of measurement equipment so that the most appropriate type can be matched to different part features or inspection needs.
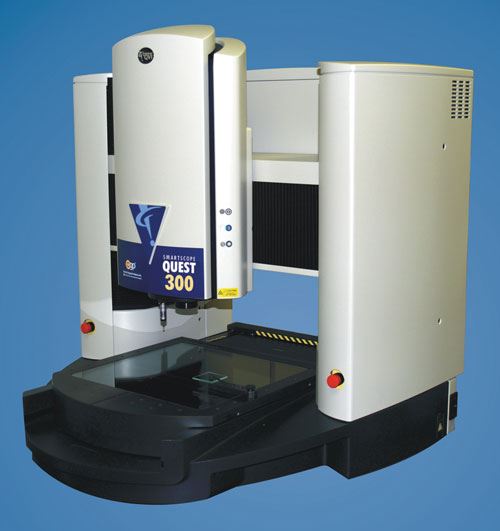
Optical Gaging Products (OGP) Inc. of Rochester, New York, has developed a type of laser system that provides a new option for the company’s family of multi-sensor SmartScope Quest systems. The laser, called the TeleStar TTL, offers a long working distance and high resolution, allowing it to measure features that are difficult for other types of laser, optical or touch-probe sensing systems to access. According to developers, machined parts with deep slots or high, upright walls are good examples of workpiece features at which the new laser system excels.
Dimensional measurement sensors are categorized as either contact or non-contact. Depending on the edges or surfaces to be inspected, various sensors from one category or the other will provide the best results. An example of a contact sensor is the touch probe, which contacts a part to register a data point. Non-contact sensors include video and vision systems, which analyze images collected by an optical device and presented to a camera. Also included are lasers that detect reflected, direct, or scattered light. Types of laser systems used for measurement include triangulation, interferometric, conoscopic, dispersive and others.
Lasers are non-contact, so they are especially useful for measuring points or lines on parts that are flexible or sensitive to touch. When integrated into a system with Z-axis motion, lasers can follow surface contours and provide X, Y and Z coordinates of surface points. Because lasers have a small spot size (typically 5 to 15 microns in diameter), they can measure extremely small features. However, a laser sensor can be limited by its working distance, the space that must be maintained between the laser system optics and the part or fixture. Limitations in working distance may force compromises in measurement resolution and accuracy.
For example, typical TTL (through-the-lens) triangulation lasers are constrained by a dependence on a high numerical aperture to get a small spot size, with a corresponding small working distance. Higher numerical apertures typically mean shorter working distances. This limits the laser’s ability to measure certain part features.
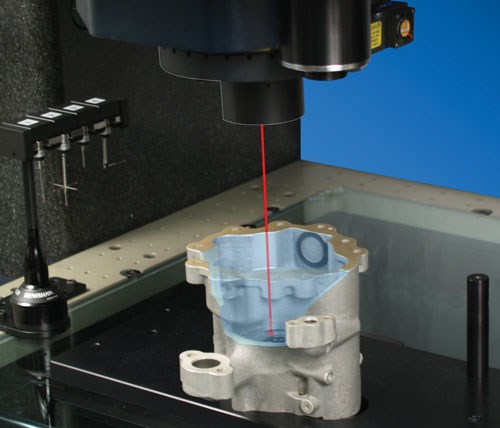
The TeleStar TTL laser does not use triangulation. Instead, it is an interferometric laser in which the incident and reflected light are coaxial. Its coaxial optical path eliminates the strict limitations of the lens aperture setting, thus allowing the laser to have both a small spot size and a long working distance. Depending on the front lens, this working distance can be as large as 200 mm (7.9 inches).
The nature of this laser allows it to measure areas on parts where light from triangulation lasers might be obscured when angled by entrance or exit sensors for triangulation. Its large working distance makes it possible to scan surfaces adjacent to vertical surfaces, such as the bottoms of slots or trenches.
A touch probe with the proper stylus might be able to reach a deeply recessed feature, but using a probe may be complicated because of the required approach and back-off distance. Respecting safe zones further complicates use. For example, a touch-probe system must have enough Z-axis travel to get the stylus from the change rack, raise it above the edge of the part and move it down to the surface being measured. Because light is emitted from the TeleStar TTL laser, it can be moved across the edge of the part with no risk of damage to part or sensor.
The TeleStar TTL laser is available exclusively for SmartScope Quest systems. On these multi-sensor systems, laser measurement of part surfaces complements the video measurement of part edges. Because the laser and video sensors share a common optical path, the user can not only switch between video and laser measurements almost instantly, but also accurately see where the laser will be effective, even at high optical magnifications. A single measure-ment system that can combine laser, video and touch probe sensors improves productivity by increasing efficiency. More features can be measured in a single setup, and data from all measurement sensors is available to verify part dimensions.
Related Content
Rethink Quality Control to Increase Productivity, Decrease Scrap
Verifying parts is essential to documenting quality, and there are a few best practices that can make the quality control process more efficient.
Read MoreThe Many Ways of Measuring Thickness
While it may seem to be a straightforward check, there are many approaches to measuring thickness that are determined by the requirements of the part.
Read MoreHow to Calibrate Gages and Certify Calibration Programs
Tips for establishing and maintaining a regular gage calibration program.
Read MoreProcess Control — Leveraging Machine Shop Connectivity in Real Time
Renishaw Central, the company’s new end-to-end process control software, offers a new methodology for producing families of parts through actionable data.
Read MoreRead Next
Building Out a Foundation for Student Machinists
Autodesk and Haas have teamed up to produce an introductory course for students that covers the basics of CAD, CAM and CNC while providing them with a portfolio part.
Read More5 Rules of Thumb for Buying CNC Machine Tools
Use these tips to carefully plan your machine tool purchases and to avoid regretting your decision later.
Read MoreRegistration Now Open for the Precision Machining Technology Show (PMTS) 2025
The precision machining industry’s premier event returns to Cleveland, OH, April 1-3.
Read More


.png;maxWidth=150)


