CAM Software For Probing
Software for creating probing routines off-line promises to make machine tool probing easier to use. As a few examples show, different software providers look at this off-line programming in different ways.
Share


Shops and plants that are thinking of investing to realize a more automated process may be overlooking an automation tool that already waits in the machining center.
Through the use of a machining center's spindle-mounted probe, a shop can save time and effort in a variety of ways. Prior to machining, probing can be used to automatically confirm that the correct part has been loaded to match the program. Probing can also locate that part, wherever it sits on the table, so time-consuming setup might be eliminated. During machining, probing can check the semi-finished part to see how much of a finishing pass is needed. And after machining is done, probing can be used to perform certain inspections right at the machine tool, before the part is unclamped and taken away.
In fact, because probing can improve efficiency in so many different ways, it is probably safe to say that the probe is underused in almost every shop that owns one.
The shops themselves are not entirely to blame for this. Part of the reason probing is underused is the awkwardness that often comes with adding probing to the process. Shops generate milling and drilling tool paths with ease, using any of a variety of CAM systems. But probing calls for macros that are often either added to the NC code through manual editing, or else entered right at the CNC.
Some recently introduced software tools attempt to address this shortcoming. The systems described in the following pages make it more practical to program probing operations off-line. They could all be thought of as “CAM for probing,” in that they generate machine-independent probing routines that can be postprocessed for individual machining centers. However, the three examples of probing software included here also represent three different ways of thinking about the way that probing is used.
One of the systems recognizes the probe-equipped machine tool as a metrology device. This system allows programs to be shared seamlessly between CMM and machine tool, and it allows the same analysis that is applied to CMM data to be applied to data captured with a machine tool probe.
Another system emphasizes the role of probing in specialized machining challenges, seeking to coordinate probing with the machining moves in cases where an important part of the job is unpredictable.
A third approach, and the first one described below, is intended simply to make probing, in general, a more natural part of the typical machining process. By operating as a plug-in within the CAM software that is used for tool paths, this utility expands the reach of the shop’s primary CAM system to include probing moves.
Probing As A Plug-In
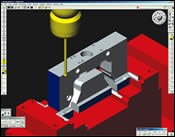
Productivity+, pronounced “productivity plus,” is a CAM software plug-in from Renishaw (Hoffman Estates, Illinois), the maker of probes and probe accessories. Currently, the plug-in is available with GibbsCAM software from Gibbs & Associates (Moorpark, California).
The point of this plug-in is to allow the CAM software that uses it to call upon the probe as easily as it might call up any cutting tool in its library. That means probing no longer has to be a separate programming consideration apart from the tool paths. In addition to the convenience this provides, improved confidence is another benefit. Like the tool paths, the probing moves can be verified using the CAM software’s own verification capability.
This utility supports probing for part setup, identification and inspection. It can also be used with the stationary tool setting probe to automate tool length and diameter measurements.
There is another version of the utility that is not a plug-in. Productivity+ Active Editor is a stand-alone software product. For existing CAM systems that do not include functionality for probing, this software lets the programmer import and modify NC programs, so the programmer can add probing moves as a follow-up step.
Probing The Unknown
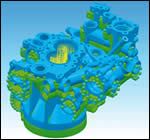
PS-Fixture from Delcam (Windsor, Ontario) is part of the company’s Power Solution family of integrated CAD/CAM products. That same family includes PowerMill software for generating NC part programs, and also PowerInspect software, which is capable of equipping these programs with probing routines. The focus of PS-Fixture lies between these modules. Its purpose has to do with putting probing to work in ways that overcome unknown variables in the machining of certain complex parts.
Exactly what variables are addressed can vary, depending on the application and the shop. For an ordinary part program, three things can be treated as known. They are: the precise position of the workpiece, the precise shape of the stock before machining and the precise shape that the machining program is supposed to create. When any one of these three aspects of the job cannot be known, PS-Fixture can potentially fill in the gaps.
Here are examples:
• Unknown work position. Plenty of production applications use dedicated, customized fixturing to lock a part in place precisely where the NC program expects to find it. But as the part size gets bigger, setting up the work that precisely becomes more difficult to do. Shifting and rotating a large workpiece can be time-consuming, not to mention fraught with error. It would be easier just to move the program instead—and that is what PS-Fixture attempts to do. After probing a complex workpiece in numerous locations, the software can use best-fit calculations in conjunction with a CAD model to determine the part’s location and orientation in space. The software then sends a variety of offsets to the CNC that both shift and rotate the program’s coordinate axes so that the program aligns with the part.
• Unknown stock shape. A casting might vary significantly from one piece to the next. One way to deal with this is to invest time and cost in giving each casting a qualifying cut that takes the variation away. But a different and potentially more efficient approach is to allow probing to quickly measure every new piece. Best-fit analysis similar to what was mentioned above can then be used to calculate precisely what machining passes are needed for any individual casting.
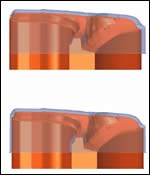
• Unknown part shape. Some parts have to be repaired to their current shapes, not to the requirements of the CAD model that spawned them. Turbine blades, for example, can be distorted by heat during use. The only way to blend a repair into such a blade is to measure and match this distortion. Probing, along with software able to calculate a curving form out of the probing data, offers a reliable way to do this.
Delcam says that this software is more of a toolbox than a tool. A single load-and-go solution that covers all of the applications mentioned above would not be practical. Therefore, equipping this software to perform effectively in a particular application is likely to involve some initial consultation with technical personnel from Delcam, the company says.
Metrology On The Machining Center
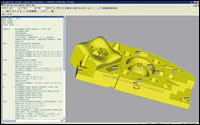
PC-DMIS NC from Wilcox Associates(Elgin, Illinois) recognizes that the machine tool equipped with a probe is not just a metal removal device, but also a metrology instrument. Resources developed for effective metrology can be put to use here as well. PC-DMIS NC for off-line programming of probing is software that is less than a year old, but it builds on a family of PC-DMIS software products that has been used for years to program and analyze the data from CMMs and other metrology machines.
The PC-DMIS software in general is device-independent. The NC version of this software not only takes advantage of a user interface proven out in CMM programming, but it also allows an inspection program created for a CMM to be imported and seamlessly applied to a machine tool.
Another aspect of the software’s independence is the NC server that manages the probing. This server sends the program to the machine tool CNC and waits for the resulting data. Probe measurements initiated in this way are used for part location, identification, inspection—all of the established probing uses. But at the same time, the use of the independent server makes it easy for the shop to track and record probing data over time, using reporting and analysis tools that are part of the PC-DMIS suite.
For a machine shop, one strength of the cross-platform approach can be realized when the same part must be inspected at the machine tool and at a CMM. For example, a routine check of every piece might occur at the machine, while occasional samples are sent to the CMM for confirmation. A process such as this typically involves different departments of the shop—Production and Quality. This division can mask a certain redundancy. Specifically, two different departments must develop two basically similar inspection routines for the same part. But with the device-independent software, one program can be used on either type of probe-equipped machine, whether it runs in the quality room or on the shop floor.
Related Content
5 Tips for Running a Profitable Aerospace Shop
Aerospace machining is a demanding and competitive sector of manufacturing, but this shop demonstrates five ways to find aerospace success.
Read MoreHow this Job Shop Grew Capacity Without Expanding Footprint
This shop relies on digital solutions to grow their manufacturing business. With this approach, W.A. Pfeiffer has achieved seamless end-to-end connectivity, shorter lead times and increased throughput.
Read MoreCan ChatGPT Create Usable G-Code Programs?
Since its debut in late 2022, ChatGPT has been used in many situations, from writing stories to writing code, including G-code. But is it useful to shops? We asked a CAM expert for his thoughts.
Read MoreERP Provides Smooth Pathway to Data Security
With the CMMC data security standards looming, machine shops serving the defense industry can turn to ERP to keep business moving.
Read MoreRead Next
Chatter Control For The Rest Of Us
This shop finds stable milling speeds quickly using a systematic pattern of test cuts.
Read MoreTools For Titanium
With all of the titanium that will be required for a new aircraft, any of 1,000 spindles might benefit from the tools and techniques described here.
Read MoreSetting Up the Building Blocks for a Digital Factory
Woodward Inc. spent over a year developing an API to connect machines to its digital factory. Caron Engineering’s MiConnect has cut most of this process while also granting the shop greater access to machine information.
Read More


