According to Kurt Manufacturing Co., the high regard for its Anglock brand of workholding vises is based on their accuracy and durability. That’s the reason, the company says, these vises have been best sellers for more than 50 years.
The company also understands that it has to be price-competitive. Great vises at great prices are the key to remaining a winner in the marketplace. To stay a leader and fend off low-cost imitators from overseas, The entire APS operates as a complete, integrated cell that enables parts to enter the system as pre-painted castings and leave as assembly-ready components. With its high level of built-in automation, the APS can operate around the clock with very little human intervention.
Of course, automated production would be pointless if the parts did not meet the necessary quality standards. For example, vise components must meet tight tolerances for flatness and parallelism—two critical quality requirements that can be difficult to achieve even with well-established manual procedures. The APS is designed to hit or exceed the flatness and parallelism tolerances consistently and reliably without compromising its hands-off/lights-out capability.
According to Kurt’s design and engineering staff, this is possible because the APS incorporates both an effective workholding strategy and a sophisticated gaging system. Together, they control the variables that occur in the APS’s machining, heat-treating and grinding operations. Components for eight different models and sizes of Anglock vises are processed on the APS, and all of them meet the test for flatness and parallelism.
What makes this an impressive accomplishment, however, is the nature of variability on a flexible, multi-machine system. Simply put, many machines with many operations multiply the chances for error.
“The challenge for achieving repeatable accuracy with this multi-capable system is that any given vise body can be processed through a very large number of production possibilities,” reports Jeff Lenz, division manager of Kurt Industrial Products. “For example, a particular model vise body can be machined on one of four HMCs, utilizing one of five machining pallets. That same vise can be heat treated in one of two stations. Grinding can take place at one of six grind stations on any one of six pallets. With this multitude of possible production scenarios, we accomplished our objectives for flatness and parallelism using custom gaging, workholding and SPC software, all of which are Kurt products.”
The APS at a Glance
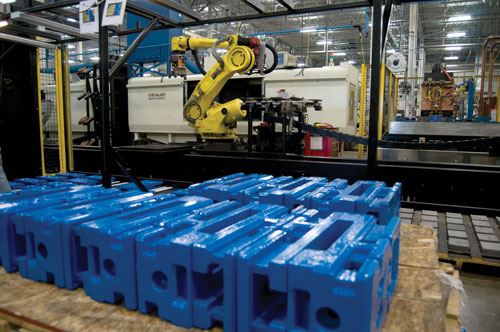
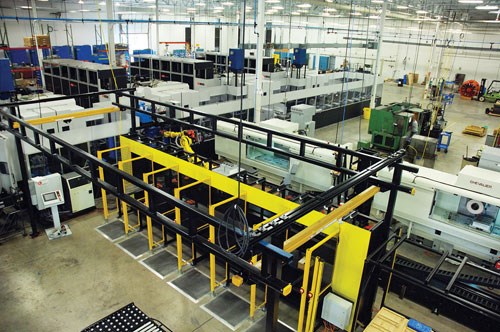
The APS is distinctive for its unusual hybrid design. It is arranged in an L-shaped configuration in which the main leg consists of a Mazak Palletech FMS built around four HMCs. One of the Palletech’s two load stations is tended by a robot that also serves a “branch line” consisting of two surface grinders, a heat-treat station and a mid-sized VMC. Although the Palletech system is a fairly standard installation of that builder’s technology, the branch line is a one-of-a-kind arrangement developed by Kurt’s engineering staff for finishing the machined parts.
Something else sets the APS apart from any other flexible system installation—its design creates a unique showcase for Kurt’s own product lines. Engineers used standard Kurt workholding, custom-engineered workholding, the DockLock and other engineered systems to put this cell together. In fact, effective workholding was the key to consistent, quality machining; reliable robotic loading and unloading; flexible scheduling to meet product mix demand; and the integration of diverse manufacturing processes.
Likewise, critical grinding operations are controlled by a customized gaging system developed by the company’s metrology division, Kurt Gaging. This system uses the company’s SPC software. The heart of this system is a gage station designed and built in-house. Without change-over, the gage station measures a family of vise bodies through each operation, monitoring and controlling each process (machining, heat treating and grinding), as the raw cast vise body moves to final finish grinding.
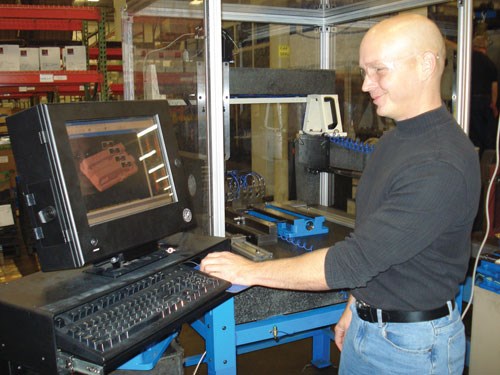
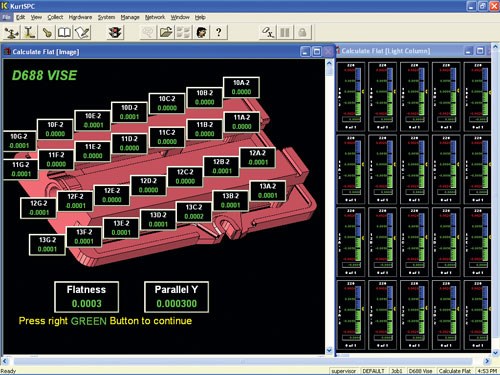
“When a vise body is loaded into the fixture, a series of LVDT probes measures the part for flatness, thickness and parallelism. This takes about 30 seconds. The gage provides measurement data over the entire length of the vise body, so the system operators understand exactly what the part’s measurements are before and after each operation,” Mr. Lenz explains.
SPC Software Monitors Quality
The SPC system guiding the APS, KurtSPC Premium and Manager software, provides fully automated machine and CNC control and automatic data collection interactions. Examining the grinding process shows how the software
manages the machines and other equipment, interacts with the other steps in the APS cell and delivers consistent results.
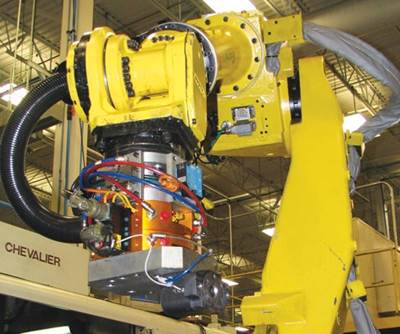
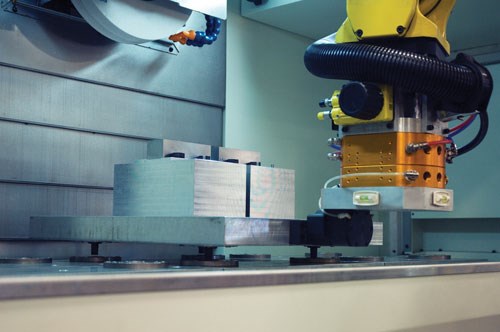
The two Chevalier Smart B246011 CNC surface grinders in the APS process as many as 60 different vise configurations. To accurately position and hold all of these different sizes, pallets are equipped with Kurt’s DockLock pneumatic positioning system. This system anchors to the bottom of each pallet via four zero-point locating pins, which are actuated by springs to position and retain the pallets and by air valves to release them. According to the company, the pins locate within 0.0002 inch, while the DockLock’s pneumatic cylinder locks vise bodies securely for grinding. The positioning and locking process takes a few seconds to accomplish. Each grinder’s receiver plate can accommodate as many as three pallets at one time, depending on the size of the vise bodies and the operation required.
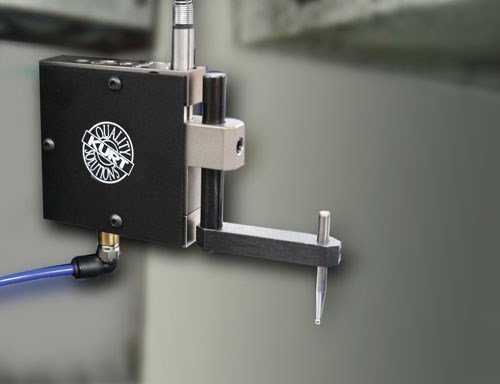
Once the pallets are loaded by the robot onto the grinding bed and positioned with DockLock locators, a gage head automatically moves into position to verify the location of each pallet and detect the height of each vise body. This is accomplished by electronically measuring the height of the rest pins on the pallet’s four corners. This procedure verifies that the pallet is aligned to the table bed, and equally important, tests for any load problems. Height verification determines the amount of grinding needed for each vise body. If the height and load are not correct, the robot will try to reposition the pallet. If repositioning is unsuccessful, the pallet is removed, an action that simultaneously triggers an alert to the system operator for a follow-up response.
The gage measuring head is designed to withstand the harsh grinding environment. The presence of coolant and slurry has no effect on the gaging operation or its accuracy. The grinder and gage communicate via the SPC data collection software and KurtUSB direct gage interface hardware. Part measurement data with grinding start/stop dimensions are transmitted directly to the grinder controller. When each grinding cycle is completed, the gage head is set to verify the accuracy of these final processes. (For gage accuracy and mastering purposes, a fixed pin independent of the grinder pallet is used to verify and master the gage at predetermined and programmable cycles.)
Controlling the grinding operations with the SPC software reduced cycle time by 30 percent compared to before the APS was installed. This figure does not account for the fact that waiting time involved with the previous manual load/unload steps has been eliminated.
Data Collection and Analysis
After weeks of collecting data, the company was able to identify problem areas and continually improve the process by eliminating variation caused by fixtures, tooling and other issues, Mr. Lenz reports. “When we started collecting data in one large population, we generated a distribution that had several modes, suggesting that there was more than one process in the data. The data showed, for example, the signature of each HMC, each grinder and so on.”
Mr. Lenz continues: “Our gaging setup assures us that we are able to produce very consistent vise bodies, regardless of the combination of machine tools, fixtures and tooling within the APS cell. If problems arise or if we make changes in tooling, fixtures and feeds on a machine to optimize the process further, we can easily analyze the impact on production.”
Before the APS system was installed, Kurt manufactured its vises using traditional heat treating, machining and grinding cells. Operators had to have special training to conduct the
gaging procedures.
Jon Baller, software development manager for Kurt Engineered Systems Group, recalls that gaging was formerly a slow process. It was subject to human variation from one operator to another and from one production shift to another, so keeping quality consistently high was a challenge, he says. “When we designed the new APS, the goal was to monitor accuracy electronically in real time with traceability of each process step. We accomplished that. Plus, we make more effective use of our labor. We need only three operators, whereas with the old system, we needed five. Also, the new system ramps up easily as we experience more variation in the order mix and increased order size.”
Noting that the new system has many advantages, Mr. Baller suggests that one of the most significant is having “a large-scale system within our own vise manufacturing that gives us a chance to show off our capabilities.” Ultimately, this advantage is meaningful be-cause it gave the company the tools it needs to maintain the quality and value to compete in the global market.”




.png;maxWidth=150)


.jpg;maxWidth=300;quality=90)

.jpg;maxWidth=300;quality=90)


