System Measures Surface Finish And Profiles
As a quality systems supplier, this manufacturer imposes strict internal quality demands on its components. Many machined parts feature bearing surfaces that will come into moving contact with mating parts made of metal, plastics or powder metal.
Share


Lemforder Corporation, a Lancaster, South Carolina, company, is a full-service supplier of steering components and suspension systems for trucks and buses. Its engineers work closely with large-vehicle manufacturing customers, offering prototype development and manufacturing.
As a quality systems supplier, Lemforder imposes strict internal quality demands on its components. Many machined parts feature bearing surfaces that will come into moving contact with mating parts made of metal, plastics or powder metal. These bearing surfaces, which can have complex geometries, must meet certain surface finish requirements to ensure product functionality and durability.
Lemforder machines many round components with varying diameters, complex surface contours, tight surface roughness specs and internal features. The company's previous surface measuring machine, while capable of performing satisfactory surface measurements on round parts, had several limitations.
According to Sri Burugapalli, quality manager at Lemforder, "It was beyond the capabilities of the machine to measure straight or non-round surfaces."
Testing protocols required technicians to run the surface-measuring probe across a reference standard that matched the particular surface finish that was being inspected. The quality laboratory maintained a number of these reference standards. To identify surfaces of blind holes or through-holes and internal threads, quality technicians were required to "feel" for these features using a probe. "In some cases, we had to inspect blind holes and internal threads destructively," explains Mr. Burugapalli.
Occasionally, quality engineers required more detailed information than the surface finish machine and comparator could provide. This required sending the part out to an inspection vendor.
The company found it needed greater quality verification on surface finish and profile measurements of the machined components going into its automotive suspension systems. When searching for better ways to measure surface finish and part profiles, Mr. Burugapalli expected he would have to buy two separate pieces of equipment. "We talked to a number of suppliers. Most offered these capacities in two separate machines, a comparator for profiles and a surface finish measuring system for the surfaces. They may have one computer that linked the two machines, but you were limited to using only one measuring system at a time and had to move the parts from machine to machine."
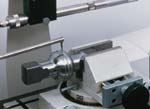
Although the initial search revealed that most suppliers could not provide both capabilities in a single unit, the Surftest SVC524 from Mitutoyo America Corporation (Aurora, Illinois) proved to be a pleasant surprise. This single instrument made it unnecessary for quality technicians to move parts from one measuring system to another to complete an inspection. Only two probe heads are needed to satisfy these measuring requirements. The new system eliminated the costly requirement of cutting open sample parts to inspect internal features and profiles.
The Surftest altered Mr. Burugapalli's expectations. "It offered us both these measuring functions in a small footprint, had more capabilities then the other systems, and the price was very competitive. It represented a $20,000 savings versus the cost of having to buy two different machines to perform the respective measurement functions." To perform both measuring functions, the Surftest requires only two interchangeable heads.
According to Mr. Burugapalli, the system gives Lemforder many measuring advantages. "Its ability to perform internal profiling was extremely attractive. Also, it gives us the flexibility to use the surface gage or the comparator to check external features and profiles."
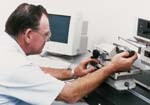
Today, quality technicians use the Surftest to measure threads, conduct surface measurements of corners, radii and merging arcs. "We can measure exact profiles of these types of parts," says Mr. Burugapalli. "If we have three or more circular features in a small area, a wave feature for example, the Surftest measures it very accurately." Quality technicians can inspect all surfaces: straight, round, contoured and wavy. "We can perform linear checks, no matter what the surface shape is," adds Mr. Burugapalli. "As long as the scribe can access a feature, the machine can measure it."
These measuring capabilities give design engineers at Lemforder greater confidence in their ability to design and build steering and suspension components and systems. "Buying the Surftest gives us confidence and verification about our machining processes," says Mr. Burugapalli. "The benefit is we know we can meet internal demands for producing quality components and products."
Now, setup times are shorter for some parts. "Occasionally a part might need both surface finish and profile measurements," says Mr. Burugapalli. "With a few basic adjustments we can do both in one setup." To change over from one inspection method to the other, the technician simply switches probe heads and tells the computer which head is now installed.
Also, installation of the system was a snap—training to get the quality technicians up to speed took only 2 days. Mr. Burugapalli is considering providing that same training to the CNC machine operators. "This way, they can come into the lab and check their own parts."
When asked about the company's return on investment with the Surftest, Mr. Burugapalli explains such information is difficult to quantify.
"You have to simply bite the bullet when purchasing this type of equipment. We knew what features we needed to measure that would verify quality and enhance our understanding of our manufacturing potential. Since the Surftest's installation, we have gained improved quality measurements, which, are in themselves, justification for buying the system."
Related Content
Choosing the Correct Gage Type for Groove Inspection
Grooves play a critical functional role for seal rings and retainer rings, so good gaging practices are a must.
Read MoreHow to Calibrate Gages and Certify Calibration Programs
Tips for establishing and maintaining a regular gage calibration program.
Read MoreOrthopedic Event Discusses Manufacturing Strategies
At the seminar, representatives from multiple companies discussed strategies for making orthopedic devices accurately and efficiently.
Read More4 Ways to Establish Machine Accuracy
Understanding all the things that contribute to a machine’s full potential accuracy will inform what to prioritize when fine-tuning the machine.
Read MoreRead Next
5 Rules of Thumb for Buying CNC Machine Tools
Use these tips to carefully plan your machine tool purchases and to avoid regretting your decision later.
Read MoreSetting Up the Building Blocks for a Digital Factory
Woodward Inc. spent over a year developing an API to connect machines to its digital factory. Caron Engineering’s MiConnect has cut most of this process while also granting the shop greater access to machine information.
Read MoreBuilding Out a Foundation for Student Machinists
Autodesk and Haas have teamed up to produce an introductory course for students that covers the basics of CAD, CAM and CNC while providing them with a portfolio part.
Read More


