Roundness Measurement System Enhances Capabilities
The company says it owes its success to teamwork. Everyone--from the engineers who craft designs, to the machine operators who grind the parts, to the president who consults with all of them-collaborates on finding ways to make quality parts the best way possible.
Share


C&S Machine Products (Buchanan, Michigan) manufactures hydraulic spool and sleeve assemblies for Boeing, Parker Hannifin and the U.S. military, as well as shafts and pistons for the vacuum pump industry. The company says it owes its success to teamwork. Everyone—from the engineers who craft designs, to the machine operators who grind the parts, to the president who consults with all of them—collaborates on finding ways to make quality parts the best way possible. The company-wide commitment to quality and technology investment—evident in EDM wire cutting machines and CNC grinders throughout the facility—improves best practices in machining.
"We specialize in incorporating a wide range of high precision CNC turning, milling, grinding and drilling—using all these pieces to manufacture complete parts for our customers," says Dominick Saratore, vice president. "We work hard to ensure that critical machining operations are accurate."
For example, a match-fit spool and sleeve set can have clearances as small as 80 millionths (0.000008) of an inch. As tolerances became tighter due to industry trends, the manufacturing capability of C&S began to surpass its inspection capabilities. C&S inspection operators were using dial indicators and V-blocks to perform runout measurements, which can require years of experience to perform effectively. Using this manual method, if the dial on the indicator didn't move, the result was used to prove accurate machining. "We were going past our envelope," Mr. Saratore explains. "It made perfect sense to find a reliable way to measure our machining capabilities."
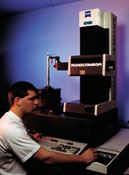
To accurately measure close tolerances in machined work, C&S decided to install the TSK Rondcom 60A measuring machine from Carl Zeiss IMT Corporation (Minneapolis, Minnesota) in the spring of 1999.
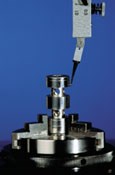
The Rondcom measures runout from a diameter to a shoulder on inlet shafts used in dry vacuum pumps, which require tolerances as tight as 0.00019. Because the parts use no lubrication, the machining accuracy must be superior.
"We do our best work in the tighter tolerances, and now we can measure them," Mr. Saratore says. "When a customer has a product that is a problem part and difficult for others to make, those seem to be the projects where we shine the most."
In addition to measuring straightness in both the R (radius) and Z (diagonal) axes, the Rondcom conducts several other complex measurements, including concentricity, coaxiality and cylindricity.
C&S also uses the Rondcom to monitor, evaluate and enhance manufacturing processes. "By checking incremental machining steps, we've been able to fine-tune our manufacturing capabilities," Mr. Saratore says. "We use it as a tool to deal with measuring millionths of an inch, which actually means something to us today. Before having the Rondcom, 10, 20 or even 30 millionths were immeasurable amounts."
Mr. Saratore is pleased with the Rondcom performance and says the system is doing more than he anticipated. "We purchased the machine to perform cylindricity and roundness measurements, then we learned how to check a runout tolerance on a shaft shoulder.
"Previously, a customer would check a part and occasionally say it was out of tolerance," Mr. Saratore adds. "We now know our parts are accurate, and we can prove it." The Rondcom runout feature ensures part accuracy.
A rotating worktable on the Rondcom features automatic centering and leveling for minimal setup time. According to Mr. Saratore, there is no comparison between the amount of time it takes to set up a part for manual inspection and the Rondcom. "On the Rondcom an operator places the part on the worktable, and the computer software automatically centers and levels the part for inspection," he says. "There's virtually no setup time required."
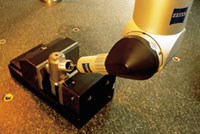
Based on his satisfaction with the Rondcom, Mr. Saratore purchased a Zeiss Eclipse coordinate measuring machine (CMM) with an RDS (Rotating Dynamic Sensor) probe and Calypso software program in late 1999. He is presently working to incorporate the CMM more into the day-to-day inspection operations at C&S.
"We have a lot of repetitive parts we'd like to set up with fixturing and have the Calypso software programmed to perform automatic inspections," Mr. Saratore says. "Having an unattended inspector frees up an employee's time for other tasks."
Based on the Windows NT platform, Calypso offers intuitive operation with CAD technologies. C&S operators import CAD model files to create inspection programs and use the reverse engineering capability of Calypso to obtain dimension specifications directly from a part profile.
The Eclipse with Calypso Windows environment played a big role in the C&S purchase decision since the entire shop runs on the Windows NT platform.
Mr. Saratore believes the Zeiss products are the best tools available. "We want our customers and our competitors to know we want to be the best high precision machine shop," he says.
Related Content
Help Operators Understand Sizing Adjustments
Even when CNCs are equipped with automatic post-process gaging systems, there are always a few important adjustments that must be done manually. Don’t take operators understanding these adjustments for granted.
Read MoreChoosing the Correct Gage Type for Groove Inspection
Grooves play a critical functional role for seal rings and retainer rings, so good gaging practices are a must.
Read MoreOrthopedic Event Discusses Manufacturing Strategies
At the seminar, representatives from multiple companies discussed strategies for making orthopedic devices accurately and efficiently.
Read MoreProcess Control — Leveraging Machine Shop Connectivity in Real Time
Renishaw Central, the company’s new end-to-end process control software, offers a new methodology for producing families of parts through actionable data.
Read MoreRead Next
Registration Now Open for the Precision Machining Technology Show (PMTS) 2025
The precision machining industry’s premier event returns to Cleveland, OH, April 1-3.
Read MoreSetting Up the Building Blocks for a Digital Factory
Woodward Inc. spent over a year developing an API to connect machines to its digital factory. Caron Engineering’s MiConnect has cut most of this process while also granting the shop greater access to machine information.
Read MoreBuilding Out a Foundation for Student Machinists
Autodesk and Haas have teamed up to produce an introductory course for students that covers the basics of CAD, CAM and CNC while providing them with a portfolio part.
Read More


.png;maxWidth=300;quality=90)


