Probing Beyond Prismatic
This manufacturer has used on-machine probing to help automate setups and maintain process control for prismatic parts produced on VMCs for years. The metrology products maker recently implemented probing strategies that let it achieve similar results on its turn-mills and Swiss-types. The smaller, more economical batch sizes these machines now produce are better aligned with true production requirements.
Share


Hwacheon Machinery America, Inc.
Featured Content
View More


Takumi USA
Featured Content
View More

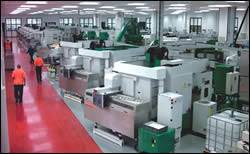
On-machine probing has been a vital part of Renishaw’s approach to automation, setup reduction and process control for some time. It is one of a handful of techniques comprising the UK-based company’s RAMTIC parts-production concept. RAMTIC, an acronym for Renishaw’s Automated Milling, Turning and Inspection Center, was developed in the early 1990s as a solution for effective process control during unattended production of small, prismatic parts. The proven concept is still being applied to produce various components for the company’s metrology products at its remarkably clean Stonehouse manufacturing facility in Gloucestershire, England.
Through the use of standardized work fixtures and mobile carousels, master workpiece artifacts, and on-machine probing routines, RAMTIC enables conventional VMCs to maintain firm control of precision machining processes on their own. Recently, though, the company has developed similar approaches to allow its more complex turn-mill machines and Swiss-type lathes to achieve the same results.
Paul Maxted is Renishaw’s principal manufacturing engineer at Stonehouse. He recently revealed how the company applies probing to reduce setup time and maintain accuracy of critical components produced on those multifunctional machines. Renishaw hopes this effort will allow batch sizes to be reduced where required to be more in line with product assembly requirements.
Rooted In RAMTIC
Before describing how probing is being used on the company’s turn-mills and Swiss-types, it’s helpful to briefly explain some RAMTIC fundamentals. Renishaw initiated RAMTIC as an automated method of producing prismatic parts on relatively low-cost VMCs. Each machine uses a fixture base having a standard dovetail interface that positions fixtures that hold multiple small workpieces. A trunnion table provides rotation that allows the machine to access multiple faces of the various workpieces. A mobile carousel located at each machine holds as many as 50 fixture plates containing the raw material needed to produce “kits” of components for a product. The carousel also includes all the tooling the machine needs for a job. A transfer system automatically loads/unloads the fixture plates from the carousel and delivers them to the machine.
Touch probes perform pre-machining alignment checks. In addition, toolsetting probes verify that each toolchanger position possesses the correct tool and measure tool lengths and diameters to determine offsets. The VMC then completely machines the first part of the batch, which is followed by a probing routine.
Rather than immediately probing the machined part, however, the probe first measures an artifact located within the machining environment. The qualified artifact is made of the same material as the part, so both have identical thermal expansion characteristics. It is either a replica of the workpiece or a general unit containing various machined features. The machined part is then probed and the results are compared to the measured artifact. Process parameters are automatically adjusted based on the deviation between the artifact and workpiece measurements, and machining of the remaining workpieces begins.
Because setups are performed sans manual intervention, the machines can run very small batch sizes (typically 10 to 20 pieces). While the machine is running a job, another carousel can be kitted with fixture plates containing the material and tools required for the next job. Upon job completion, an employee simply swaps carousels and starts the new part run.
In 2005, the company looked to achieve similar process benefits for the turn-mills it commonly uses to machine larger components. That paved the way for the development of a probing solution for Swiss-type lathes that is said to possess a level of inspection sophistication that previously hadn’t been realized on Swiss-types.
Beyond Prismatic
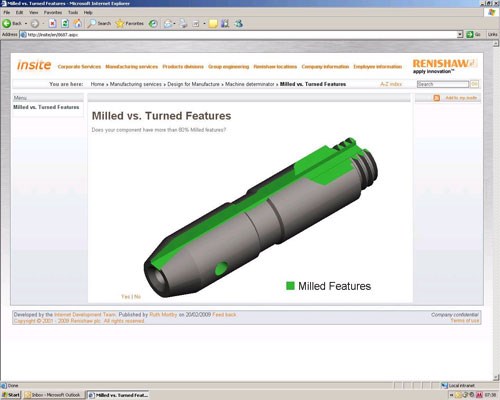
While the RAMTIC system continues to be applied in the production of the company’s small, prismatic parts, turn-mill machines and Swiss-type lathes are increasingly used to produce parts that have both turned and milled features. That prompted the company to develop a probing strategy for its Mori Seiki SL 153Y turn-mills, which are equipped with barfeeders and gantry loaders to allow extended stretches of unattended operation. The advantage of these machines is that they offer capability to completely machine a part in one fell swoop. The downside is that the combined turning, milling and drilling operations can make setups tricky and time consuming.
Previously, the company would dial in a new job on a turn-mill by setting up the machine in a traditional manner and producing an initial part. The completed part would be delivered to a CMM that measured its key features. The machine setup person would then compare the CMM’s findings with the workpiece’s expected dimensions and determine how best to adjust machining parameters to bring the process under control. During complex setups, occasional incorrect decisions made in this effort greatly extend the time to tune the process. And when setup times are long, batch sizes are often increased to justify the machine downtime.
The company now uses on-machine probing to automate and speed setups of these complex machining jobs. The process strays from the RAMTIC approach in that a part is not machined complete and then measured against a qualified artifact. Instead, a measurement is performed after each feature of an initial part is machined. All necessary process adjustments are made instantaneously before the next feature is cut.
This feature-by-feature setup measurement process continues until the part is completed. At that point, the process is considered optimized, and the probing cycle switches into process-control mode. The feature-measurement routine then is performed after every 40 to 50 parts (depending on the required tolerance) to compensate for any process deviation.
The software developed to update machining parameters also compares measurements against process rules Renishaw engineers establish for each job. These rules ensure that an anomaly doesn’t cause the software to automatically update a process based on incorrect measurements. Consider the worst-case scenario in which a nest of chips collects around a part during a turning operation. The tangled chips would cause a probe to trigger before actually touching the external feature. Without adequate intelligence built into the software, the software would automatically update the process based on an incorrect measurement.
History demonstrates that once a machining process is initially optimized on these machines, there will not be a significant discrepancy between a machined feature and its expected size. In fact, Renishaw’s expected variance often doesn’t exceed 0.004 inch. If a measurement value was to fall outside the software’s defined variance, as in the case of the chip nest, the system assumes there is a problem and the machine is instructed to run the tool around the profile to remove any chips before re-measuring. If the variance returns to the expected range, then the software will alter process parameters as needed per the true measurement.
Swiss Challenges
On-machine probing has most recently been integrated in a handful of the company’s Swiss-type lathes. Like the turn-mills, these machines can produce intricate components complete, but setups can be a bear. This not only causes production delays, but also necessitates larger-than-desired batch sizes to justify the long setup time. That meant at some times components were machined even though they weren’t immediately needed.
Originally, new jobs on the Swiss-types were dialed in similarly to the original turn-mill process. After setup, an initial part would be machined and taken to a CMM for measurement. The machine operator would then interpret the measurement results and decide how to adjust the process parameters to bring the part into specification. It wasn’t uncommon for new jobs on the Swiss-types to require five to ten process-adjustment iterations to optimize the process. This exercise often took several hours, although there were some instances in which it consumed entire 8-hour shifts.
The company’s initial effort to reduce setup time on these machines was to use standard tooling packages to eliminate the need to break down all tools after completing one job and rebuild the machine from scratch for the next. However, the company realized that on-machine probing was required to achieve the fast, automated setups it needed for its Swiss-types.
Integrating probing on Swiss-types is challenging because there are oftentimes various operations being performed simultaneously. There also is limited space within the work zone of Swiss-types to accommodate a probe.
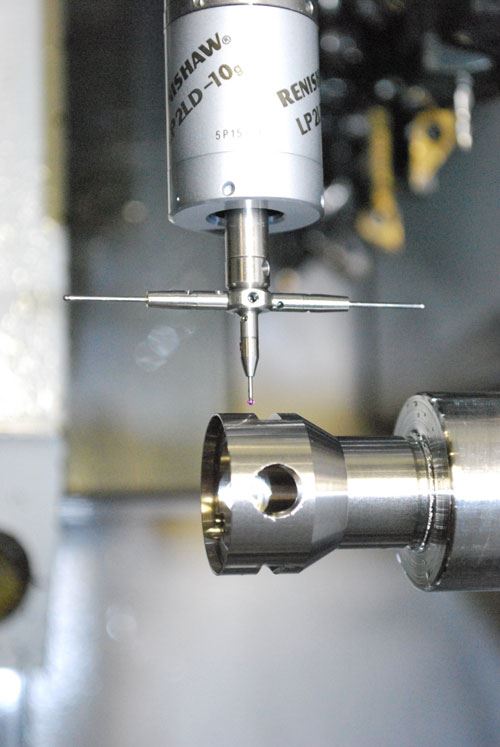
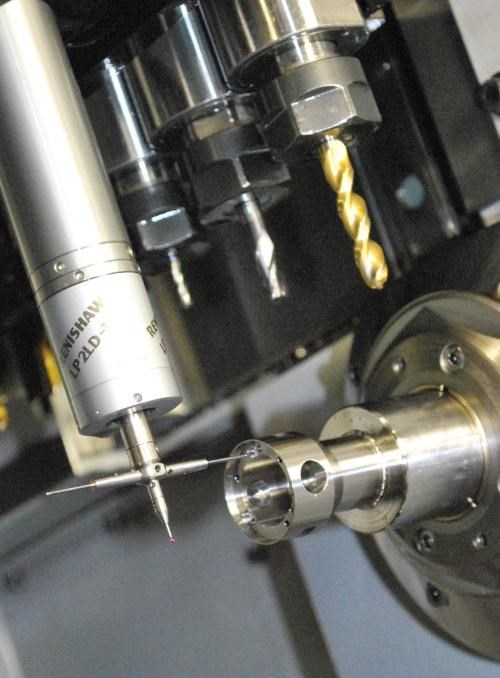
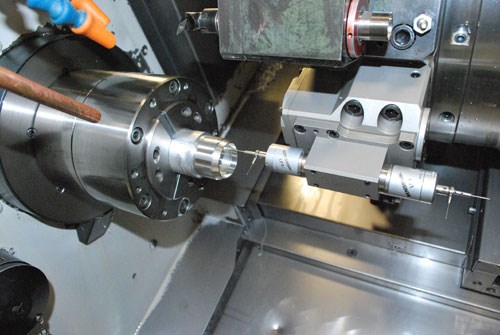
Renishaw decided to develop a probing solution for its M32 machines from Marubeni Citizen-Cincom. An LP2 LD low-force touch probe mounts on the machine’s main platen to allow both X- and Y-axis travel around a part. If the probe was mounted in the turret of these machines, then only X-axis travel would be possible (the turret doesn’t offer Y-axis movement). This would make it impossible to measure part features such as the center point of a hole. The goal for this probing system was to provide the ability to measure all machined features on Swiss-types.
The probe doesn’t consume a tooling station because it piggy-backs onto the main platen via a custom mounting bracket. This is important because many complex, multiple-operation jobs require tools in every station. The stylus configuration, designed specifically for use on Swiss-types, allows a single probe to measure multiple features produced on either the main or secondary spindle.
The stylus pointing to the right in the photo is used to measure features machined on the machine’s main spindle. It can perform internal and external probing for IDs and ODs in addition to flats, holes and chamfers machined into the face of a part. The downward-pointing stylus can measure cross-worked features and the width and diameter of grooves. The stylus pointing to the left is used to measure milled, drilled and turned features on parts loaded in the machine’s secondary spindle. During setup, the probe measures each feature after it is machined, and the system’s software automatically updates tool offsets.
Renishaw began running production parts using this probing technique during the middle of 2008 and is currently implementing it on eight M32 machines. Early indications show that setup reduction times of approximately 50 percent will be possible on the company’s ten most complex components machined on those Swiss-types. Although this probing system currently is being used only at Stonehouse, Marubeni Citizen-Cincom plans to offer a similar probing package as an option on its Swiss-type lathes.
Related Content
Help Operators Understand Sizing Adjustments
Even when CNCs are equipped with automatic post-process gaging systems, there are always a few important adjustments that must be done manually. Don’t take operators understanding these adjustments for granted.
Read More6 Machine Shop Essentials to Stay Competitive
If you want to streamline production and be competitive in the industry, you will need far more than a standard three-axis CNC mill or two-axis CNC lathe and a few measuring tools.
Read MoreTurning Fixed-Body Plug Gages Inside Out
Fixed-body mechanical plug gages provide fast, high-performance measurement for tight-tolerance holes.
Read MoreThe Link Between CNC Process Control and Powertrain Warranties
Ever since inventing the touch-trigger probe in 1972, Sir David McMurtry and his company Renishaw have been focused on achieving process control over its own manufacturing operations. That journey has had sweeping consequences for manufacturing at large.
Read MoreRead Next
RAMTIC System Still Ticking
When it first appeared in the early 1990s, RAMTIC (Renishaw’s Automated Milling, Turning and Inspection Center) pioneered the use of portable carrousels for palletized workpieces and the use of artifacts, or master components, by which a machine tool could check its own dimensional calibration. This innovative approach to process control is still highly effective as applied in the company’s most advanced machine shop, which opened in 2006. Carrousels and artifacts are very much a part of this new shop’s remarkable success.
Read MoreRegistration Now Open for the Precision Machining Technology Show (PMTS) 2025
The precision machining industry’s premier event returns to Cleveland, OH, April 1-3.
Read MoreSetting Up the Building Blocks for a Digital Factory
Woodward Inc. spent over a year developing an API to connect machines to its digital factory. Caron Engineering’s MiConnect has cut most of this process while also granting the shop greater access to machine information.
Read More

