More Than Big Machines
This shop specializes in very large components such as rotor hubs and support bases for wind turbines. Its lineup of large horizontal boring mills can handle parts weighing 40,000 pounds and 12 feet on a side. However, the shop’s success also lies in other manufacturing resources and strategies. These include material handling equipment, customized tooling, special fixtures and wireless, portable measuring systems.
Share


Giant wind turbines have become symbols—symbols of a new age of alternative energy sources. The tall, slender towers and sleek, symmetrical rotor blades embody the hopes of energy consumers looking for a cleaner, safer, more sustainable means of generating electricity. Painted white as a cloud and shaped as simply as a three-petaled flower, wind turbines evoke a vision of benign, inexhaustible power for homes, schools and businesses.
In fact, wind turbines are highly complex mechanical structures of immense size. The newest turbine designs reach almost 300 feet in height and have blade rotor diameters that exceed 300 feet. Many of the main components are large castings with features that require hundreds of hours of precision machining. One machine shop that has become a specialist at providing this service is Magna Machine Co. in Forest Park, Ohio, a northern suburb of Cincinnati.
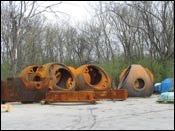
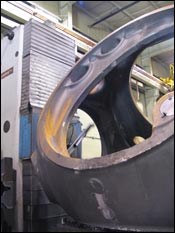
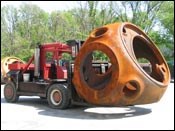
Magna currently has a multi-year contract to machine rotor hubs and support bases for a major U.S.-based wind turbine manufacturer. However, unlike the pristine image and promising symbolism of newly installed wind turbines, these components make a different, yet very striking, impression when seen lined up as raw castings in Magna’s back lot. The rotor hubs, for example, are hollow spheres about 12 feet in diameter, flattened on three sides, with large openings on each side, top and bottom. An orange hue from natural oxidation makes them look even more peculiar, as if they might be shells of gigantic pumpkin pods left behind by a band of extraterrestrial Cinderellas. More practical minds are likely to imagine the unusually large machine tools needed in the nearby shop buildings to machine parts of this dimension.
Magna Machine does indeed have some very large machine tools, including more than a dozen horizontal boring mills (HBMs) from Union Machine, a builder based in Chemnitz, Germany. Magna has been such a good customer over the years that Union asked the shop to serve as its U.S. marketing, distribution and service organization. Under the name United Precision Services, this business operates out of Magna’s facilities in suburban Cincinnati.
Besides Union, many other builders of large machine tools from all over the world are represented here. In fact, working with big parts and big machines defines the nature of this shop. In addition to wind turbine components, Magna builds, repairs and remanufactures industrial machinery for the plastics, mining, chemical processing, paper and other industries. As company president Scott Kramer puts it, “We have to think about all the things that a typical job shop has to think about, but we have to think about these things very differently.” For example, every shop wants to minimize setup time and combine as many operations into one setup as possible. “For us, moving parts that weigh as much as 80,000 pounds makes setup an especially critical issue,” Mr. Kramer explains.
The same point can be made for every aspect of a machining process at Magna—the type of machine to use, how to fixture the parts, what tooling strategies to apply, how to inspect the parts, how to schedule the shop for efficient workflow and so on. For this shop, thinking big and thinking smart have to go together.
Growing, Growing, Growing
Although Mr. Kramer would agree that thinking smart has been a tradition for Magna Machine since its founding in 1947, he is sure that thinking big was a more gradual development. Mr. Kramer’s family started the shop as a repair and maintenance facility for components used in industrial equipment. In 1985, the shop relocated to an industrial park, where it has more room for larger machines, higher bays and stronger overhead cranes. Today, processing large, heavy workpieces is its specialty. Customers include both those seeking repairs as well as OEMs such as wind turbine manufacturers.
After several expansions, Magna’s facilities now occupy 100,000 square feet of space. Enlarging the office and engineering complex at the front of the building is its most recent project.
“The pavement in our truck delivery area still needs some work,” Dave Myers, one of Magna’s chief sales engineers, notes wryly. He explains that the frequent movement of trucks carrying heavy loads has taken its toll on some portions of the concrete surface. Much of this traffic is due to the big order for turbine components. The contract calls for weekly shipments of three completed rotor hubs and two support bases.
Installations of wind turbines are booming because of rising petroleum and natural gas prices, renewed tax incentives and growing environmental concerns. At the same time, the size and power of new turbine designs are also growing. For example, the hubs and bases being machined at Magna are destined for the 2.5-megawatt turbines produced by the customer. Each of these wind turbines is capable of generating enough electricity to power as many as 1,000 homes. When installed, the hubs and bases will be 300 feet off the ground.
Although a few patches of crumbling concrete by the loading dock are a minor issue, it highlights how, at Magna, considerations for processing the turbine components begin out in the lot. For example, the shop invested in a fork truck capable of lifting 80,000 pounds to shift heavy loads to and from the dock handily. Once in the building, the hubs and bases move by overhead crane. Even so, handling of these components is critical.
Two Big Operations
The rotor hubs and support bases are machined in two main operations. In both cases, the first operation is designed to qualify the castings and establish critical reference datums. Qualifying the castings (that is, making sure that stock material is evenly distributed and in position for all features to be properly machined) and establishing surfaces that ensure alignment in all subsequent machining steps is the key to effective and efficient operations in the second setup. So, although the first operation involves less metal removal and a shorter floor-to-floor time, it is more critical than the second. For this reason, the first operation is entrusted to the shop’s most experienced operators.
The rotor hubs are completed entirely in one bay, which is currently dedicated to these parts. This minimizes the distance the parts have to travel and simplifies work flow. The first operation is conducted on a Juaristi TS-5 HBM with CNC. This machine has a rotary table rated to handle the 40,000-pound weight of the hub casting.
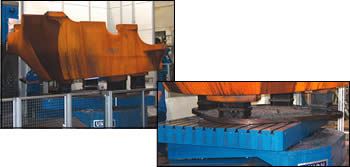
According to Mr. Myers, the shop has developed some simple alignment jigs that help position the hub prior to machining. Once the hub casting is qualified, reference datum surfaces are established on the top and bottom of the part. These surfaces will locate the hub on a special fixture for the second operation. This fixture ensures that the center of the hub will remain in perfect radial alignment. Facing and drilling operations on top and bottom of the hub are also completed in this setup.
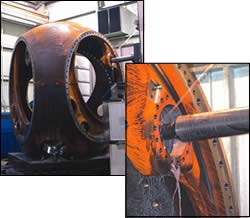
The second operation takes place on a Union P-130 HBM, a CNC floor-type machine with axis travels of 197 by 118 by 30 inches in X, Y and Z, and with a 29-inch ram stroke (W axis). The special fixture on the machine’s 96 by 96-inch rotary table allows the hub to be “plugged in” to achieve the required alignment and allow automated machining of the numerous bolt holes and faces.
Several features of this machine are worth noting. First, the floor-type configuration means that the column moves rather than the worktable. Thus, the machine is always moving the same mass, allowing higher accuracy and speed. Also, the model has the fastest positioning moves of any HBM in the shop. Positioning speed makes a difference in this operation because of the large number of features involved, including approximately 100 bolt holes in each blade face, which is a ring-shaped flat on each of the three sides of the hub. In addition, this machine is equipped with glass scales and linear ways for high volumetric accuracy and repeatability.
Finally, this machine has the torque, spindle speeds and high feed rates to support ongoing trends in cutting tool developments, which the shop watches closely. “We’re constantly reviewing new insert styles and grades, knowing that a machine like this can take advantage of the push to higher metal removal rates,” Mr. Myers says.
Other tooling strategies contribute to the efficiency of the second operation. These include a custom-designed backfacing tool that speeds completion of the bolt holes without working from the interior of the hub. This tool saves about 6 hours on each hub. Although such special tools represent a considerable investment, they pay for themselves quickly, Mr. Myers reports. In this case, the cost was recovered from the savings processing just two hubs. The shop has also invested heavily in especially modified or custom-designed boring bars.
Machining the support bases follows a similar, two-operation process. Here, too, Union HBMs play the main role in both setups. Like the hubs, the bases are castings of ductile iron in a grade with superior low-temperature properties. Unlike the “nice and round” hubs, the bases are configured like a gigantic bowl-shaped lower jaw. Each weighs about 32,000 pounds.
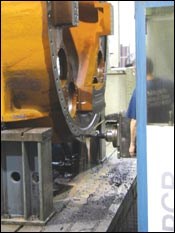
For the first operation, the base is fixtured in an upright position on a PCR-150 HBM. With 396, 157 and 39 inches of axis travel in X, Y and Z and 29 inches of ram stroke, this is the shop’s largest HBM. Like the other Union HBMs, this machine is equipped with glass scales and linear ways. This model is also a floor-type machine, allowing the part to be clamped upright on large angle plates. In this setup, the casting is qualified; the flange face and mounting feet on the underside of the base are facemilled; and all bolt holes are drilled. The flange face becomes a reference surface for the fixture used in the second operation.
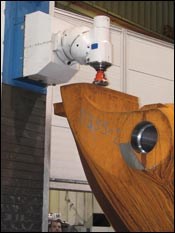
The shop acquired a KC-150 HDT specifically for this second operation. It has 157, 118 and 98 inches of travel in X, Y and Z and 29 inches of ram stroke. The 78 by 118-inch contouring rotary table is a conspicuous feature. The machine also has a head changer that allows automatic installation of a right-angle head. The right-angle head is essential for machining the support pads on the upper side of the base. The special fixture for this operation not only maintains the alignment established in the prior operation, but also orients the base at a 5 ½-degree angle (the machining head can only be positioned in even-degree angles).
According to Mr. Myers, the fast positioning capability, head changer and other automated features of this machine have substantially reduced the cycle time of this operation. The support bases can be completed in about 50-percent less time than would have been possible on earlier generations of HBMs in the shop. Although unplanned for, this process efficiency amounted to additional machining capacity that the shop could readily put to use. “It’s like we acquired half again as much machine with this model,” Mr. Myers says.
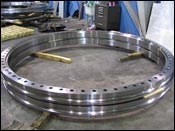
One of the jobs absorbed by this bonus capacity is the machining of steel bearing races, which are part of the yaw motor assemblies for wind turbines. These parts allow the turbine to turn into the wind to maximize the force of moving air on the rotor blades. The new machine is used to drill and tap the circle of bolt holes that completes the120-inch-diameter, ring-shaped part.
Inspection Is Big, Too
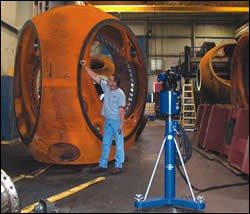
One of the challenges of processing large, heavy workpieces is being able to verify machining results. For this, the shop uses a Faro Laser Tracker Xi, a portable contact measurement system that allows the bases and hubs to be inspected on the shop floor. The system uses a laser to follow a spherically-mounted retroreflector that is moved from point to point on the workpiece. At each point, the system measures the length of the laser beam as it bounces back from the reflector. Dimensional measurements are derived in essentially the same way as they are on a coordinate measuring machine with a touch-trigger probe. An integrated “weather station” in the system takes temperature and barometric readings from on-board sensors to adjust for environmental conditions, an important consideration because Magna’s machining areas are not climate controlled.Magna uses the wireless option for this system. This means that inspection becomes a one-person task. The inspector moves the reflector and clicks on a hand-held transmitter to record “hits” remotely on a laptop computer. It takes approximately 4 hours to complete the measurement routine for a rotor hub and about a half hour longer for a support base. Critical features on the hubs have a 0.004-inch true position specification; 0.003 inch true position on the bases. (The Laser Tracker’s stated accuracy is as fine as 0.001 inch).
“Interestingly, we find that we have to take the same precautions and conditions into consideration when measuring big parts that we do when setting up a job for machining,” Mr. Myers states. For example, a hollow, sphere-shaped casting such as the rotor hub sags slightly, depending on which side the hub is resting. The shop is well-accustomed to adjusting for the ways large parts are likely to “squish and bend” each time they change position.
Significantly, this final part inspection is to certify and document that parts meet all of the customer’s specifications. It is not a check on machining process capability. That issue is addressed with a variety of traditional gages, calipers and measurement instruments. According to Mr. Myers, this approach is effective because the shop follows a strict approach to maintaining the “health” of its machine tools. For example, the shop regularly calibrates the volumetric accuracy of its HBMs with laser interferometry. In addition to routine maintenance and service items, a preventive maintenance program requires all critical machines to undergo a thorough, week-long maintenance checkup and restoration each year. This downtime is built into the shop’s production schedule to make sure it is completed on time.
Shared Advantages
Mr. Kramer is well aware that Magna’s close relationship with Union Machine is a competitive advantage for both organizations. For example, technical personnel from Germany are frequently on-hand to work with Magna’s operators, applications engineers and maintenance technicians. As a result, the shop has gotten to know its machines inside and out, helping it get the most out of these manufacturing resources. Likewise, Magna’s experience and application expertise have helped the builder evaluate designs and assess its product development plans. “We learn from each other,” Mr. Kramer says.The benefits of this relationship extend to the machine-buying customers of United Precision Services, the business entity that operates as Union’s arm in the United States. For example, the same staff that has been maintaining and troubleshooting Magna’s machines for years is available to provide this service to other owners of Union machines. According to Mr. Kramer, application advice and maintenance tips can be shared “from one user to another.”
With interest in alternative energy sources rising, Mr. Kramer expects interest in large machine tools and the shops that have them to rise, too. Wind turbine work is one the opportunities that reflects this trend. However, recognizing the value of diversification is the key, he says, because the winds of change are always shifting.
Related Content
Lean Approach to Automated Machine Tending Delivers Quicker Paths to Success
Almost any shop can automate at least some of its production, even in low-volume, high-mix applications. The key to getting started is finding the simplest solutions that fit your requirements. It helps to work with an automation partner that understands your needs.
Read MoreHow to Mitigate Chatter to Boost Machining Rates
There are usually better solutions to chatter than just reducing the feed rate. Through vibration analysis, the chatter problem can be solved, enabling much higher metal removal rates, better quality and longer tool life.
Read MoreThe Future of High Feed Milling in Modern Manufacturing
Achieve higher metal removal rates and enhanced predictability with ISCAR’s advanced high-feed milling tools — optimized for today’s competitive global market.
Read MoreHow to Successfully Adopt Five-Axis Machining
While there are many changes to adopt when moving to five-axis, they all compliment the overall goal of better parts through less operations.
Read MoreRead Next
Thinking Big
This shop specifies large machine tools for the machining possibilities of the future. To prepare for the feed rates the shop expects to use one day, the latest large gantry mills apply linear motors on all three linear axes.
Read More5 Rules of Thumb for Buying CNC Machine Tools
Use these tips to carefully plan your machine tool purchases and to avoid regretting your decision later.
Read MoreRegistration Now Open for the Precision Machining Technology Show (PMTS) 2025
The precision machining industry’s premier event returns to Cleveland, OH, April 1-3.
Read More


%20and%20Dave%20Myers.jpg;width=860)


.png;maxWidth=300;quality=90)
