Mobile Measurement Pays Dividends
In addition to easing quality control on large parts, the ability to perform precision measurements virtually anywhere can boost overall manufacturing efficiency and provide critical data where none existed before.
Share


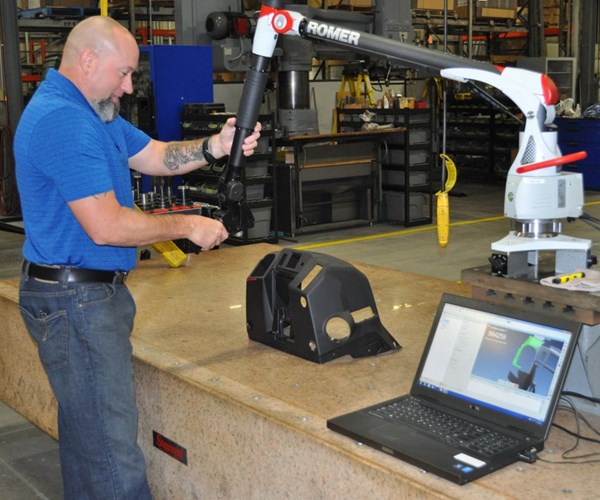
Bob Beltz, Global Quality Manger at the Velocity Group, conducts an inspection with Oakley Die & Mold’s Romer Absolute arm from Hexagon Manufacturing Intelligence. Designed for easy manipulation in all directions, it can be mounted on a table, as shown here, or directly onto the part surface. Scanning is useful for not just mold components, but also plastic parts from both trial and production runs on the shop’s four in-house presses.
Although my reasons for visiting Oakley Die & Mold had nothing to do with the shop’s new portable measuring arm, my host, Jim Goddard, wasn’t about to let me get away without hearing about it. Judging from the results the shop has seen so far from this technology, his excitement was more than understandable.
The obvious use for this kind of technology is large parts, and there are plenty of those at Oakley. Although the shop only recently became part of a broader organization, the Velocity Group, it has always specialized in large plastic injection molds such as the one shown below. Big molds mean big parts, parts that are often easier to measure with a portable arm or that simply won’t fit on a CMM table.
Consider a case in which there are concerns about dimensional accuracy on a critical component. The larger the part, the longer it takes and the more difficult it is to remove it from the machine for inspection, only to potentially put it right back again. That delay can affect downstream work, too. The risk of error is also greater because the second setup may differ ever-so-slightly from the first.
The portable arm is particularly useful for the shop’s robust mold repair business. Before-and-after scans provide a fast, easy means of verifying any repair. Another use of scanning is to create 3D data for molds with no data associated with them (a common case for repaired tools that weren’t produced by Oakley to begin with).
The addition of this technology is far from the only recent change at Oakley Die & Mold. The purpose of my visit was to explore the shop’s expanding use of computerized, point-of-use storage and distribution systems. Not only do these lockers and vending systems handle more than just cutting tools, they embody lean concepts in their very design—the very same lean concepts that have been driving a significant transformation at this shop since it became part of the Velocity Group in 2013. That story is told in detail in this article.
Related Content
-
The Many Ways of Measuring Thickness
While it may seem to be a straightforward check, there are many approaches to measuring thickness that are determined by the requirements of the part.
-
How to Evaluate Measurement Uncertainty
Manufacturing and measurement are closely coupled. An important consideration for the use of measurement results is the associated measurement uncertainty. This article describes common metrology terms and provides an example uncertainty analysis.
-
6 Machine Shop Essentials to Stay Competitive
If you want to streamline production and be competitive in the industry, you will need far more than a standard three-axis CNC mill or two-axis CNC lathe and a few measuring tools.


