Increase Machining Efficiency through Machine Monitoring
A manufacturer that is distinctive for its attention to in-cycle machining productivity describes its efforts to obtain efficiency improvements outside of the machining cycle. The shop’s primary tool is a simple, daily, graphical recap that illustrates when each machine tool was and was not making parts.
Share


Takumi USA
Featured Content
View More


Hwacheon Machinery America, Inc.
Featured Content
View MoreIf there is one simple idea that has framed and guided all of Tech Manufacturing’s process improvement since its current owners bought the aircraft-industry machine shop in 2003, then that simple idea is this: The procedures that seem efficient and the procedures that are efficient might be two different things. And telling the difference requires data.
Like this article? See more every month.
Subscribe to Modern Machine Shop.
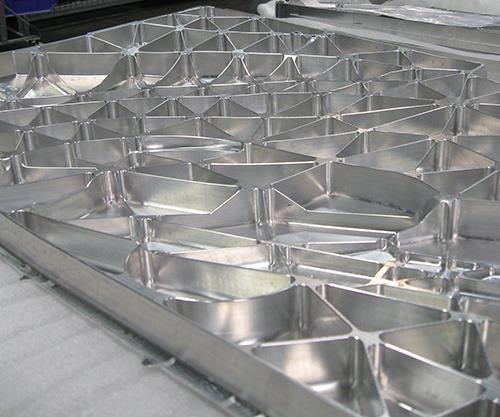
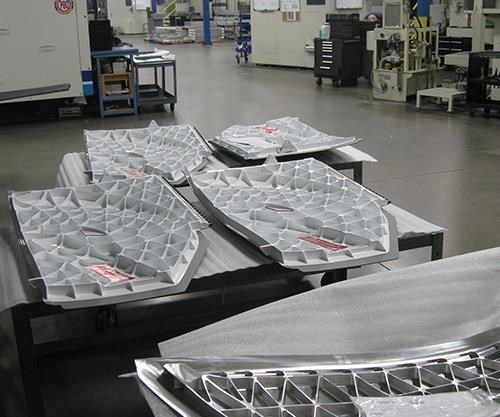
The machining cycle is one area in which this idea is strikingly applied. One of those co-owners of the Wright City, Missouri, manufacturer—engineering vice president Jerry Halley—spent much of his career with aircraft maker McDonnell Douglas, which became Boeing during his time there. At that company, he helped to pioneer the use of dynamically stable spindle speeds in production milling. That is, instead of machining aircraft structural components by roughing them with large tools and finishing them with smaller tools (the procedure that had long seemed efficient), Mr. Halley demonstrated that small tools used at the specific, harmonic spindle speeds that avoid chatter can cut deeply enough and quickly enough to remove material more efficiently than traditional rough cutting. Today, his company employs exactly the same practice, achieving high metal removal rates by milling at stable spindle speeds on the shop’s machines.
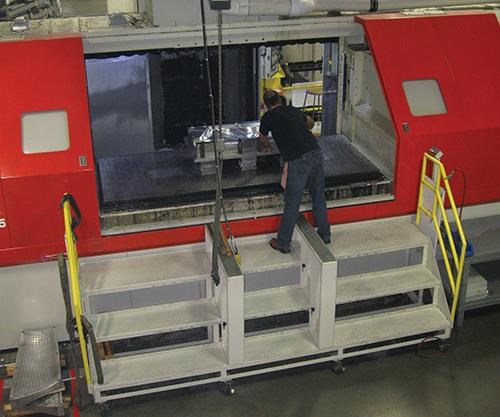
Mr. Halley even chose the machining centers with the expectation that they would be run that way. Most of the company’s work relies on 3/4-inch- and 1-inch-diameter end mills. Therefore, when the shop was ready for its first five-axis aluminum profiler, he set out to measure the dynamic response (in a measurement known as a tap test) of various machine tool builders’ spindles. These measurements revealed to him that machines from SNK were dynamically stable with the cutting tools he expected to use at frequencies very near the top speed of the spindle. That meant that his style of fast, chatter-free cutting would be particularly fast on these machines. He made this discovery several years ago, and today the shop has three 15,000-rpm SNK profilers and two 16,000-rpm SNK horizontal machining centers. These machines all cut aluminum, while older, lower-speed five-axis machines are used for harder metals such as titanium.
But finding and implementing dynamically stable speeds has been only part of the company’s attention to refining the processes on these machines. In addition, Tech Manufacturing has been proceeding through a years-long evolution of testing and modifying its choices of cutting tools, tool paths and cell configurations in order to win measurable gains in cycle time and throughput. Then, about two years ago, those gains stopped. The shop reached the point where—at least in aluminum, and at least for now—its efficiency within the machining cycle was as good as it was going to get.
This was a victory. Yet to a greater extent, it was also a real problem, because the company had to find a way to continue winning efficiency gains so it could continue delivering cost savings. Not only did competitiveness require this, the formally specified cost-reduction targets of OEM customers required this as well.
The answer, therefore, was to look for cost savings elsewhere. The answer was to find cost savings far outside the machining cycle and even far outside the routine steps in a part’s workflow. What are the inefficiencies that do not occur every time a part is run but still occur often enough to impose a cost? Finding and fixing those problems would provide the additional savings.
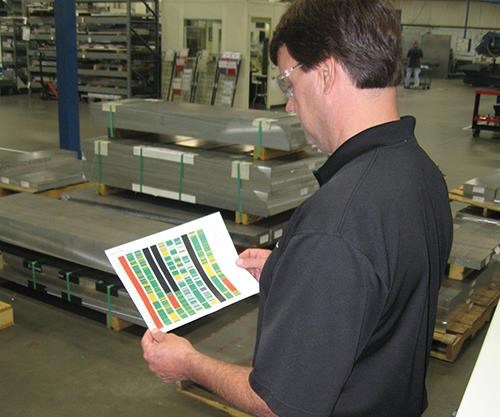
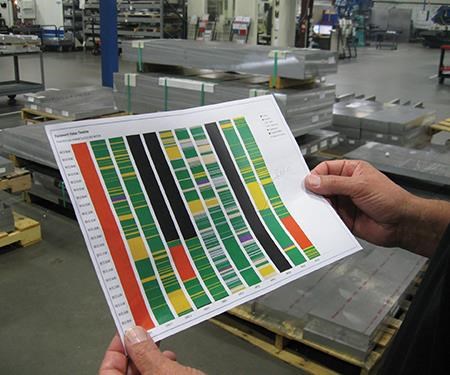
To discover these sources of additional savings, Tech Manufacturing began measuring its entire process. The company began to measure not just its cycle time and not just the processing of individual parts, but the entire performance of its CNC machines around the clock. Implementing machine monitoring software from Scytec, the company began to measure the in-cycle and out-of-cycle time of 11 CNC machines. Now, company leaders in the office and on the shop floor all study a daily, visual printout of just how much machining time each of those machines delivered over the course of the previous workday.
The first result of doing this, says Mr. Halley, was an almost immediate 5-percentage-point improvement in measured performance. That boost was the early return on simply paying attention to this performance for the first time. And that boost hinted at an important insight, one that the company validated as it went on to find further performance gains with the data. Namely: Even in a seemingly efficient shop, there is still plenty of chronic inefficiency just waiting to be addressed.
Daily Report
The Scytec software is simpler than other machine-monitoring systems that Tech Manufacturing evaluated. Other systems had more capability than the management of this company thought it would use, at least at first. Scytec’s modularity makes it possible to buy up into additional capability over time. For now, though, Mr. Halley’s belief—a belief that has proven true—is that significant process improvement can be won just from the simple measurement of when the machines are and are not making parts.
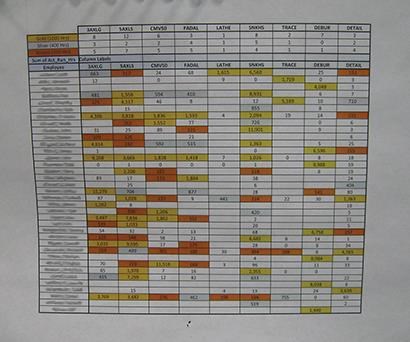
There are actually more than just these two states measured. On the daily reports of the performance of the monitored machines, the color red indicates a planned interruption (such as inspection or scheduled maintenance), while black indicates periods in which a machine is scheduled offline. Green, meanwhile, is in-cycle time. The machine is producing parts and making money during these periods. (Green is thus a fitting color in more ways than one.) The hope with the daily reports is to see larger and larger fields of green, but the obstacle to this is yellow, which is the report’s color for unexplained non-cutting conditions. Yellow indicates a delay that potentially could have been avoided, and a delay that cost the company money it expected to earn. Every time shop leaders see a significant interlude of yellow on the graph, this is cause not for finding fault with a person, but instead for asking questions about just what happened during that interlude. The aim, in each of these cases, is to create or communicate procedures so that employees can respond with far less yellow in the future when the same situation arises again.
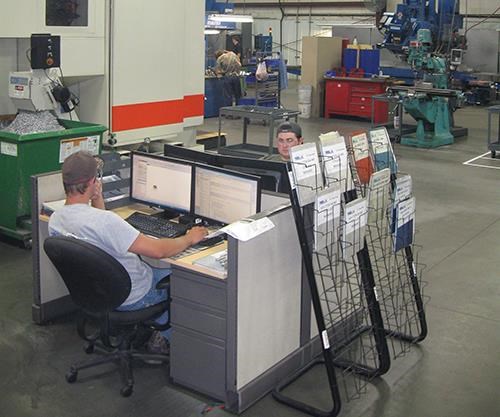
Plant manager Rich Vaughan sees a copy every morning of the one-page report. Each of the leads of the shop’s five cells sees the report as well, and they all know that Mr. Halley and the other owners of the company are seeing the same document. The result is not fear, because the responses do not take the form of personal reprisals, but the result instead is a focusing of company-wide attention onto a metric the company has chosen to take seriously. Just this focus is valuable.
Indeed, this focus is powerful. It is an effect that has been observed frequently in manufacturing: Whatever performance metric is chosen for observation, that very metric will generally improve. With its own operational efficiency, Tech Manufacturing saw this bump. The observation effect, combined with the low-hanging fruit that became easy to see as soon as the company started tracking performance, accounted for the early 5-percent improvement in the company’s shop-wide efficiency.
This efficiency is defined as the amount of time the shop’s machines spend machining, as a percentage of the time that is theoretically available for machining. Both planned and unplanned interruptions are included in this, but scheduled offline time is not. The shop’s efficiency therefore is the green time divided by the sum of green, yellow and red.
At the start, that efficiency was 52 percent. Scytec told the company’s team that this is reasonably good. Shops generally assume they are far more productive than they really are. Thirty to 40 percent efficiency is common, said Scytec, and the software company has had machine-shop customers that initially measured an efficiency below 10 percent. Now, after two years of monitoring performance every day and responding to yellow events, Tech Manufacturing is consistently running at an efficiency of 65 percent.
The goal is to reach 70, says Mr. Halley. Getting there will be hard, because the reality of diminishing returns has set in. After two years of improvement, the inefficiencies remaining to be discovered relate to increasingly minor or increasingly rare events.
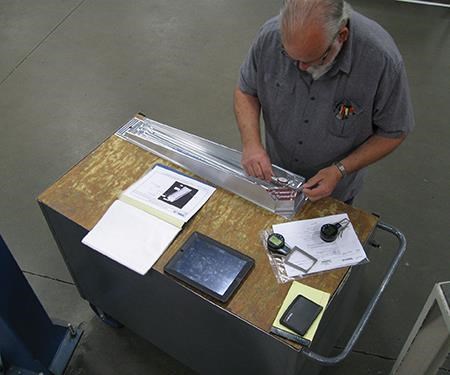
Again, there was low-hanging fruit in the beginning. For example, the observations of green and yellow quickly showed how much time was being lost by employees carrying parts to gages for in-process inspection. Gages were relocated and/or duplicated to reduce this travel, and changes such as this shaved considerable yellow from practically every working day thereafter. Now, those high-impact changes have been made. The yellow periods the shop leaders are addressing today relate to unusual cases or smaller slivers of yellow.
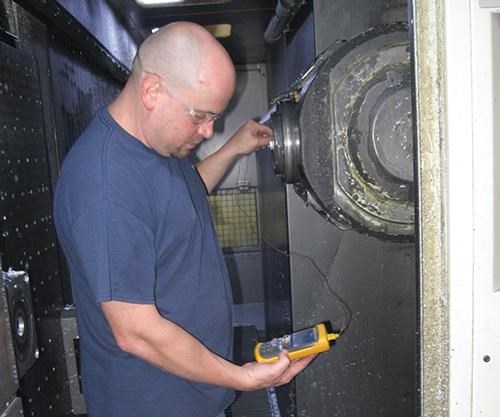
Even so, company leaders believe there are still big fixes to be made. There are still trends—messages, really—to be discovered in the data. Looking at the first year’s data, for example, the team discovered that spindle failure was the leading cause of unplanned maintenance downtime. Because the shop takes heavy milling passes near its spindles’ top speeds, it works its spindles very hard. Seeing this pattern, the shop began to tap test spindles frequently, and also to take frequent drawbar force and temperature measurements, all to determine whether it could discover an early warning indicator that the spindle was soon to fail.
Temperature proved to be that indicator. Temperature inside of a spindle taper is generally about 120°F just after milling, but measurements revealed that temperature begins to rise when the spindle is in decline. Therefore, the shop’s routine now includes a quick, regular measurement of this taper temperature. Operators seeing above-normal readings know to alert management that a spindle is nearing the end of its life. In fact, the digital temperature measurement is now becoming practically superfluous, because operators are so familiar with this warning clue that they can detect a declining spindle just in the hot feel of the toolholder when they are changing out tools between jobs.
Learning to make this prediction has been significant, because in the past, an unexpected wait for a spindle could produce a long yellow delay. Now, the warning that the replacement will have to be made gives the shop the chance to obtain the new spindle in advance and schedule its replacement for a convenient time. Unplanned maintenance thus has been converted into planned maintenance, and that is a meaningful change.
Questioning “Hard Work”
Underlying this entire approach to process improvement is something profound that deserves to be noted, an assumption that Tech Manufacturing has made about its employees. Simply put, the company assumes that all employees are conscientious. The approach to process improvement that Tech Manufacturing has put in place takes for granted that employees want to do a good job, and that they will do a good job if given the opportunity. When performance falters, this is assumed to be a failure of the overall system that includes the employees, and company leaders evaluate the system in search of an improvement.
By contrast, trying to improve performance by urging employees to “work harder” is counter-productive, Mr. Halley says. First, it’s not clear that people respond to this urging in a sustained way. Second, and more importantly, he does not want employees working hard.
In manufacturing, he says, employees work hard because they are fighting against the failings or the friction of the system. Because of this, the productive response is not continued effort. Instead, the productive response is to fix the failing or take the friction away. Manufacturing management ought to have its focus on doing precisely this—or so the leaders of Tech Manufacturing believe.
Here is an example of an employee who was working hard: During one evening shift, says Mr. Halley, a problem with the setup of a particular machine was causing a drill to break. The operator of the machine was alert to the problem and was responsive to it—diligently so. He replaced the drill. Not only that, but the machine went through drill after drill—eight drills total—and the operator kept on promptly replacing the drill for as long as it took to complete the cycle. This was the conscientious choice, but it was also an incorrect choice, because the system would have been better served if the employee had sought help to correct the underlying problem. The failure here was on management, the shop owner says, because managers had not taught a diligent employee how best to react when a process departs from its optimal performance.
“The employee on the shop floor will live with problems,” Mr. Halley says. In general, the employee will do this because he is humble and doesn’t want to be a bother, and also because he doesn’t realize just how much value the company stands to lose when machine time and his own time are used inefficiently.
Indeed, part of enacting the habit of machine monitoring at Tech Manufacturing has been to change employees’ own picture of what effective work looks like.
“I don’t want the employee who can heroically set up two jobs at once if doing this causes either of those machines to wait,” Mr. Halley says. “We’re trying to teach employees: Call for help.”
The goal is not to work hard, he stresses. The employees overseeing an advanced manufacturing facility should not be straining to keep that facility producing.
The goal instead is to control the yellow. The goal for the entire manufacturing team in this shop is to take the steps and make the decisions that sustain and extend the green.
Related Content
Lean Approach to Automated Machine Tending Delivers Quicker Paths to Success
Almost any shop can automate at least some of its production, even in low-volume, high-mix applications. The key to getting started is finding the simplest solutions that fit your requirements. It helps to work with an automation partner that understands your needs.
Read MoreThe Future of High Feed Milling in Modern Manufacturing
Achieve higher metal removal rates and enhanced predictability with ISCAR’s advanced high-feed milling tools — optimized for today’s competitive global market.
Read More5 Tips for Running a Profitable Aerospace Shop
Aerospace machining is a demanding and competitive sector of manufacturing, but this shop demonstrates five ways to find aerospace success.
Read MoreOrthopedic Event Discusses Manufacturing Strategies
At the seminar, representatives from multiple companies discussed strategies for making orthopedic devices accurately and efficiently.
Read MoreRead Next
Building Out a Foundation for Student Machinists
Autodesk and Haas have teamed up to produce an introductory course for students that covers the basics of CAD, CAM and CNC while providing them with a portfolio part.
Read More5 Rules of Thumb for Buying CNC Machine Tools
Use these tips to carefully plan your machine tool purchases and to avoid regretting your decision later.
Read MoreRegistration Now Open for the Precision Machining Technology Show (PMTS) 2025
The precision machining industry’s premier event returns to Cleveland, OH, April 1-3.
Read More




.jpg;maxWidth=300;quality=90)


.jpg;maxWidth=300;quality=90)


