Share


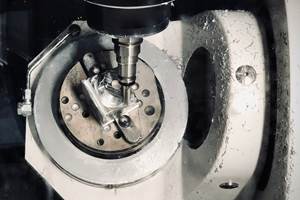
The parts running through the dedicated centerless grinding cell pictured in the slideshow above are not arthroscopic shaver tubes, but they might as well be. Comparable in size, shape and material and adhering to the same stringent specifications as their real-world counterparts, these samples are ideal for demonstrating a process that can be adapted for virtually any arthroscopic shaver manufacturer. So says John Bannayan, president of turnkey grinding specialist Glebar, which developed the cell for medical manufacturers frustrated by multiple setups and quality issues. Leveraging a quality-data feedback loop, the auto-correcting, automated grinding process can churn out one of these 6- to 8-inch-long parts every 20 seconds, piece-to-piece.
Challenges Beyond Part Handling
Available in various sizes and configurations, arthroscopic shavers generally consist of two stainless steel tubes, one fitting inside the other. As the inner tube spins, precisely formed cutting edges on one end shave small amounts of bone or tissue through a corresponding opening in the side of the outer tube. Ensuring debris flushes harmlessly away through the interior at speeds ranging to 10,000 rpm requires keeping the gap between the spinning inner and stationary outer tube as tight as 0.0005 inch.
Outer tubes can be ground relatively easily and efficiently in a through-feed centerless process, in which the work passes through the machine’s grinding and regulating wheels and into a bin or other parts catcher. Inner tubes are less forgiving. With multiple tapering diameters and a rounded, attached tip, typically made from a harder material and including as many as 30 blended radii, these components must be placed onto and lifted from the work support as part of an in-feed grinding process.
In Glebar’s cell concept, the process begins with a step feeder that conveys inner-tube blanks (with the harder-material tips already attached) to a robot arm that carries it to the machine. Glebar’s centerless GT-610 CNC grinds the entire tube at once, removing 0.012 inch of stock from the shaft and 0.004 inch from the precisely contoured tip, where cutting edges will be formed in downstream operations. Mimicking real-world requirements, the sample part demands tight tolerances: ±0.0002 inch for the three diameter sections of the 304v stainless steel tube, as measured every 0.125 inch along its length. Surface finish is 9 Ra, and wall thickness is held within ±0.001 inch.
The primary challenges of automating tube grinding have little to do with loading and unloading, Mr. Bannayan says. With or without part-handling automation,high volumes necessitate periodic process interruptions for dressing, a process in which a diamond-studded roll re-shapes the grinding wheel to the mirror image of the desired part profile. Dressing involves a cycle of measuring the part, adjusting the dressing program to correct for any variance, and repeating on subsequent parts until specifications are met.
The more stringent those specifications, the more frequent and more demanding this correction cycle becomes, possibly necessitating hours of CAD/CAM programming while the cell sits idle. “It’s not like a turning tool, in which knowing the radius of the tool essentially tells you the amount of material that will be removed,” Mr. Bannayan explains about the nature of wear on the bonded, abrasive grains that make up a grinding wheel, adding that the diamond-plated dressing roll features similar construction. “Every time you dress the wheel, you change the relationship between the dressing roll, the tool and what the tool is shaping.” Arthroscopic shaver manufacturers have no time for such complications.
A Self-Correcting Process
Glebar’s answer to these time-consuming correction cycles is the P4K, a laser-scanning system that measures tube diameters after the grind. Custom software analyzes the inspection data and sends dressing-routine adjustments directly to the CNC, eliminating the need for manual programming. Thanks to this system, the process corrects itself, delayed only by the time required to physically dress the wheel. “Two or three dressing cycles, and it’s back up and running,” Mr. Bannayan says.
Potentially useful for any lengthy, cylindrical part (or multiple shorter parts), the P4K was developed in the early 1990s for a specific application: cardiovascular guide wires. Measuring as long as 16 feet, these components are employed by surgeons in procedures for inserting stents into arteries and veins. They are characterized by multiple tapering, transitioning diameters and precisely shaped tip geometry as small as 0.002 inch in diameter—requirements similar to those of the shavers’ inner tubes.
Similarly, both guide wires and inner tubes can be good candidates for inspection on vision systems, Mr. Bannayan says. However, the nature of such work generally limits these vision systems to high-magnification, small-field-of-view checks of only a portion of the part. For arthroscopic shaver manufacturers, this practice also adds another manual operation to an otherwise automated process. In contrast, the P4K processes more than 9,000 readings per second as parts slide by the laser diameter gage on a servo-driven stage, matching length and diameter readings in real time every 0.00003 inch. “It’s all about repeatability,” he says about the rich dataset required for these applications. “We’re essentially oversampling the data to minimize the probability of measurement error.”
The Right Machine for the Job
Post-grind inspection is not the only example of a metrology-data-feedback loop facilitating automatic process corrections. The cell features a pre-grind inspection, too: a length gage that measures every part at the top of the step feeder before the robot picks it up.
This pre-grind check is critical because there is a tolerance to the connection between tube and tip. The resulting length variations, generally ranging from 0.001 to 0.015 inch, can lead to broken tube walls and other problems because certain parts will not line up precisely with the dressed profile of the grinding wheel, Mr. Bannayan says. Pre-grind length inspection feeds back to the CNC for automatic adjustment of the grinder’s work-support blade. This GT-610-CNC accessory can move laterally to ensure proper alignment between the wheel and the workpiece, a capability he says is commonly employed for both arthroscopic shaver tube tips and for controlling radii behind the heads of various fastener components.
Although centerless grinding is not the only means of shaping arthroscopic shaver tubes, Glebar contends these developments make it an even more attractive option. With automatic inspection, automatic wheel dressing and automatic compensation for length variation, manufacturers can enjoy the inherent efficiency and precision of this process without compromising throughput. “It can combine multiple operations into one, and it will likely reduce cost and improve quality,” Mr. Bannayan says.
Related Content
How to Successfully Adopt Five-Axis Machining
While there are many changes to adopt when moving to five-axis, they all compliment the overall goal of better parts through less operations.
Read MoreInside a CNC-Machined Gothic Monastery in Wyoming
An inside look into the Carmelite Monks of Wyoming, who are combining centuries-old Gothic architectural principles with modern CNC machining to build a monastery in the mountains of Wyoming.
Read MoreWhere Micro-Laser Machining Is the Focus
A company that was once a consulting firm has become a successful micro-laser machine shop producing complex parts and features that most traditional CNC shops cannot machine.
Read MoreHow to Determine the Currently Active Work Offset Number
Determining the currently active work offset number is practical when the program zero point is changing between workpieces in a production run.
Read MoreRead Next
Building Out a Foundation for Student Machinists
Autodesk and Haas have teamed up to produce an introductory course for students that covers the basics of CAD, CAM and CNC while providing them with a portfolio part.
Read MoreRegistration Now Open for the Precision Machining Technology Show (PMTS) 2025
The precision machining industry’s premier event returns to Cleveland, OH, April 1-3.
Read More5 Rules of Thumb for Buying CNC Machine Tools
Use these tips to carefully plan your machine tool purchases and to avoid regretting your decision later.
Read More


