CNC Tech Talk: 2 Lesser-Known Ways to Trigger the Skip Signal
Here are two lesser-known ways to trigger the skip signal.
Share


While the most common way to trigger the skip signal is with a spindle probe, there are at least two more, lesser-known ways to trigger the skip signal.
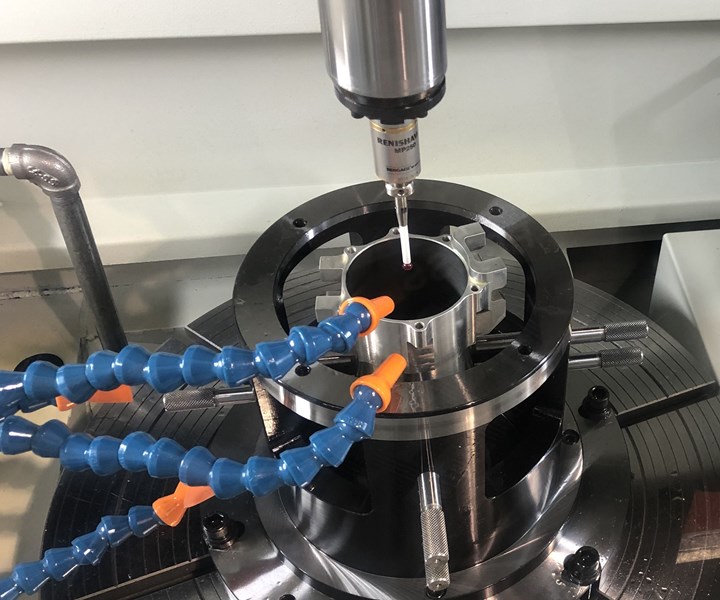
If you have used spindle probes, you know the skip function, specified with G31, is used to probe a surface. The probe stylus is first positioned within a small distance of a surface to be touched. A G31 command is given that will cause the stylus to make contact. Within microseconds of when the probe triggers, it sends a skip signal to the CNC that causes three things:
- Motion to stop.
- The balance of the motion command to be skipped.
- Axis positions to be stored in system variables, like #5061 (X), #5062 (Y) and #5063 (Z).
Consider this command, given right after the probe stylus has been programmed to move within 0.2 inch of the left (negative) side of an X-axis surface.
G91 G31 X0.3 F20.0
The X axis is being told to move 0.3 inch in X. Since the stylus is within 0.2 inch from the surface to start, it will contact the surface along the way. When the probe triggers, the CNC will halt motion and store the X position in system variable #5061.
While the most common way to trigger the skip signal is with a probe, there are at least two more, lesser-known ways to trigger the skip signal. As with a spindle probe, they require the machine builder or accessory device provider to integrate them, meaning you will need help to take advantage of the techniques introduced here.
Trigger the skip signal using changes in axis drive motor load.
Torque limit skip, as FANUC calls it, makes it possible to detect hazardous situations and stop the machine before catastrophe strikes. I offer two scenarios, but once you understand how this feature works, you will surely be able to come up with more.
In automation systems:
Most machines that have main- and subspindles automatically transfer the partially completed workpiece from the main spindle to the subspindle for additional machining. Once the main spindle is finished, the subspindle axis advances until its grippers/chuck jaws can grab the workpiece from the main spindle. The subspindle grippers clamp on the workpiece and the main-spindle jaws unclamp. The subspindle axis then retracts to its machining position and subspindle machining begins.
This method works well unless something gets in the way of the subspindle advancing motion, like chips caught between the workpiece and the subspindle grippers. In this case, the grippers may jam, causing gripper and/or machine damage. Or equally problematic, the process may finish with a chip jammed between the grippers and the workpiece.
If torque limit skip has been properly integrated, you can confirm that the grippers have fully advanced. If something is in the way, the load for the subspindle axis will increase above its norm, triggering the skip signal. In this case, the balance of the motion will be skipped before severe damage can occur. After the torque limit skip command (again, a G31), a test can be made to confirm that the value of the subspindle axis system variable (like #5065 if it is the machine’s fifth axis) is equal to the commanded end point. If it is not, a custom macro alarm can be sounded, which will stop the machine.
With cutting tools that are prone to breakage:
Consider a lathe cutoff tool. If the cutoff tool breaks during cutoff, it can cause damage to the tool and possibly to the machine. With flammable materials like magnesium and titanium, the related heat buildup will likely start a fire. You can include a torque limit skip (G31) command in the cutoff motion to confirm that the drive motor axis load for the cutoff axis does not increase past a known acceptable limit. If it does, the balance of the command is skipped and an alarm can be sounded, which will minimize the potential for tool/machine damage.
Trigger the skip signal using conductivity.
Touch sensor makes it possible to detect metallic surfaces on-the-fly. With it, you can use metallic (not ceramic) cutting tools to find workpiece surfaces. Consider, for example, spotfacing a 1-inch diameter hole 0.06-inch deep into a cast surface. Cast surfaces are notorious for varying from part to part. You could deal with the variation with a spindle probe, but this would take more time.
With touch sensor, you can use the spotfacing tool to detect the surface, eliminating the need for a spindle probe. Bring the (rotating) spotfacing tool to a safe approach position and then use G31 to command the spotfacing tool to move into the surface. As soon as the spotface touches, the skip signal will be generated. The CNC will stop motion and skip the balance of the motion. From there, specify an incremental move of 0.06 inch to spot face to the required depth.
As has been stated, you must contact your machine tool builder to have these features integrated with your CNC machine(s), and it will require an investment. But given the potential benefits, it may be well worth the cost and effort.
Related Content
Continuous Improvement and New Functionality Are the Name of the Game
Mastercam 2025 incorporates big advancements and small — all based on customer feedback and the company’s commitment to keeping its signature product best in class.
Read More6 Machine Shop Essentials to Stay Competitive
If you want to streamline production and be competitive in the industry, you will need far more than a standard three-axis CNC mill or two-axis CNC lathe and a few measuring tools.
Read MoreCan AI Replace Programmers? Writers Face a Similar Question
The answer is the same in both cases. Artificial intelligence performs sophisticated tasks, but falls short of delivering on the fullness of what the work entails.
Read MoreThe Power of Practical Demonstrations and Projects
Practical work has served Bridgerland Technical College both in preparing its current students for manufacturing jobs and in appealing to new generations of potential machinists.
Read MoreRead Next
Fast Part Inspection Enables Quick Turnaround
Renishaw probes, used both on and off the machine tool, helped Tridan Engineering turn a Rally car part in just 17 days. It previously would’ve taken months to complete and inspect.
Read More5 Mistakes We Find in Most CNC Machine Programs
While the mistakes listed here will not sound an alarm or cause a program to fail, they will cause confusion, wasted time and scrap parts.
Read More5 Things New CNC Machine Operators Must Know
These subjects are the building blocks of training newcomers on a specific CNC machine tool.
Read More
.jpg;width=70;height=70;mode=crop)


.jpg;maxWidth=300;quality=90)


