Share


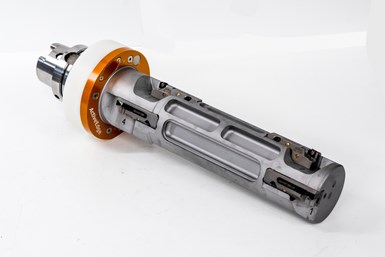
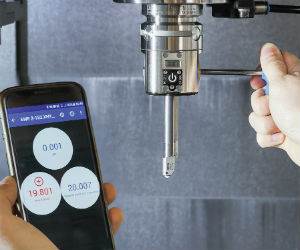
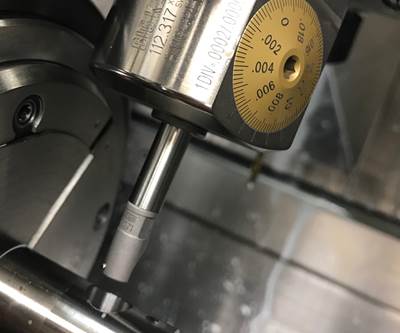
Rigibore’s ActiveEdge wireless boring bars, when paired with the company’s Zenith closed-loop system, automatically adjust the boring diameter based on in-process gage data. The adjustment is based on user-defined limits that are inside the tolerance of the hole, so when the measurement system detects two consecutive parts that are outside the limits, Zenith adjust the tool back to the nominal value. Photos provided by Rigibore.
Automation can be an aid to maintaining tight part tolerances in production. Boring bar adjustment offers an example of this. This adjustment is often manual. However, “the reality is that as tolerances become harder and harder to obtain, it doesn’t take much for somebody to misjudge an adjustment,” points out Anthony Bassett, president of boring bar supplier Rigibore. Rigibore’s ActiveEdge wireless boring bars, in combination with the company’s Zenith interface, provides a closed-loop system that adjusts the boring bar automatically based on in-process measurement data. “The goal is to allow the manufacturing process to make a decision, and when you do that, if the gaging is good, it will continue doing the right thing until the insert’s worn out or it comes to the end of the life of the insert,” he explains.
The Zenith interface adjusts the boring bar based on user-defined warning limits that are inside the tolerance of the hole. When the measurement system detects two consecutive parts that are past the upper or lower limit, Zenith automatically adjusts the tool’s cutting diameter back to the nominal value. Waiting for two consecutive measurements that exceed the limit ensures a valid compensation is made and not, for example, a response to an out-of-tolerance measurement that’s based on the probe picking up on a piece of dirt inside the bore. “Our goal here is to get a nice, sawtooth adjustment factor,” Bassett says. “We’re drifting away, getting smaller, adjusting back to nominal, drifting away and adjusting back, and we get a nice sawtooth.”
When the tool needs an adjustment, it can occur while the tool is
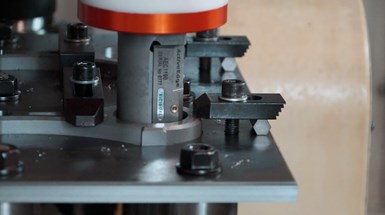
The ActiveEdge tools are self-powered, so they don’t pull any power from the machine tool. This means that when they do need to adjust, they can do so while in the tool carousel instead of the spindle, so adjustment doesn’t add to the part’s cycle time.
in the carousel, not the spindle, so it doesn’t add to the part’s cycle time. “The tools are self-powered. We’re not pulling any power from the machine tool,” Bassett says. “So the tool adjusts while it’s in the carousel, not in the spindle.” Users select a point in the part program where the boring bar is in the carousel and program it to make any movement then. Once activated, the tool moves about one micron per second to make the correction.
A Closed-Loop System
Because the system relies on outside measurement data to make adjustments, it’s only effective if the data is accurate. “Gage accuracy has to be rock solid,” Bassett says. “The tool is only as good as the data that’s being received. If that data is inconsistent, it’s going to make inconsistent parts.” Users have several options for measurement systems. Touch probes are common but can be prone to errors if the bore isn’t clean or the machine isn’t accurate. However, as long as the proper procedures are in place, Zenith works well with a touch probe. “I’ve got lots of these systems out there with probe systems that work fine because the disciplines in the measurement using the probe are in place,” he says. In-process bore gages are another option, and can provide more accurate data because they’re dedicated to specific bore sizes. Users can also set up a cell with an offline gaging system and use data from that. As a dedicated unit, an offline system provides highly accurate data, but timing can be a challenge. “You may be machining another part before that one is measured,” he explains. In this case, compensation will lag — the system wouldn’t have time to adjust if the first part is out of spec.
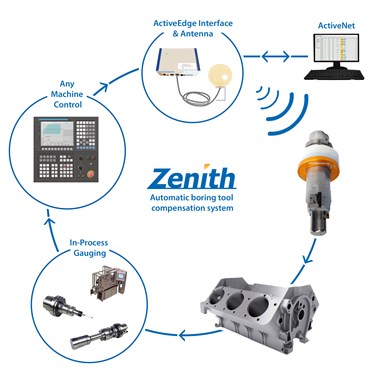
When a part is measure with an in-process measurement system, such as a touch probe, bore gage or offline gaging system, the information is sent from the machine control to the boring bar, which compensates if necessary. Once the tool adjusts, it confirms this back to the machine control and can send the information to a PC.
Once the part is measured, the information is sent from the machine control to the boring bar via low-power radio frequency. The tool has a cartridge that contains a measuring sensor along with the mechanics that move the cutting edge. The sensor is calibrated to within four decimal places. “That’s why it can adjust to one micron on diameter,” Bassett explains.
Once the tool makes an adjustment, it confirms this back to the machine tool, so the control knows that it’s safe to proceed. If the user has a PC near the machine tool, the system can also send tool performance data there so the user can see all the information that has been sent to the tool and any adjustments that have occurred. “You can see all the compensation values and everything that’s happened, so you have this complete history of what’s been going on with the tooling in the machine,” Bassett says.
HIgh Quantity or High Cost Work
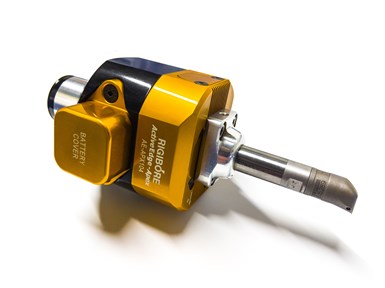
Rigibore has three lines of ActiveEdge tooling: the original ActiveEdge tools handle bores with diameters of 25 millimeters and larger; the Apex system (shown here) is designed for diameters up to 26 millimeters; and the Nexus line can bore holes on parts larger than 275 millimeters, such as wind turbines.
Rigibore has three lines of ActiveEdge tooling: the original tools handle bores with diameters of 25 millimeters and larger; the company’s new Apex system is designed for diameters up to 26 millimeters; and the Nexus line can bore holes on parts larger than 275 millimeters, such as wind turbines.
Zenith and ActiveEdge can be installed on most machine tools with recent CNCs. The tools are controlled by a set of macros at the machine control. These are supplied by Rigibore and tailored to the CNC.
Because the system requires an investment in tooling, gaging and more, it makes most sense for applications with high volumes and tight accuracy requirements, such as production lines producing aerospace, automotive and heavy industry parts. It also has a place in lower-volume, high-value applications with extreme accuracy requirements, such as an aerospace part that is low in quantity but would be very expensive to scrap.
Because Zenith and ActiveEdge keep parts within a set tolerance range, this system can improve part quality. Beyond eliminating scrap, this can have other downstream effects such as easing assembly, Bassett points out.
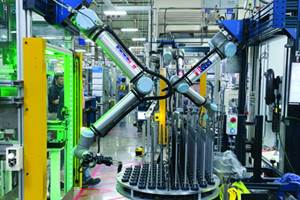
But just the scrap savings can be considerable. For example, one of the company’s customers produces large connecting rods for gas turbine engines. “We have been running there for close to eight years now, and we’ve never scrapped a rod on bore size in that time, ever,” Bassett says. The implementation of the Zenith system, along with the use of machine-tending robots, enables the production line to be overseen by a single employee. According to him, by removing potential human errors, this company has been able to improve scrap rates and efficiency of the production line by more than 50%. Process capability (CPK) is over 3. Another customer used an Apex tool to bore a hole with a diameter of 17 millimeters. On a 24-piece run, he says, the CPK was over 5.
“We have been running there for close to eight years now, and we’ve never scrapped a rod on bore size in that time, ever.”
By automating tool adjustment, Zenith can also aid shops in lights-out machining. “A lot of companies are now looking to this type of technology because they don’t want that many people on the line anymore,” Bassett says. Getting the finest-detail machining automated reliably can be the last step allowing a job that otherwise has to be done with people present to run in the unattended nighttime hours instead.
Related Content
How to Accelerate Robotic Deburring & Automated Material Removal
Pairing automation with air-driven motors that push cutting tool speeds up to 65,000 RPM with no duty cycle can dramatically improve throughput and improve finishing.
Read MoreIncreasing Productivity with Digitalization and AI
Job shops are implementing automation and digitalization into workflows to eliminate set up time and increase repeatability in production.
Read More4 Steps to a Cobot Culture: How Thyssenkrupp Bilstein Has Answered Staffing Shortages With Economical Automation
Safe, economical automation using collaborative robots can transform a manufacturing facility and overcome staffing shortfalls, but it takes additional investment and a systemized approach to automation in order to realize this change.
Read More3 Ways Artificial Intelligence Will Revolutionize Machine Shops
AI will become a tool to increase productivity in the same way that robotics has.
Read MoreRead Next
Setting Up and Operating Fine Boring Heads Just Got a Lot Easier
The combination of a digital boring head integrated with tool data software dramatically reduces the time required to set up a fine boring head. And still more IIOT-enabled advancements are just around the corner that will finally automate many boring operations.
Read MoreBold, Insightful Leadership Defines Manufacturer’s “DNA”
At its core, this highly successful contract manufacturer is a tool and die shop. Its founder, who has the heart and soul (and mind) of a tool maker, imbued his company with the values and the versatility of a tool room. This is his lasting legacy.
Read MoreBoring Head Enables Sculpture Hardware to Be Machined on a Lathe
When small job shop Ansonia Manufacturing took on a tricky hardware component job for a “live” glass art sculpture, it realized a boring head would be needed to machine the part complete on its live-tool lathe.
Read More


.png;maxWidth=300;quality=90)


