Titanium, it turns out, is not all that difficult to machine.
That’s ADEX’s perspective. This machining contractor in Greenville, South Carolina, (the name stands for “Aerospace, Defense and Energy eXcellence”) is a specialist in working with materials such as Inconel, Rene and Waspalloy. When titanium 6-4 jobs started to become a significant part of the shop’s workload during the past year, the shop applied the same methodologies to this metal that it applies to other aerospace alloys. As a result, titanium has proven to be—by comparison—easy.
Many shops regard titanium as one of the more challenging materials they face. ADEX personnel say this is because shops compare it with forgiving metals such as aluminum or free-machining steel. Whereas workpieces made of these materials can benefit from careful attention to cutting conditions, aerospace superalloys require this careful attention—which is why ADEX is not accustomed to engineering processes any other way. Because of this, the shop has discovered something significant about titanium: Cutting tools tailored to this metal have advanced so far that a disciplined approach to using these tools can deliver far more productivity than many shops working with the metal might expect.
Lean Machining
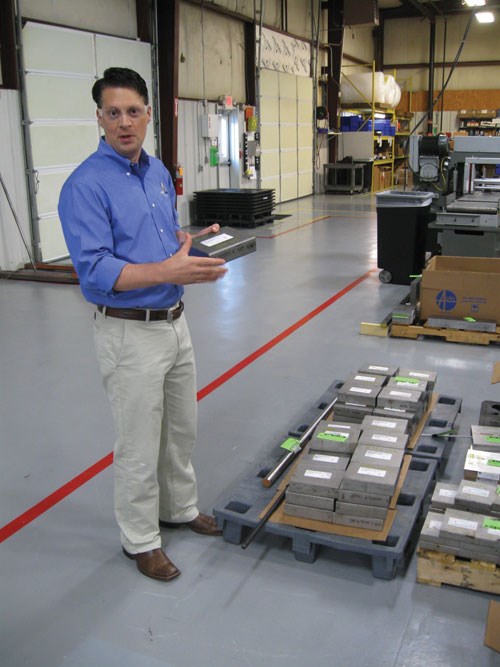
Jason Premo is the co-owner and CEO of ADEX. His shop uses modern equipment and an emphasis on continuous improvement to deliver responsive, cost-competitive machining of high-value parts in hard metals. The work is often lean in two different senses. Lean manufacturing—and the efficiency of this approach to production—is fundamental both to ADEX’s cost advantage and the culture on which the organization is built. That is one sense of lean. At the same time, Mr. Premo says the profit margins on jobs he quotes are often “lean” themselves. He bases pricing estimates on the level of machining performance his shop has achieved in recent jobs that are comparable. From there, he builds in the expectation (not unreasonable) that the discovery of further process improvement in the course of running that very job will provide performance that is greater still.
These performance levels often go beyond handbook expectations of what cutting tools ought to be able to do. This is particularly true with tool life, he says. In one recent example involving a titanium 6-4 part, the shop quoted and engineered a process with the expectation that a certain end mill would last through 5 pieces per tool. Instead, the tool lasted through 155 pieces—with the tool’s supplier agreeing to buy back all of the tools that ADEX ultimately did not need.
Engineering staff members at ADEX say no cutting tool brand is unique in terms of its potential for this kind of high performance. The shop uses tools for milling titanium from at least a half-dozen cutting tool companies. To realize the potential of these tools, the shop relies on tool paths that maintain a consistent level of material engagement by avoiding abrupt changes in feed direction within the cut. ADEX’s experience before and after implementing this toolpath strategy reveals that, in hard metals, these direction changes within the cut are where just about all of the tool life gets lost.
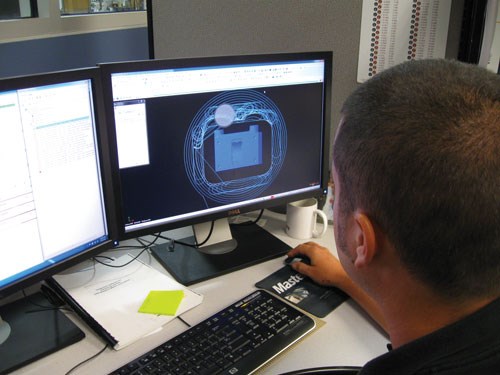
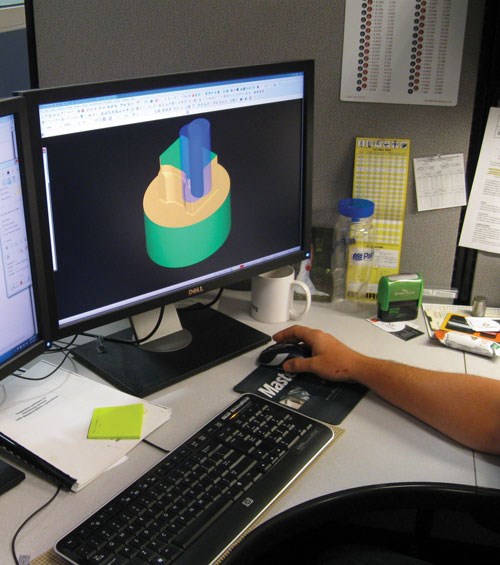
Mastercam’s “Dynamic Mill” is the CAM capability ADEX uses for this constant engagement. The programming feature creates tool paths that often look counter-intuitive when compared to the shape of the form to be machined, because the paths are designed to keep the material engagement constant (see photo). Throughout the milling operation that is programmed this way, stress on the tool does not significantly fluctuate.
Now, because ADEX programmers are accustomed to using this feature, they often find milling parameters by looking at tool vendors’ recommendations for slotting cuts. Rarely does the shop take a true slotting cut, but a cut that benefits from constant material engagement is like a slotting cut that is able to follow curves instead of a straight line.
Even those recommendations are just the starting point, however. In titanium, the shop searches for cutting depths that are heavy enough to reach past work hardening, but also light enough to allow for a rapid feed rate that races ahead of this same work hardening. Because titanium 6-4 work hardens quickly, too light or too slow a cut risks machining metal that is harder than what the cutting edge would encounter if it cut deeper or faster than this hardening is proceeding.
Factors such as this make it cost-effective for ADEX to invest time and material on experimentation—searching for the optimal process for any part number that is slated to repeat. The best parameters for a given cutting tool and a given machined feature often can be found only through this experimentation. The research never begins from zero, because the findings of previous jobs—captured through log books, as well as formal discussions after each job is done—enable past experience to be applied to later situations. The emphasis on maintaining an internal knowledge base in this way is vital to the company’s success machining hard metals, and this is particularly true of titanium.
Building the knowledge base for titanium has arguably been more valuable than that of any other metal. In a short period of time, the shop has learned how the latest milling tool edge geometries, combined with new coatings that keep the edge sharper than coatings of the past, enable performance in titanium 6-4 that sometimes goes well beyond what tool vendors’ recommended parameters suggest. The key, says ADEX, is to make sure the process does not unduly compromise the potential performance with programmed paths that hammer the tool through unnecessary increases in stress.
Setup Savings
One additional part of the shop’s formula for machining titanium and other hard metals efficiently relates to fixturing. In the markets this company serves, batch sizes are often small, so setups have to come on and off the machines quickly. On its machining centers, ADEX uses the
Jergens Ball Lock tooling system to quickly and accurately clamp fixtures in place. Even with this system, though, the number of setups for any part number is best kept small. Maintaining a steady load on the tool in titanium contributes to this priority as well.
One titanium part the shop won recently provides an illustration. Historically, the tail rotor hub for a military helicopter has required at least six setups on a machining center. This is because of the part’s flatness tolerance of 0.002 inch across a part 14-inches square. Formerly, the part was rough machined on both sides, then semifinished on both sides to overcome the warp left by roughing, then gingerly finished through additional steps. ADEX’s engineers quoted the job with the assumption that their process would handle the part the same way.
But the reason for warping turned out to be the high forces in the cut. Those forces could be contained—ADEX programmed tool paths that kept the load on the tool steady. Gone were the high spikes in force typical of previous roughing. In fact, the cutting forces in ADEX’s process were uniformly low, without compromising efficiency, because the high feed rate made up for a light depth of cut. At first, ADEX employees expected to find a warp of 0.020 inch or so before the semifinish passes. They found instead no significant warp from roughing. As a result, the shop now performs all of its machining for one side of the part in one cycle before flipping the part to complete the machining. A jig-boring operation for the center hole was even done away with. Quoting the job “lean” thus proved advantageous, because the shop won the work, then went on to realize a significantly more efficient process than the one it had quoted.
Getting to Unattended
 Speed isn’t everything. ADEX’s aim is to realize a process in which hard metals can be machined unattended because all of the variables that can threaten the machining cycle’s performance have been controlled. In cases where the shop can accomplish this, the value of doing so is much greater than the value of speed. The need to have a human being near the process to respond to uncontrollable events not only adds significant cost to the job, but also limits ADEX’s ability to expand—because there is only so much staff that this facility and its lean culture can accommodate. As a result, ADEX keeps exploring how far it can go toward engineering processes to minimize the need for people to intervene.
The process for the part shown here is an example. This small linkage component, machined from titanium, is produced in a setup of 12 pieces in order to make efficient use of the machine’s volume. Six pieces are machined on one side, with these pieces flipped over for side-two machining in the next running of the same cycle. To allow the cycle to produce this many pieces between operator actions, the shop slowed down from the speed and feed rate it could reasonably achieve on milled features such as the interpolated bores. At faster parameters, tool wear could cause bores machined at the end of the cycle to differ from bores machined at the beginning. Though the shop might set up fewer pieces per cycle and run them faster, extending the cycle time per piece was a small price to pay for the value of letting the employee leave this process longer and focus attention somewhere else.
By the same philosophy, in-process measurement will be the next element added to processes such as this one. ADEX has begun to use the spindle-mounted measuring probe on its machining centers to confirm in-process that features have been machined to spec. This step also adds to cycle time, but the cost is insignificant if it lets the process run the part reliably and completely with little attention from a person.




 Speed isn’t everything. ADEX’s aim is to realize a process in which hard metals can be machined unattended because all of the variables that can threaten the machining cycle’s performance have been controlled. In cases where the shop can accomplish this, the value of doing so is much greater than the value of speed. The need to have a human being near the process to respond to uncontrollable events not only adds significant cost to the job, but also limits ADEX’s ability to expand—because there is only so much staff that this facility and its lean culture can accommodate. As a result, ADEX keeps exploring how far it can go toward engineering processes to minimize the need for people to intervene.


.jpg;maxWidth=300;quality=90)


