CMM Reduces Manual Inspection, Increases Efficiency
By integrating a Contura CMM from Carl Zeiss into its production process, Sunnen reduced manual inspections helped make the most of other improvement efforts.
Share


Performing more than 18,000 manual inspections each year ensured high quality at Sunnen Products Co. However, the quality of these parts came at the expense of productivity. To improve efficiency, Sunnen invested in a coordinate measuring machine (CMM) from Carl Zeiss Industrial Metrology (Minneapolis, Minnesota) that helped reduce the number of manual inspections to 8,000 annually.
Sunnen, located in Saint Louis, Missouri, manufactures and distributes honing machines, tools and abrasives for bore sizing and engine rebuilding. Its portable tooling department focuses on 2- to 48-inch-diameter bores, including hone heads, stone holders and onsite equipment. To inspect these bores, the company had been using such common manual tools as height gages, micrometers, calipers and optical comparators.
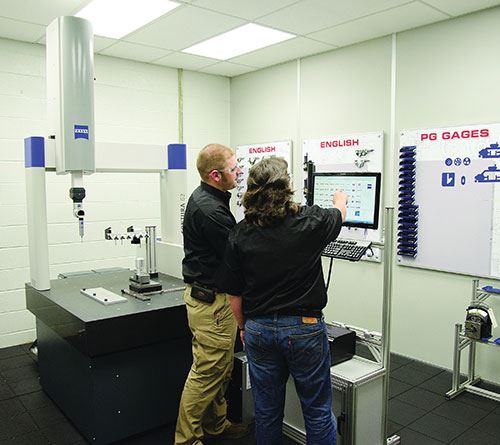
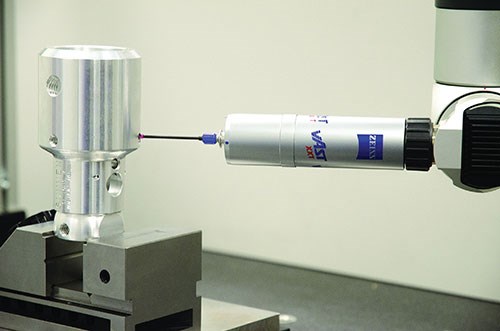
“One thing we take great pride in here is quality,” says Steve Sutton, portable tooling department supervisor. To maintain this high quality while inspecting an increasing number of complex parts, the company decided to incorporate a CMM into its production process. After evaluating all of the manufactured components and looking at their features and angles, Sunnen decided that the larger-sized Contura G2 7/10/6 from Carl Zeiss would provide the flexibility and automation the department required. The machine’s RDS articulating probe would be able to reach into many angles of complex parts, and the ViScan optical probe would be well-suited for 2D geometries. In addition, the company could download existing CAD models to speed measurement program
creation.
The Contura also fulfilled another department requirement: ease of use. This was necessary because only two machinists with little metrology experience would be responsible for implementing the new system. Furthermore, they would provide support for 25 other machinists who were also untrained on the CMM. “After taking the basic Calypso training course at Carl Zeiss, and with a little practice, I was creating several complex part programs a day. This included 10 to 20 programs a day of parts without CAD models,” says machinist Ed Fowler.
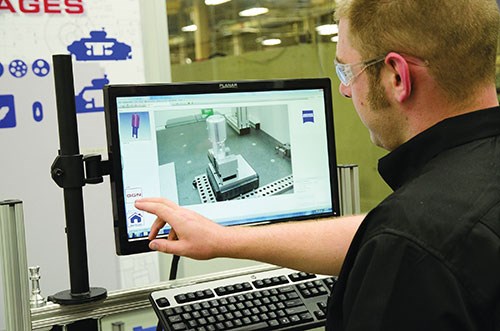
After about 10 minutes of training on the Calypso programs, the machinists were able to quickly inspect parts with the AutoRun features, the company says. The inspection process begins in a temperature-controlled lab where the machinist uses a touchscreen drill-down menu to select the part number and operation. Visual work instructions that appear on the screen indicate which fixture to use and its orientation on the CMM. The machinist then places the part on the fixture and starts the inspection process. Parts that once took an hour to inspect now take 10 minutes, Mr. Fowler says. This averages 50 more minutes of machining time for 25 machinists. Each day, Sunnen measures about 50 parts on the Contura G2.
After the raw stock is cut to length and sent to a CNC lathe, mill or wire EDM, a typical part for Sunnen’s portable tooling department undergoes three inspections: initial, at least one in-process, and final. If accurate, the part continues on to a finishing operation prior to assembly and shipment. Target tolerances are typically ±0.003 inch and frequently ±0.005 inch. Now that documentation is automated and electronic, the number of inspections has been reduced.
The Contura CMM has also helped Sunnen make the most of its other improvement efforts. For instance, the company transitioned to using multitasking machines, which produce a finished product in one operation, in order to further increase its production efficiency. However, manual inspection times were much longer when all the features were machined into a part in one operation, Mr. Sutton says. Having the CMM to manage these inspections reduces setup time even more and frees time for machinists to take on other tasks. “What once took an hour to check now takes a few minutes,” Mr. Sutton says. Part setup time has reduced from 25 hours with 10 operations to about 2 hours with one operation.
By improving its metrology process, Sunnen also improved its manufacturing process, Mr. Sutton says. For example, the Calypso software helps identify process discrepancies by making it easy to find more part detail and determine root causes for any variance between departments. “With Calypso reports, you can select exactly what you want to know about a particular feature, which makes it very concise and easy to read,” Mr. Fowler says.
According to Sunnen, the Contura G2 has opened the door to identifying opportunities to develop processes and tools that make better bores with higher quality and tighter tolerances. “The amount of time we’re saving in the long run far outweighs the upfront development of our new quality process,” Mr. Sutton concludes. “Other departments are seeing the improvements, and the financial growth opportunities from the CMMs are now visible. The best part is that it was all implemented by two of our machinists.”
Related Content
Rethink Quality Control to Increase Productivity, Decrease Scrap
Verifying parts is essential to documenting quality, and there are a few best practices that can make the quality control process more efficient.
Read MoreThe Link Between CNC Process Control and Powertrain Warranties
Ever since inventing the touch-trigger probe in 1972, Sir David McMurtry and his company Renishaw have been focused on achieving process control over its own manufacturing operations. That journey has had sweeping consequences for manufacturing at large.
Read MoreTurning Fixed-Body Plug Gages Inside Out
Fixed-body mechanical plug gages provide fast, high-performance measurement for tight-tolerance holes.
Read MoreThe Many Ways of Measuring Thickness
While it may seem to be a straightforward check, there are many approaches to measuring thickness that are determined by the requirements of the part.
Read MoreRead Next
Registration Now Open for the Precision Machining Technology Show (PMTS) 2025
The precision machining industry’s premier event returns to Cleveland, OH, April 1-3.
Read More5 Rules of Thumb for Buying CNC Machine Tools
Use these tips to carefully plan your machine tool purchases and to avoid regretting your decision later.
Read MoreBuilding Out a Foundation for Student Machinists
Autodesk and Haas have teamed up to produce an introductory course for students that covers the basics of CAD, CAM and CNC while providing them with a portfolio part.
Read More


