Share


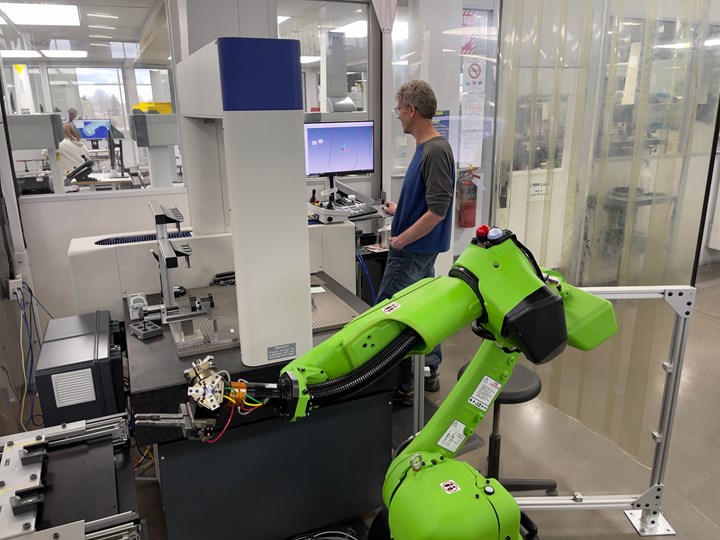
John Loscheider, CMM programmer at Ultra Machining Company, oversees an automated CMM and multiaxis robot. The inspection data from this CMM is uploaded in real time to the shop floor, allowing machine operators to see whether the parts remain within tolerance requirements. Photos by Brent Donaldson, with screen captures provided by 1Factory.
There are practical reasons why machine shops might shy away from highly complex parts. Small, multifaceted medical implants for the spine or jet engine components such as fuel injection nozzles might feature hundreds of dimensions per part, with tolerance requirements that routinely fall within two ten-thousandths (0.0002) of an inch. Even when perfectly machined, the parts are worthless without the documentation required for compliance with medical and aerospace standards, such as ISO 13485 or AS 9100.
When complex parts come with stringent inspection requirements, the quality control process begins with three core questions:
- Which part dimensions require inspection, and at what point in the process?
- What equipment will I use to check those dimensions?
- At what frequency will I check those dimensions?
For mid- to high-volume shops, the amount of data required to answer these questions can become so overwhelming that shops turn to multiple software platforms to perform individual tasks. One software for ballooning, one for first article inspections (FAI), one for in-process inspections and so on. Considering the sheer volume of data, trying to fine-tune different software platforms to communicate effectively with one another becomes a nearly impossible, thankless task. Cross-channel data traffic gums up the network. Operators trying to input inspection data are greeted by spinning wheels of death. The keepers of tribal knowledge about each software system grow fewer in number. As for training new employees on the system? Good luck.
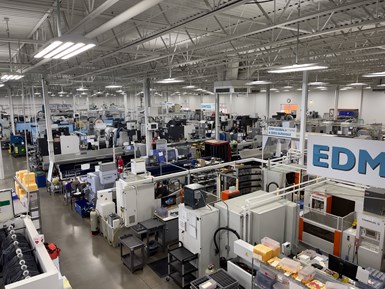
UMC, which recently expanded to more than 140,000 ft2 of shopfloor space, relies on its quality control system that features real-time availability of measurement and inspection data.
This is exactly the situation that a high-precision shop near Minneapolis called Ultra Machining Company (UMC) found itself in just two years ago. Business had accelerated, but so had the burden of managing stringent quality control standards on highly complex parts. By 2019, UMC was collecting a million points of part inspection data per month, then segmenting it off into five separate quality management platforms.
One of those platforms was designed and built by UMC in partnership with their vendor, in the hope of eventually marketing the software and selling it to customers. But the software became so highly customized for UMC that, whether related to its customization or not, the vendor decided to exit the product category. The vendor notified UMC that, after a six-month phase-out period, they would no longer support it.
Sarah Sundine, UMC’s director of project management, remembers the day the news dropped — during a production crunch when UMC was actively processing more than 1,000 parts. “We were like, oh my gosh, if you shut down our quality software, we can't run,” she recalls.
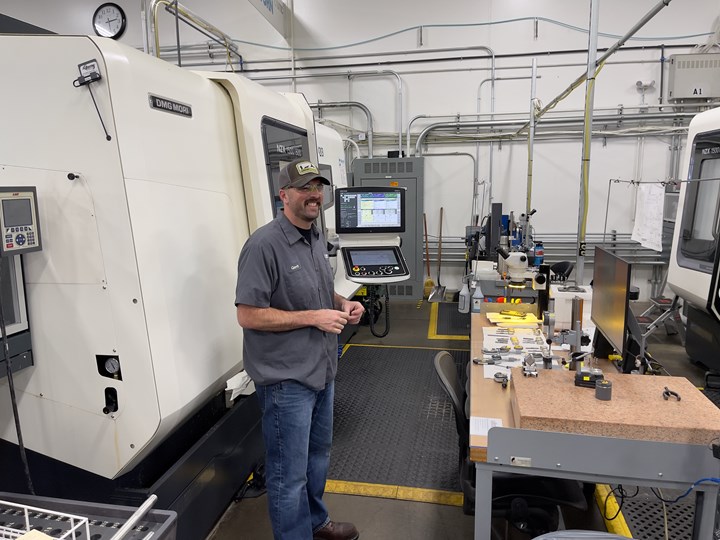
Like most workstations on UMC’s shop floor, machinist Gerrit Fonkert’s station features several measurement tools and a computer where he processes each part’s inspection data in real time with 1Factory.
A Sleepless Month of Nonstop Work
The immediate response from Sundine and her team was to write a request for quote (RFQ) that included more than 150 technical requirements, which UMC then blasted out to quality management software companies around the globe. After a weeks-long vetting process, UMC had all but signed a contract with another quality management provider when a colleague of Sundine began researching one of the lesser-known bidders on the RFQ. That research led to Nipun Girotra, CEO and cofounder of a company based in San Jose, California called 1Factory.
“It was the most detailed RFQ I’ve ever seen,” Girotra says. But a quick demo of 1Factory by Girotra and his business partner, CTO and cofounder Oleg Nickolayev, was impressive enough to convince UMC to purchase a 30-day pilot program.
At the end of the trial run, nearly everyone at UMC who interacted with 1Factory, from the machinists to the quality engineers to the inspection lab workers, lobbied hard for the company to adopt it, Sundine says. So as the clock ticked down toward pulling the plug on UMC’s existing quality control software — and as COVID-19 began sweeping the globe — Sundine, Girotra, Nickolayev and several members of UMC’s team embarked on a sleepless month of nonstop work to integrate 1Factory into UMC’s systems.
I traveled to UMC this past March to learn how the two companies pushed the envelope of automated quality control data in a machine shop.
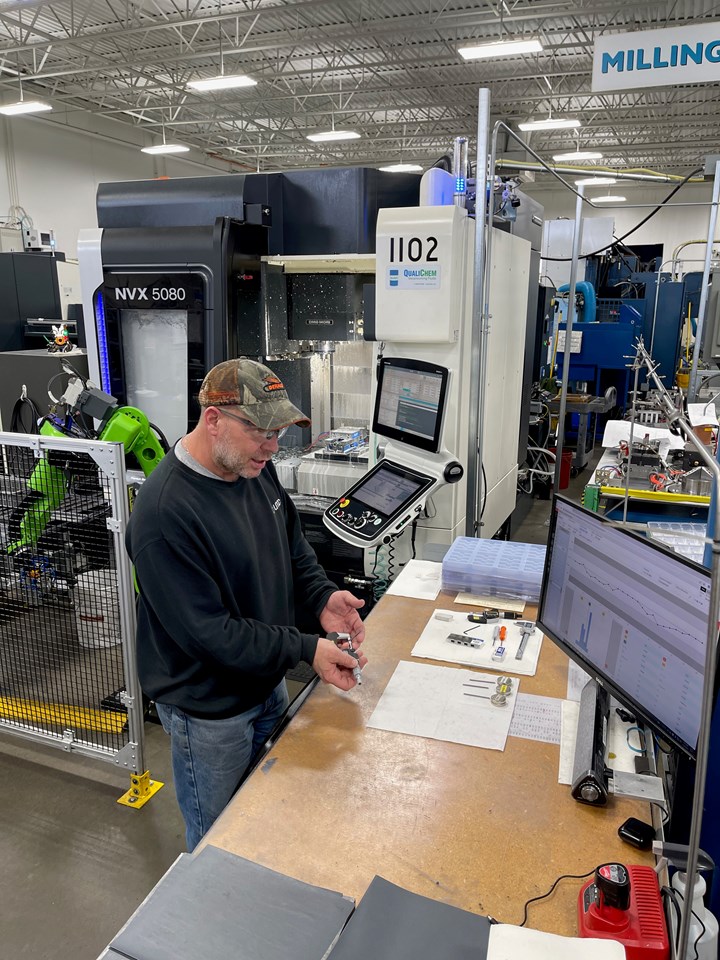
UMC machinist Jeremy Desmet views the inspection history of a part using 1Factory’s run chart.
Ultra Machining Company
I first met Nipun Girotra and Oleg Nickolayev at 1Factory’s booth at Westec in late 2021. Displayed on a large screen behind the two men was a print drawing of a complex part that had been auto-ballooned by their software. “There are plenty of quality control softwares that auto-balloon prints, but,” Girotra said, before launching into a dizzying array of features built into the platform.
“By the way,” he asked at the end of the visit, “have you ever heard of a shop near Minneapolis called UMC? It might be the most impressive machine shop I have ever seen.”
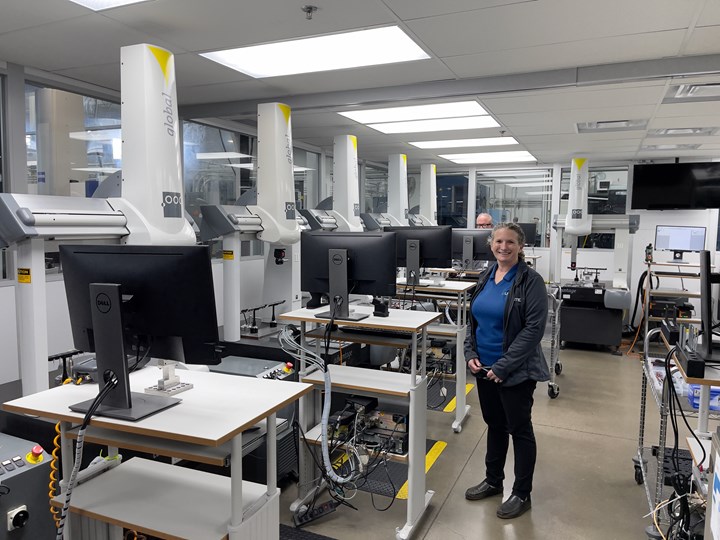
Established in 1968 near Minneapolis, UMC is a family-owned machine shop that not only produces complex parts routinely, but also machines a full spectrum of challenging materials, such as hastelloy, Inconel, titanium and cobalt alloys. UMC’s 140,000-square-foot shop floor is organized into separate operational departments for mill-turn, Swiss, EDM, turning, milling, prototyping and inspection. As a company that primarily serves highly regulated industries including medical, aerospace and defense, the UMC’s inspection lab is a central hub of activity. The lab boasts eight vision machines and more than 20 coordinate measuring machines (CMMs), some of which are serviced by pallet changers and multiaxis robots.
By the time I arrived at UMC in March, the company had fully integrated 1Factory into its operations. On the shop floor, every workstation featured a desktop computer with 1Factory displayed on the monitor. Everyone was tuned to the same channel.
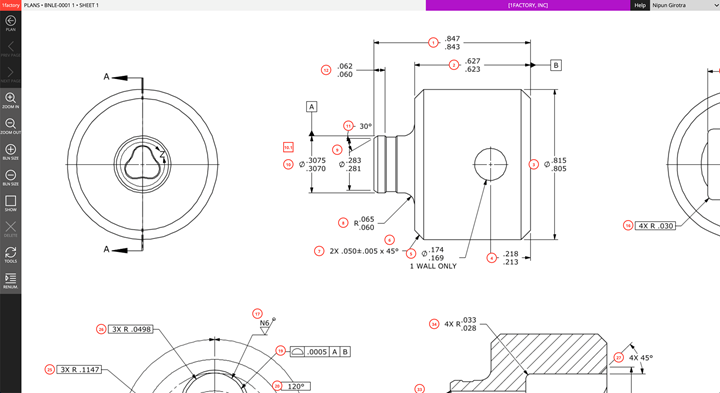
The first step in UMC’s quality management process for each part is to auto-balloon the print, like above, then export the data into a quality control plan.
The quality control process at UMC begins like this: An engineer uploads the customer’s print, typically from a PDF drawing, and 1Factory auto-balloons the drawing and assigns numbers to the part’s features, including radiuses, diameters, positions, geometric dimensioning and tolerancing (GD&T) data, and any text instructions contained in the margins. Let’s say that balloon 1 is a linear dimension located in zone f5 with a mix/max value of 0.843–0.847 inches. The software extracts this information and populates it into an auto-generated quality control plan. Attempting this process manually (still a reality for many shops) means ballooning one feature at a time and individually notating all the values required for the report. Mistakes discovered down the line of a manual process often mean starting over from scratch.
As the control plan is created in 1Factory, UMC quality engineers can manually define or let the software auto-generate sampling rules for part inspections. For instance, a critical feature for a highly regulated industry might require inspection of every tenth part by a laser micrometer, while a noncritical feature may require inspection of every hundredth part by a digital caliper.
The software also ties every part feature to the specific tool or CMM required to inspect it. As parts come off the machine, the control plan lets UMC’s machine operators know which features require measurement checks at their workstation, and which measurement tool to use for the inspection.
The inspection summary screen in 1Factory shows, among other data, the inspection method and the sampling rate for each part feature.
If an operator on the shop floor is looking at the control plan and needs to find the location of a specific feature on the part, rather than searching through a complex print drawing to find one feature among dozens or hundreds, a click of the mouse on the feature number zeroes in on the precise location of the feature on the print. This capability struck me as particularly cool, and I wasn’t the only one. As Sundine walked me around the shop floor, she showed this relatively new capability of 1Factory to two operators who didn’t know it existed, and it blew their minds.
Capabilities like this were part of the solution that UMC sought in a new quality control system. But they weren’t necessarily unique in the marketplace. Several of the 12 different vendors that UMC evaluated after its RFQ offered functionalities like auto-ballooning, data capture and control plan processes. What put 1Factory over the top, Sundine says, were two specific qualities: Its ease-of-use, and the promise of integrating in-process inspection data, uploaded in real time, from all 28 of UMC’s CMMs.
Why just a promise? Because until Sundine’s team asked for this capability, 1Factory didn’t have it. It took UMC to help them get there.
“OK, prove it.”
This was the gauntlet thrown down by UMC to 1Factory — a challenge to automate the data output of nearly 30 CMMs straight into 1Factory in real time.
“And we built it,” Girotra says. “And by the way, we built it within that first month of the pilot.”
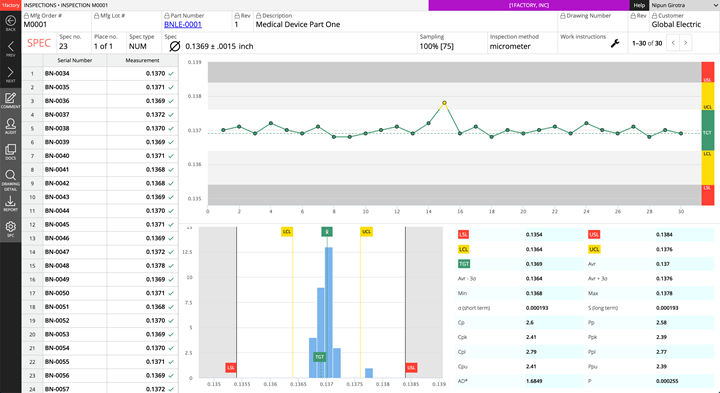
This capability means that every data point from every touch of a CMM probe or scan of a vision machine is visible almost instantly to every machinist at every workstation on the shop floor. Once UMC’s inspection data is in 1Factory, the software analyzes the data and creates a run chart and histogram that shows which part features present the highest risk of failure.
1Factory’s run chart, histogram, and statistical process control data show feature-level tracking for each part. In this example, only one measurement of one feature fell into the yellow zone, indicating that the feature measured within 25% of required tolerance.
This real-time feedback loop means that 1Factory is integrating UMC’s inspection points — not only from the CMMs, but also from manually input data — and then handing over statistical process control (SPC) to the machinist. The visual data lets the machinist know that adjustments to the machining process are needed to bring the measurements back in line.
If a part fails inspection, 1Factory automates the nonconformance report process by uploading the part number, the out-of-tolerance feature, the part description, the operator assigned to the inspection, and the day and time of the part’s production. The report also identifies which gage or CMM was used for inspection, and can identify all prior inspections performed with that gage. On top of that, the software tracks calibration schedules for all measurement equipment — which at UMC includes more than 10,000 hand gages — and displays a red flag if an operator attempts to use a gage that requires calibration.
During my visit to UMC, I asked Sarah Sundine to wear a lavalier microphone before we walked the shop floor. Unless you’re my mom, if you’re reading this you know that a machine shop floor is no place to record an interview. But Sundine, instead of clipping the lav mic to her shirt, held it aloft and began hustling between workstations, interviewing UMC machinists like a TV reporter interviewing local citizens on the town square.
Sarah Sundine, UMC’s director of project management, in UMC’s CMM lab. Sundine helped lead a transition from the company’s use of five different quality management software platforms to full integration into 1Factory.
I mention this not only as a testament to Sundine’s rapport with UMC’s employees, but also because the employees’ opinions (shoutout to Justin Meinzer, Jeremy Desmet, Lucas Scholtz and Lisa Anderson) were so strong. It turns out that integrating five quality management platforms into one has made the work lives of the machinists and inspectors much easier.
“When we talk about automation, yes, it's machine automation, but it's also data automation,” Sundine says. “We're always trying to look at all aspects of the business. So the investments that UMC makes are not just on the machine side but the software side, too.”
Related Content
Mikron Milling Tool Suppresses Machining Chatter
IMTS 2024: The CrazyMill Cool CF milling tool features chatter suppression during machining, especially on thin-walled parts, which enables smoother cutting.
Read MoreGerman Project Yields Three New Medical Machining Processes
Trends to Watch at IMTS: Recent research has resulted in a new mix of high-speed turn whirl milling, polygon turning and rotational turning for manufacturing medical bone screws and out-of-round nails.
Read MoreAmetek EMC Laser Cutting System Offers Through-Part Cooling
The new laser cutting system offers comprehensive Swiss machining capabilities, as well as through-part cooling and automatic part-handling options.
Read MoreLyndex-Nikken Collets Enable Accurate Small-Diameter Cutting
The MMC Mini-Mini collet chuck is well suited for high-speed machining applications where clearance is needed, such as die mold, aerospace and medical parts.
Read MoreRead Next
Vision Systems: One Shop's Competitive Edge for Measurement and Inspection
Even for high-volume machine shops like Alpha Grainger, every part is critical. When the bottleneck to inspect a vast number of parts resulted in lost business, the company built, then invested in, digital vision systems to gain a competitive advantage.
Read More5 Rules of Thumb for Buying CNC Machine Tools
Use these tips to carefully plan your machine tool purchases and to avoid regretting your decision later.
Read MoreBuilding Out a Foundation for Student Machinists
Autodesk and Haas have teamed up to produce an introductory course for students that covers the basics of CAD, CAM and CNC while providing them with a portfolio part.
Read More







.jpg;maxWidth=300;quality=90)


