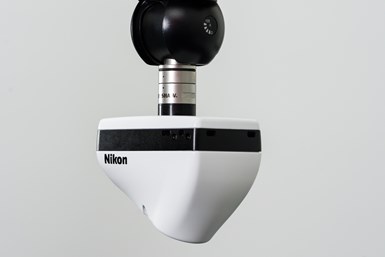
Nikon Laser Scanner Improves Inspection of Complex Parts
The LC15Dx laser scanner incorporates a patented Nikon software algorithm that maintains scanning accuracy, speed and data quality.
Share


Nikon Metrology’s LC15Dx laser scanner is designed for efficient measurement and inspection of manufactured components, especially those having complex freeform geometry such as turbine blades, orthopedic implants and intricate plastic parts. Compatible with all metrology platforms and software, a new version of the sensor has been launched with functionality that has been upgraded in several areas.
The LC15Dx is certified according to ISO 10360-8, the industry standard for the performance of CMM laser scanning devices. The “ISO 10360‐8 Probing size error All” enables the scanner to deliver more accurate and repeatable dimensional measurements, close to those achievable using a tactile probe. Additionally, the Nikon lens features improvements to the way data is captured, enhancing structural resolution to enable finer surface texture and detail to be seen.
The LC15Dx incorporates a patented Nikon software algorithm that maintains scanning accuracy, speed and data quality by automatically adapting the laser settings in real time at each measured point, which matches the type and reflectivity of the material being examined. Coupled with a high-grade daylight filter to accommodate different ambient light conditions, it enables the inspection of any material, regardless of color, shininess or transparency, without the need for spraying or other surface preparation. This ability has been improved further in the new unit by facilitating better data acquisition from very dark materials. There is even a high ISO mode that can be switched on for coping with black surfaces, including those having a gloss finish.
The LC15Dx can start scanning more quickly than before after being switched on, raising productivity when inspecting or reverse engineering components. It continues to have zero warm-up time, as an algorithm compensates for any measurements taken while the sensor’s temperature is rising to match that of its environment. This upgrade promotes metrology productivity by enabling almost instant operation.
Related Content
-
The Link Between CNC Process Control and Powertrain Warranties
Ever since inventing the touch-trigger probe in 1972, Sir David McMurtry and his company Renishaw have been focused on achieving process control over its own manufacturing operations. That journey has had sweeping consequences for manufacturing at large.
-
Help Operators Understand Sizing Adjustments
Even when CNCs are equipped with automatic post-process gaging systems, there are always a few important adjustments that must be done manually. Don’t take operators understanding these adjustments for granted.
-
Parts and Programs: Setup for Success
Tips for program and work setups that can simplify adjustments and troubleshooting.


.jpg;maxWidth=300;quality=90)
