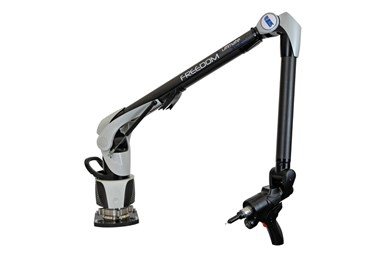
LK Metrology's Freedom Ultimate Arms Maximize Usability
LK Metrology’s Freedom Ultimate and Freedom Ultimate Scan arms provide a portable, accessible and highly accurate measuring system for complex applications.
Share


Takumi USA
Featured Content
View More
Autodesk, Inc.
Featured Content
View More


Hwacheon Machinery America, Inc.
Featured Content
View More
LK Metrology has expanded its Freedom arm range of 3D articulating arm metrology systems, or portable measuring arms, with the launch of five ultra-accuracy models in both six-axis touch probing and seven-axis multi-sensor variants. The 10 new arms mean LK now offers 34 arm varieties.
The new Freedom Ultimate and Freedom Ultimate Scan arms are available with measurement volumes from 2.5 to 4.5 m. They ship with a calibration sphere and verification bar with ISO 17025 certification, offering increased precision in applications spanning quality control and on-machine verification to reverse engineering, virtual assembly design and 3D modeling. Measuring accuracy is enhanced by up to 8% in comparison with the Select range, and up to 43% compared with the entry-level Classic arms.
The tactile probing accuracy of all Freedom arm products is certified to ISO 10360-12. The Scan models’ extra degree of freedom provides infinite movement to enable scanning with a Nikon Metrology ModelMaker H120 laser scanner. Each arm is compatible with a variety of probe kits, styli, magnetic- or vacuum-base mounting rings, tripods, rolling stands and carts with laptop arms.
Carbon fiber tubular construction improves stability under challenging operational conditions. A proprietary counterbalance makes manual movements light, promoting ease of use even when trying to access awkward component areas. Optional Wi-Fi connectivity and battery power enable portable wireless measurement, and users can stow and lock the arm between measurements and during transport.
The arms use absolute rather than incremental rotary encoders to report the angular position of joints, eliminating the need for encoder referencing before use. This optimization raises productivity, as does the repeatable hot-swapping connection that enables quick probe exchange without interrupting the measuring process for recalibration. An LCD display with a quick-access menu on the probe wrist puts information directly in the operator’s hands during measurement.
Related Content
-
Rethink Quality Control to Increase Productivity, Decrease Scrap
Verifying parts is essential to documenting quality, and there are a few best practices that can make the quality control process more efficient.
-
The Many Ways of Measuring Thickness
While it may seem to be a straightforward check, there are many approaches to measuring thickness that are determined by the requirements of the part.
-
Parts and Programs: Setup for Success
Tips for program and work setups that can simplify adjustments and troubleshooting.


.jpg;maxWidth=300;quality=90)

