What to Know About Roughness Average
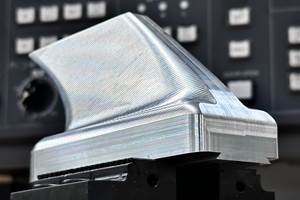
Roughness average, the most commonly used parameter for surface finish, is a good starting point for quantifying parts when there is no parameter callout.
Share


ECi Software Solutions, Inc.
Featured Content
View More

Autodesk, Inc.
Featured Content
View More

Hwacheon Machinery America, Inc.
Featured Content
View More
More often than we like, prints still come across our desks with a surface finish callout that makes no reference to the parameter to be used when measuring the surface texture.
The irregularity of a machined surface is impacted by variables in the machining process, including the choice of tool, feeds and speeds of the tool, machine geometry, and environmental conditions. This irregularity consists of high and low spots machined into a surface by the tool bit or a grinding wheel.
When an engineer includes a surface finish specification on a print, the intent is usually not just to make the part look good. Surface finish also affects how a part will fit, wear, reflect light, transmit heat, distribute lubrication and accept coatings. The finish should be determined by the part’s function; you want a surface that fulfills the engineering requirements of the application, without wasting time and effort on pursuing a higher quality finish than is necessary. (Many applications do better with a certain amount of “texture,” and too fine a finish can be as bad as too coarse.) There are more than 100 ways to measure a surface and analyze the results, and the engineer should determine the best parameter that quantifies the part surface for its particular function.
In fact, in order to completely and fully characterize a surface, between three and six parameters must be chosen, including at least one of each of the types: one amplitude, one spacing and one hybrid parameter. For many applications, however, this recommendation is far from the reality of what is specified.
So, if there is no parameter callout on the print, what should the person responsible for producing the part use as a reference for measuring surface finish?
Roughness average (Ra) is the most commonly used parameter for surface finish, and it is the go-to parameter when none is specified. In the not-too-distant past, it was the only parameter recognized by ANSI, although new ANSI and ISO standards include many different parameters from which to choose. While additional parameters are useful in many applications to ensure or enhance functionality, Ra is still included in most specs as a good starting point and a basic benchmark when a process is under control and when the conditions (cutting tips, speeds, feeds, cutting fluid or lubricant) are always the same.
Ra provides an arithmetic average of surface irregularities measured from a mean line that lies somewhere between the highest and lowest points on a given cutoff length. It is statistically very stable and even good for evaluating random surfaces such as those produced by grinding. Ra is not so good as a discriminator for different types of surfaces, because it does not distinguish between peaks and valleys, or in the application of sealing surfaces.
Another good thing about the roughness average parameter is that, because it is the most commonly used, it is available on even the least significant surface finish measuring instruments. In fact, most of the reference specimens provided with these instruments include a patch with a certified Ra value.
When performing an Ra measurement, it is essential to choose a cutoff (or sampling) length appropriate to the process. This cutoff length should be short enough so that the measurement will not be influenced by waviness. On the other hand, it also must not be so short that only a portion of a tool mark is measured. A cutoff long enough to include five complete sets of tool marks is desirable to obtain a good average roughness measurement. To make things easier for the user and relieve him or her of this selection choice, some of the surface texture gages currently available offer automatic selection of cutoff length based on an on-going analysis of the surface as the sample is being collected.
Ra is not going to be much help in determining whether you’ve got a peak-and-valley problem. It may be necessary to perform a complete surface finish analysis, including a look at the waviness component, to get a full understanding of this type of profile. With that in mind, however, straightforward Ra measurements may be all you need to maintain control over your process and be enough to alert your quality assurance department to the presence of potentially damaging surface anomalies.
Related Content
4 Steps to a Cobot Culture: How Thyssenkrupp Bilstein Has Answered Staffing Shortages With Economical Automation
Safe, economical automation using collaborative robots can transform a manufacturing facility and overcome staffing shortfalls, but it takes additional investment and a systemized approach to automation in order to realize this change.
Read MoreHow to Mitigate Risk in Your Manufacturing Process or Design
Use a Failure Mode and Effect Analysis (FMEA) form as a proactive way to evaluate a manufacturing process or design.
Read MoreCustom Workholding Principles to Live By
Workholding solutions can take on infinite forms and all would be correct to some degree. Follow these tips to help optimize custom workholding solutions.
Read More4 Commonly Misapplied CNC Features
Misapplication of these important CNC features will result in wasted time, wasted or duplicated effort and/or wasted material.
Read MoreRead Next
Building Out a Foundation for Student Machinists
Autodesk and Haas have teamed up to produce an introductory course for students that covers the basics of CAD, CAM and CNC while providing them with a portfolio part.
Read More5 Rules of Thumb for Buying CNC Machine Tools
Use these tips to carefully plan your machine tool purchases and to avoid regretting your decision later.
Read MoreRegistration Now Open for the Precision Machining Technology Show (PMTS) 2025
The precision machining industry’s premier event returns to Cleveland, OH, April 1-3.
Read More


.png;maxWidth=150)


