Shaft Measuring Systems
Here’s a list of questions to consider in choosing the solution that’s right for you.
Share


Hwacheon Machinery America, Inc.
Featured Content
View More


.png;maxWidth=45)
DMG MORI - Cincinnati
Featured Content
View MoreThe vast majority of machining that goes on in the world is related to making shafts, holes or the pieces that hold them together. A shaft, for our discussion purposes, is a round part whose length is greater than its diameter(s). Its size can range from very, very small to very, very large.
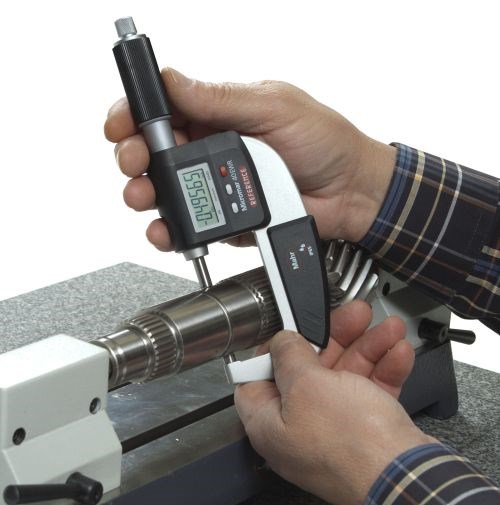
Just as there have been great leaps in shaft production over the years, there also has been a dramatic increase in the ways that shafts can be measured. Inspection tools, many of which are fairly new to dimensional metrology, include:
• Gage blocks and comparators
• Micrometers/indicating micrometers
• Vernier/dial/digital calipers
• Mechanical indicating snap gages
• Air snap/ring gages
• Measuring microscopes
• Dedicated fixture gages
• Height gages
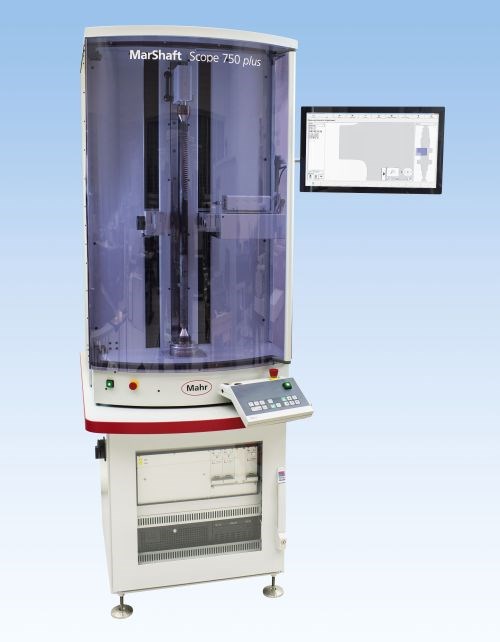
• Automatic shaft gages
• CMMs, measuring arms
• Precision length machines
• Laser micrometers
There are probably a few more, but the point I want to make here is that there are a wide range of prices among these options, as well as differences in gage accuracy, operator influence, throughput, data output, etc. It’s confusing, to say the least.
So which is the best one for your company? A good approach is to first define the functional requirements of the inspection task, and let that steer you toward the hardware that is capable of performing the tasks as identified. In order to do this, you might consider the following factors:
1. What is the nature of the features on the shaft to be inspected? Are they only ODs, or are there radii or lengths that also need to be inspected?
2. Are there multiple ODs that need to be inspected in the same operation, or are they measured in sequence as manufactured?
3. What level of accuracy are you looking for?
4. How much are you willing to pay for super-accuracy? Before setting up a gaging operation for extremely close tolerance, verify that a high level of accuracy is really necessary.
5. Will your process be subject to a gage repeatability and reproducibility study, and if so, how will it be structured? If passing GR&R is required, discuss those details with your gage supplier.
6. How important is gaging throughput? If a fixed gage will save 1,000 hours of labor over the course of a production run, it may pay for itself.
7. How long is the particular job going to last? If the job has a short life, high-throughput measurement may be too costly.
8. How about flexibility? Sometimes it’s appropriate to buy a gage based on overall shop requirements instead of one that measures a specific dimension with optimal efficiency. Will fast changeover be needed, or are production runs long?
9. What will you do with the readings?
10. How important is ease of use? Especially for shopfloor gaging, you want to reduce the need for skill and the possibility of operator influence.
11. Is your ideal gage one that can be maintained, or is it a throwaway? Gages that can be reset to a master to compensate for wear are generally more economical, but may require frequent mastering.
12. Is the part dirty or clean at the stage when you want to measure it? That may affect labor requirements, maintenance and the level of achievable accuracy, or it might steer you toward air gaging, which tends to be self-cleaning.
13. Will the gaging environment be subject to vibration, dust or changes in temperature?
14. Would it be better to bring the gage to the part, or vice versa?
15. What happens to the part after it’s measured? Are bad parts discarded or reworked? Is there a sorting requirement? Is there potential for automated parts handling to improve efficiency.
16. Is the part compressible? Is it easily scratched? Many standard gages can be modified to avoid such influences.
17. Does the machine tool impose certain geometric and surface finish irregularities that require measurement? If so, what is the nature of these deformations? Are there lobing conditions that may affect the gage type?
18. What kind and grade of master do you need? The class is determined by the 10-to-1 rule, but this time in comparison to the gage, not the part.
19. What about master materials? This will depend on your gaging environment. Steel is preferred where there is temperature cycling. Chrome plating protects against corrosion. Carbide is highly resistant to abrasion and corrosive chemicals.
20. What’s your budget? If you absolutely cannot come up with the funds for the gaging solution of your dreams, you’ll have to go back over these questions to see where you can compromise.
21. Is there a need for the operator to measure the part in the machine?
22. Is the gaging to be part of an automated process? Will the gaging be robot-loaded?
23. Is speed critical? How many parts need to be measured per hour/day/week?
24. What’s the surface finish of the part? How compatible is it with part tolerance, gaging, etc.?
25. Will the part’s size require special handling?
26. Is it important to measure relative to the axis base on centers or diameters?
All of these questions may be important in considering what gaging solution to choose and instituting the inspection program. Answer as many as you can to help narrow the field.
Read Next
5 Rules of Thumb for Buying CNC Machine Tools
Use these tips to carefully plan your machine tool purchases and to avoid regretting your decision later.
Read MoreBuilding Out a Foundation for Student Machinists
Autodesk and Haas have teamed up to produce an introductory course for students that covers the basics of CAD, CAM and CNC while providing them with a portfolio part.
Read MoreRegistration Now Open for the Precision Machining Technology Show (PMTS) 2025
The precision machining industry’s premier event returns to Cleveland, OH, April 1-3.
Read More


.png;maxWidth=150)


.png;maxWidth=300;quality=90)

.jpg;maxWidth=300;quality=90)


