Gaging Compressible Materials
Meeting exacting thickness tolerances is just as important for non-metal products.
Share


For most of us, making simple dimensional measurements is pretty basic: grab the item to be measured, get the micrometer, place the two together and let the measuring process begin. As most of us work in the metalcutting industry, we don’t often give much thought to those other manufacturers out there who work with compressible materials and for whom these basic measurements are not so “simple.” But you never know when the need might arise.
Manufacturers who work only with metals should realize they are not alone in their concern for accuracy: the shirt on your back, the newspaper you read this morning and the garbage bag you tossed it in, the water bottle, and the wiener are all produced to exacting thickness tolerances. Even the skin on your bratwurst has to be controlled. Not meeting these exacting tolerances can be costly in one of two ways. If the material is too thin, the result could be exploding bottles, see-through yoga pants or bursting bratwurst. Too thick, and the extra material costs could eat any profits from the product.
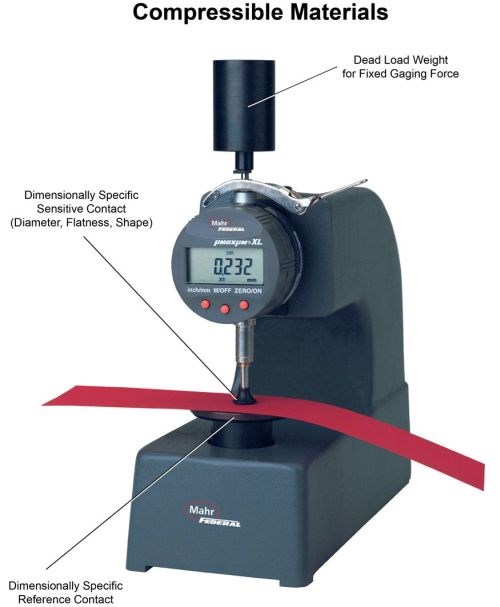
Differences in gaging pressure translate readily into differences in the degree to which the sensitive contact compresses or penetrates the material being gaged. It is therefore essential to use a standardized method when measuring the thickness of compressible materials. Every industry and every kind of material has its own standards, most of which have been established by the American Society for Testing Materials (ASTM) or by Underwriters Laboratories. These standards specify the size of the reference table and the measuring contact (or foot), the dial gradations, and the amount of force to be used. (Gaging force is controlled by a weight rather than with the springs found in most dial indicators to ensure consistency of compression). They make purchasing decisions quite straightforward: Often you need only specify which ASTM standard you wish to meet.
Assuming you have the right gage for your material, making accurate measurements of compressible materials is not difficult if you follow a few basic guidelines:
First, the anvils must be parallel. If they are not, they will compress the material at an edge rather than across a flat surface. To check for parallelism, close the contacts and try to shine a flashlight through them. Parallel contacts allow no light to shine through; any lack of parallelism is readily apparent down to about 0.0001 inch. Check front to back and side to side.
It is difficult to hold larger contacts—say those larger than 1/2 by 1/2 inch—in alignment with the light source, however, and the visual method may fail to reveal problems such as an upper foot with a worn center or a chipped edge.
If you need more accuracy, or if visual inspection reveals a lack of parallelism and you want to measure it, use this method: Place a precision wire of 0.010- or 0.020-inch diameter under the front edge of the upper foot, and zero the indicator. Then retract the contact, place this “master” under the rear edge, and repeat the measurement, noting the variation. Repeat for left and right sides also.
Some gages have machine screws to adjust the reference table into parallel with the upper foot. On those gages that do not, the common solution is to file down either the boss that holds the indicator to the frame, or the shoulder against which the reference table support is clamped.
Second, after checking for parallelism, make sure the contacts are not contaminated. This is a common source of error. As in any gaging procedure, the contacts must be kept clean of dirt, lint or hair. When measuring materials such as polyethylene film—which may have been in liquid form only minutes before—beware of the buildup of chemical deposits on the contacts. As with any textile product, frequently clean lint off the contacts.
Third, check for gage repeatability by checking several points on the surface of a known consistent sample. Most gages for thin materials do not need to be mastered. Simply “zero” the gage against the reference table. To avoid having to count dial revolutions when measuring thicker materials like acoustic tiles or carpet, use a gage block to set the zero at the nominal dimension of the material.
If a gage reads “under,” the problem is most likely a lack of parallelism. If it reads “over,” dirt is probably the culprit. Of course, other factors common to all gaging, such as friction in the mechanism or a loose fixture, can also be at fault.
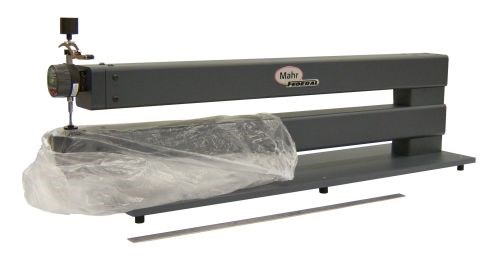
Other challenges to be considered are the shape, size, and speed of the process or time required to make the measurement. Very often a sample is cut from the large process run to get an indication of how the process is doing. However, sometimes it’s necessary to test the complete “part” to make sure it is good. For example, a large plastic bag or large filter bag may require a final manual inspection for thickness.
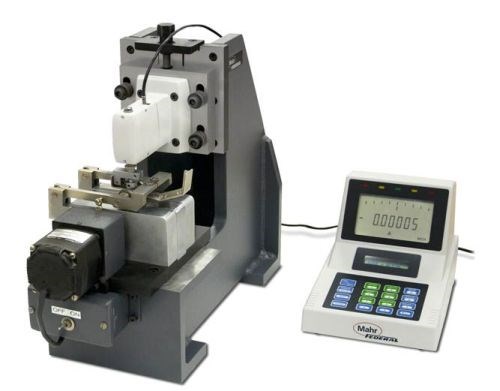
In this type of gaging, not only is the configuration of the contact and gaging pressure important, but the gage itself may require special design to get into the depth of the sample. By knowing the compressing characteristic of the material and the final form of the product, gaging can be designed to meet these critical needs.
Read Next
Registration Now Open for the Precision Machining Technology Show (PMTS) 2025
The precision machining industry’s premier event returns to Cleveland, OH, April 1-3.
Read MoreBuilding Out a Foundation for Student Machinists
Autodesk and Haas have teamed up to produce an introductory course for students that covers the basics of CAD, CAM and CNC while providing them with a portfolio part.
Read More5 Rules of Thumb for Buying CNC Machine Tools
Use these tips to carefully plan your machine tool purchases and to avoid regretting your decision later.
Read More


