Air Rings And Air Forks
Air gaging brings advantages to the manufacturing process, especially on the shop floor. In addition to speed, ease of use and the ability to automatically clean part surfaces before measuring, air gages can also measure to tighter tolerances than mechanical gages.
Share


.png;maxWidth=45)
DMG MORI - Cincinnati
Featured Content
View MoreAir gaging brings advantages to the manufacturing process, especially on the shop floor. In addition to speed, ease of use and the ability to automatically clean part surfaces before measuring, air gages can also measure to tighter tolerances than mechanical gages. At their best, mechanical gages can measure to 50 millionths, but this requires extreme care. Air gages handle 50 millionths with ease, and some will measure to a resolution of 5 millionths.
When people think of air gaging, they think of plugs. However, a number of air ring and air fork styles provide the same benefits and some additional ones as well.
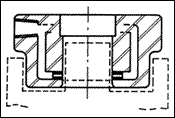
An air ring is the opposite of an air plug, and is primarily used to measure ODs. It looks simple—a steel ring with a pair of jets at a particular location—but there is a lot of engineering built into them. One trick is calculating the size of the ring to achieve a good balance of clearance between the part and the opening in the ring. Too much clearance will cause the readout to start showing centralizing error, which happens when the part is shifted slightly in the tool and the air ring measures a chord rather than the diameter. Too little clearance limits the indicator’s range. Or even worse, a geometry error can prevent the operator from inserting the part into the air tool.
There is also a good amount of engineering involved in building the proper recess in the jets to precisely position them lower than the body of the ring. This allows for ring wear, while making sure the jets are equally balanced to ensure the differential characteristics the air system needs to function.
Two-jet air rings are commonly used for measuring basic diameters. As with an air plug, the position of the jets is determined by the part being measured. The ring can act like a through-hole plug, where the jets are in the center of the ring and the part is passed through. This configuration allows for exploring the part from end to end. Sometimes there are parts with multiple ODs, such as pulleys or gears, where it is critical to measure the diameter to the face to which it’s attached. At this point, shoulder or snout-type rings, which are basically blind hole rings that position the jets as close as possible to the face for measuring the OD to its end, come into play. A snout-style goes one step further and is used when there are other clearances or obstacles to get around.
Similar to air plugs, air rings may be designed with multiple jets—three, four or six—to find lobing or average diameters.
Another design decision is whether to bring the gage to the part or the part to the gage. Air rings can be portable and held in the hand while the part is inserted. Another option is mounting the ring horizontally on a bench fixture—where it is often called a “pot gage”—and placing the part into it. For smaller parts, the ring can be mounted vertically, with vees or chutes that are used to help align the part to the gage.
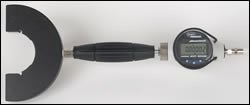
There are times when it’s not possible to just take a part and place it in an air ring. On crankshafts, for example, there are many journals—some with tolerances too tight for a mechanical snap gage—and there is no way to place an air ring over the part. When this occurs, an air fork is needed.
Making an air fork involves more than slicing an air ring in half. There are the same critical dimensions to worry about, but there are some added tricks needed to make it perform as well. One trick is to position the air jets on the expected diameter in a repeatable fashion. With an air ring, the whole inner surface acts as a part reference. With an air fork, we don’t have that luxury, so precision-ground locating stops are manufactured into the back of the fork. This creates the reference based on the expected part diameter, and it positions the jets precisely.
By customizing the position of the air jets, air forks can really begin to shine. Jets can be placed near the end of the fork so that the diameter can be measured right up to a face. Multiple jets can also be added to check two or three diameters simultaneously. With a little computing power, the three diameters can be read as one, and taper or shape can also be calculated.
So when measuring those tough ODs, you may want to put away the bench stand or mechanical snap and consider the advantage of air.
Read Next
Setting Up the Building Blocks for a Digital Factory
Woodward Inc. spent over a year developing an API to connect machines to its digital factory. Caron Engineering’s MiConnect has cut most of this process while also granting the shop greater access to machine information.
Read MoreRegistration Now Open for the Precision Machining Technology Show (PMTS) 2025
The precision machining industry’s premier event returns to Cleveland, OH, April 1-3.
Read MoreBuilding Out a Foundation for Student Machinists
Autodesk and Haas have teamed up to produce an introductory course for students that covers the basics of CAD, CAM and CNC while providing them with a portfolio part.
Read More


.png;maxWidth=150)


.jpg;maxWidth=300;quality=90)


