Working Toward Lights-Out Inspection
Contract shop PDQ is developing a process to enable its new CMM to inspect multiple parts unattended, thereby minimizing the impact that part measurement has on the company’s bottom line.
Share


Many shops are realizing the benefits of lights-out machining, having established a reliable process to enable machine tools to run unattended overnight or during the day to free operators to perform other duties while machines make chips.
Rocky Hill, Connecticut’s PDQ Inc. is currently rethinking its approach to CMM inspection to establish a lights-out measuring process to realize similar benefits.
CMM part inspection is often looked upon as a necessary evil, notes Kurt Stephens, PDQ’s quality assurance manager. Plus, in many cases, only a single part is set up on a CMM, inspected and then removed, oftentimes requiring an operator to flip or reposition the part midway through so the CMM can access all necessary part features. However, Mr. Stephens envisions a day in which, say at 2:30 p.m., a PDQ quality inspector loads a variety of parts onto the shop’s CMM, calls up and strings together their individual measurement programs, and then heads home while the CMM inspects those parts on its own.
The purpose of working toward this goal, he says, is to limit the impact part inspection has on PDQ’s profitability, as I learned during a recent visit to the Northeastern shop.
Quality Focus
Ron Gronback Sr. started PDQ (which stands for product, delivery, quality) in 1989. His son, Ron Jr., took over 15 years ago and has grown the company to $7 million in sales in 2014. The 25-person shop performs contract work primarily for the aerospace industry in which typical lot sizes are 50 pieces or fewer. Mr. Gronback continually invests in new machining equipment. Plus, most machines in the facility, which was recently expanded to 15,000 square feet, are less than 7 years old. This includes Eurotech Elite and Doosan turn-mills as well as a new Akari Seiki HMC with a six-station pallet pool to enable lights-out machining. Similarly, the shop is likely to invest in pallet changers for its five Hurco VMCs to enable longer stretches of unattended operation. In fact, PDQ is so busy that it has established partnerships with 10 other shops in the area to which it frequently sends work.
Mr. Gronback also invests heavily in PDQ’s quality department, where approximately $1.5 million in new inspection and measurement equipment has been added over the past four years. This department supports not only PDQ’s specific inspection needs, but also the needs of the 10 partner shops, leveraging PDQ’s compliance to AS 9100C:2009-01, EN 9100:2009 and JIS Q9100:2009. Nine of the company’s 25 employees work in the quality department, and the shop has recently adopted a quality inspector apprenticeship program through Connecticut’s Department of Labor. PDQ currently has three quality inspector apprentices and is only the second company in the state to implement such a program (although Mr. Stephens says it was the first to actually bring apprentices on board).
Mr. Stephens appreciates this continued investment in the quality department, but doesn’t take it for granted. He looks for ways to become more efficient to minimize the cost of part inspection. In 2013, he was given the green light to purchase a second CMM and placed an order for a ZEISS Contura. Soon after, he and a colleague attended the Eastec trade show and discovered a modular, quick-change CMM fixture system developed by Phillips Precision (Boylston, Massachusetts). This system, called Inspection Arsenal, uses standard plates that magnetically interlock like puzzle pieces to enable parts fixtured on the plates to be easily removed and replaced to speed change-overs for new inspection jobs. Not long after, Mr. Stephens experienced this lightbulb moment:
Why not lights-out CMM inspection?
Many shops use quick-change workholding devices on their CNC machine tools as part of a lights-out machining process. Mr. Stephens envisioned a similar process that would leverage the new CMM’s capability with the quick-change fixturing system to enable multiple parts to be installed on the CMM at once and then inspected unattended through the night.
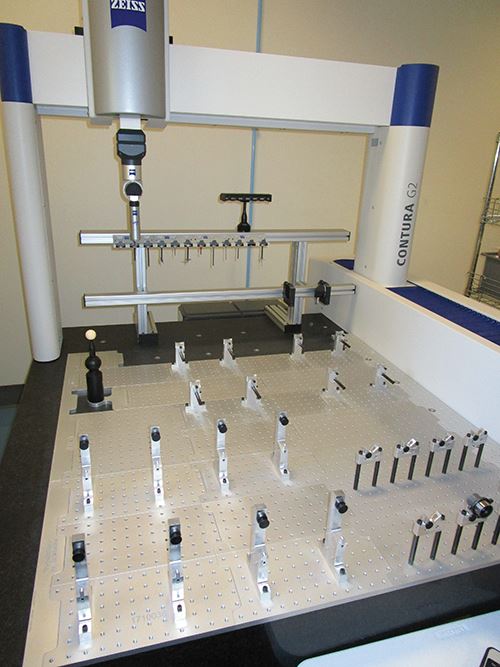
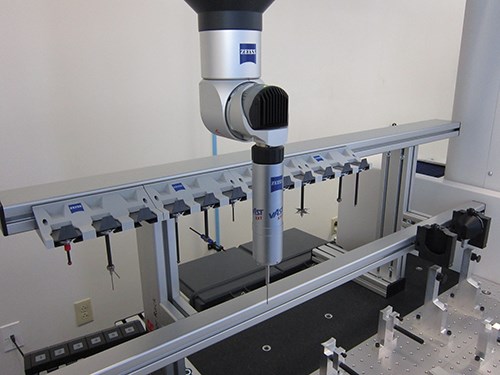
To that end, he changed his original order with Zeiss to a larger Contura model with XYZ travels measuring 1,000 by 1,200 by 600 mm. After all, a bigger table can accommodate more parts. This particular CMM has ceramic guideways for high rigidity, low thermal expansion and minimal moving weight. Floating glass ceramic scales are said to be virtually expansion-free and don’t require additional temperature sensors or mathematical compensation. The CMM also has the Vast XXT scanning sensor with RDS articulating probe holder. This probe holder enables the CMM to scan part features in a variety of angular positions in 2.5-degree increments. Mr. Stephens says this eliminates the need to purchase rotary tables or deal with their associated cables, too.
After taking delivery of the CMM, Mr. Stephens then ordered a complete Inspection Arsenal plate system. Inspection Arsenal is a collection of modular fixturing components that offers an alternative to using traditional glue, clay and tape, as well as more costly precision clamps and fixtures.
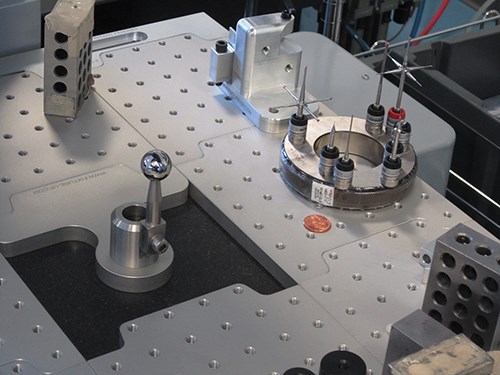
The primary design element that enables repeatable part positioning and quick-change capability is the Loc-N-Load fixture plate system. This includes a docking plate that bolts to one side of the CMM’s table outside of the probe’s travel to maximize the inspection envelope. Individual fixture plates can then be added together like puzzle pieces. These 0.5-inch aluminum plates interlock and remain tightly secured to one another via embedded steel and magnetic inserts. A plate designed to accept a qualifying sphere enables the system’s true position to be established. After that, the plate with sphere can be removed to accommodate large parts and reinstalled without requiring probe recalibration.
Mr. Stephens created a CAD model of the Contura CMM’s table, and Steve Phillips, president of Phillips Precision, created and sent him CAD models of all the Inspection Arsenal fixturing plates and standard clamping devices that the shop had purchased. Mr. Stephens and his team then looked to identify parts that the shop machined on a routine basis and worked with Mr. Phillips to develop a clamping strategy that would enable the CMM to access approximately 95 percent of those parts in one setup while eliminating the need to flip them midway through the operation.
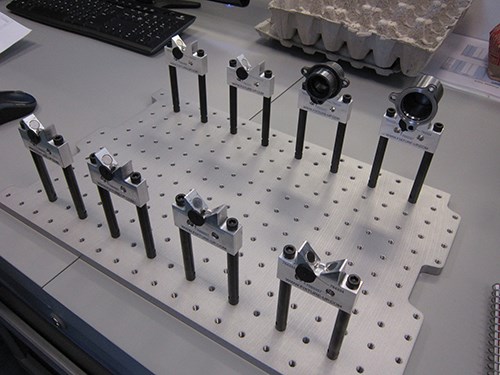
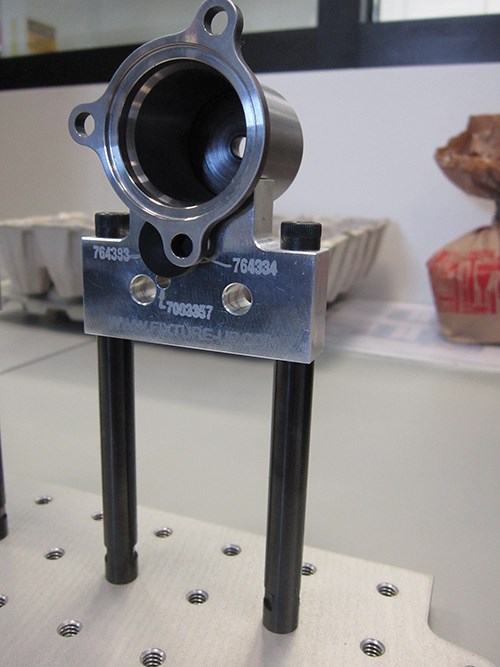
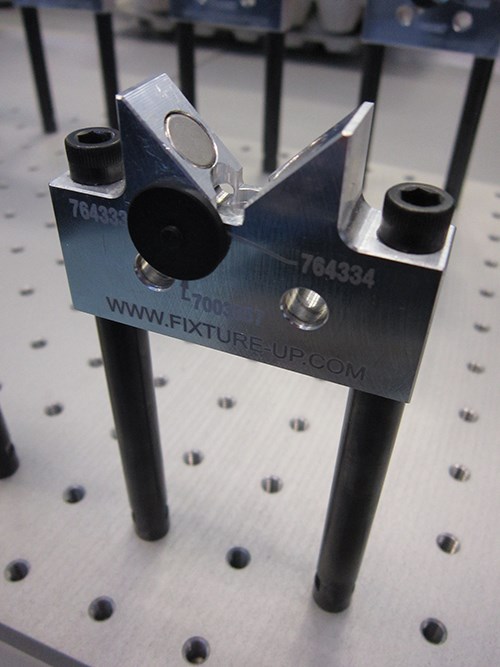
The fixture plate shown on the left is the first one developed with lights-out inspection in mind. It uses eight V-block aluminum clamps on stand-offs to hold a family of round steel housings for an aerospace application. The V-blocks have recessed magnets to hold the parts in place during inspection. That way, no mechanical clamps are needed to hold down parts from above that the CMM would otherwise have to work around. The V-blocks can also accommodate three different housing designs. A plastic pin is inserted into one of three part-specific locations identified by laser markings to ensure that the operator is installing the proper part (a poka-yoke measure) and that the part is orientated properly.
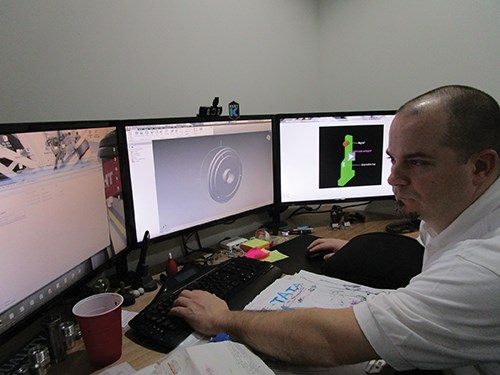
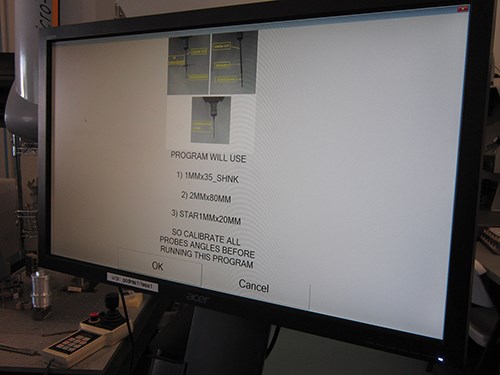
Mr. Stephens imports CAD models for the CMM table and all fixturing elements into the Calypso programming software to develop concurrent inspection routines. He sets up planes around each modeled part/fixture/plate system so the CMM knows to avoid the area around those elements. This prevents collisions with those elements when moving from one part to another. The software can also perform a simulation to ensure there will be no collisions.
The housing parts were previously measured in batches of two, with measurement taking approximately 40 minutes each. Using this new method, each part is measured in 11.25 minutes, and the CMM can inspect eight parts in one setup. Using a conservative $100 per hour quality control rate, this yields a savings of $384 per batch. Because this eight-part inspection job repeats 10 times per year, the annual savings for this three-part family is $11,523.
Mr. Stephens has since developed fixturing for other parts that commonly repeat. The beauty of this process is that once inspection programs are created for a part, it is easy to call up those models and string them together to enable the CMM to perform a number of measurement operations one after another. Because of the fixturing plate repeatability, plates can be located in various different positions on the table. Each possible plate position is assigned a location number. Mr. Stephens simply changes the CMM coordinate system to match the location of the first plate/part on the table. Once that is defined, the CMM knows the location of all the other plates/parts on its table. That also means that an operation no longer has to jog the CMM probe to the part to pick up a plane, hole location or some feature to enable the CMM to know how a part is oriented on the table.
This “drag and drop” programming capability has him looking at setting up jobs and programming a bit differently. “Now, I consider how many parts I can fixture together, how close they can be to each other, how I can access as many features in one setup as possible and how I can take advantage of the CMM’s articulating probe,” Mr. Stephens explains.
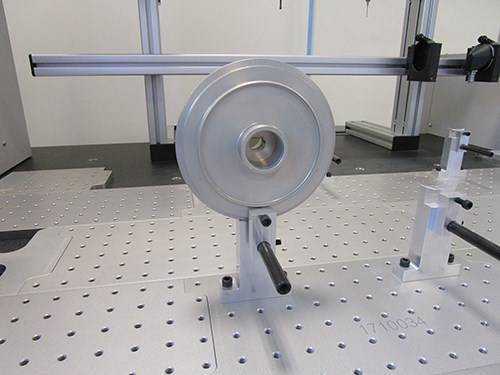
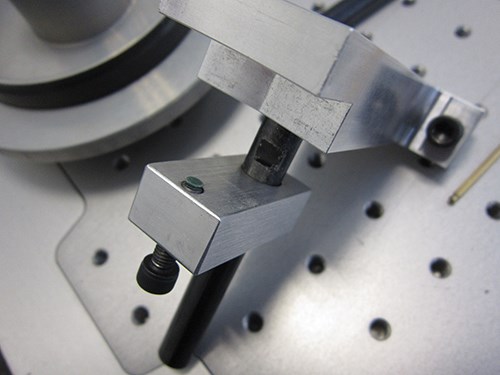
Moving forward, Mr. Stephens is creating CMM inspection fixture plates for other jobs that routinely repeat. The part shown on page 82 is an example. This clamp for a round aluminum part uses a rubber tip on the setscrew so as not to damage the part. Plus, orienting this part vertically enables the CMM to inspect both sides in one setup. This eliminates the need to flip the part to inspect the other side as would be necessary if it were clamped horizontally. The inspection time originally was 2.5 hours per piece, but now it is only 45 minutes. He plans to build a fixture rack to store dedicated plates with fixtures still in place, similar in concept to a pallet pool for an HMC.
The shop’s other smaller Tesa CMM has also been fitted with the Inspection Arsenal fixturing system. It is primarily used to perform first-article inspection or one-off-type measurement projects while enabling the larger Contura to perform longer-running inspection routines of multiple parts. Mr. Stephens says he plans to add a similar fixturing system to the shop’s Mitutoyo QuickScope vision measuring machine.
“Tools and strategies like this for part inspection let our department shine a bit,” Mr. Stephens says. “It demonstrates that we’re working to reduce the money that we’re taking out of the product for inspection—taking the expense out of quality. Given the nature of our shop’s owner, I’ll likely be afforded to reinvest that savings back into our quality department to achieve additional savings.”
That’s a huge advantage to Mr. Gronback’s approach, he notes, and is also a big reason why the shop has realized 25 to 30 percent annual growth for last 7 years.
Related Content
Using Automation to Reduce COGS and Stay Globally Competitive
Decade-long, multiphase automation investments lower operating costs and maintain technology lead in an increasingly competitive global market.
Read MorePrioritizing Workholding Density Versus Simplicity
Determining whether to use high-density fixtures or to simplify workholding requires a deeper look into the details of your parts and processes.
Read MoreChuck Jaws Achieve 77% Weight Reduction Through 3D Printing
Alpha Precision Group (APG) has developed an innovative workholding design for faster spindle speeds through sinter-based additive manufacturing.
Read MoreFixturing Castings Made Simple Through Adhesive Workholding
When a casting proved too malleable for traditional gripping, Thomas/Euclid Industries adopted — and succeeded with — Blue Photon adhesive workholding.
Read MoreRead Next
5 Rules of Thumb for Buying CNC Machine Tools
Use these tips to carefully plan your machine tool purchases and to avoid regretting your decision later.
Read MoreRegistration Now Open for the Precision Machining Technology Show (PMTS) 2025
The precision machining industry’s premier event returns to Cleveland, OH, April 1-3.
Read MoreSetting Up the Building Blocks for a Digital Factory
Woodward Inc. spent over a year developing an API to connect machines to its digital factory. Caron Engineering’s MiConnect has cut most of this process while also granting the shop greater access to machine information.
Read More

