When Probing Is Pivotal
Software for using the probe at angles expands the productive capabilities of this plant’s five-axis machine.
Share


The probe can do a lot. The spindle-mounted inspection probe that comes as standard equipment with many machining centers can be used both to reduce setup time and to inspect the part, along with other applications. Given that so few shops realize the full potential of their existing probing capabilities, it's hard to imagine that there might be a next step. But the Clearfield, Utah, Composites Center for ATK Space Systems discovered that there is indeed a next step. This plant fabricates and machines large composite structures for rockets and aircraft. For years—for more than a decade, in fact—the facility has used probing to make many of its large machine tools more versatile. Recently, the plant realized that it needed probing to become more versatile as well.
Mitch Brown is a programmer at the Clearfield plant. He says programming accounted for one of the long-standing difficulties in putting machine tool probes to use. The CAM software he uses in his office to generate tool paths for milling and drilling could not generate probing moves in the same way. These had to be created at the control, out on the shop floor, with the resulting code then copied and pasted if it was to be integrated into the machining program. More than inconvenient, this approach enlarged the opportunities for error. While the machining moves were generated by software, the probing moves were the result of information keyed in by human fingers that were prone to making human mistakes.
One other long-standing difficulty with machine tool probing became significant when the plant purchased its first five-axis machining center. Though the machine was effective for milling and drilling at odd angles of the tool, it had no corresponding capability for measuring at odd angles of the probe. The machine could measure only with the probe held at an angle of 0 or 90 degrees—horizontal or vertical, says Mr. Brown. While the plant was familiar with this limitation from its use of three-axis machining centers using angle heads, it had bought this five-axis machine to achieve more efficient machining of angles and contours than what these three-axis machines could provide. The limitation on the probe's angle meant that the capacity to efficiently inspect these angles and contours was still missing.
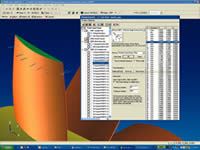
Mr. Brown found software able to solve the first problem. "ProbeDriver," created by High Tec Industrial of Polson, Montana, allows for off-line programming of probing moves within the 3D environment of Surfware's SurfCAM software (though non-SurfCAM users can make use of the software also). This software was effective enough for Mr. Brown that he was willing to help make machine time available so that the software supplier could prove out a five-axis version of the same system. High Tec Industrial developers including Mark Weber created algorithms that accurately interpret probe contacts by accounting for the programmed angle of the probe, even in cases where the angle of the probe and the direction of the probe's triggering are not square to one another. With this new software, Mr. Brown's second problem with using probing also seems to have been solved.
Five-Axis Probing
For the Composites Center, the payoff of the five-access probing software is this: It allows the plant to apply its most productive method of machining to five-axis work. Specifically, probing can be used to both locate and inspect five-axis machined features.
For example, a milled periphery machined at a steadily changing tool angle can be measured using a probe angle that adjusts from point to point. Also, a series of holes drilled at various angles can be inspected with the probe inclined to match those various angles.
Another important point is that all of the machine's travel is available for inspection. On a five-axis machine, a tilted tool can sometimes reach poorly accessible features of the part—an important benefit of five-axis machining. But when the same benefit does not apply to probing, some of the machine's travel may effectively be taken away.
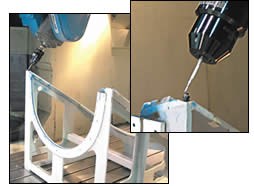
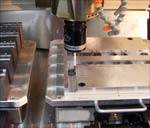
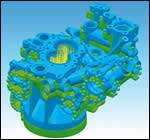
The photos above provide an illustration. Composite structures receiving precision machining work at the plant are held in fixtures such as the one shown. The fixtures include tooling balls that are probed to establish coordinate references. Design engineers place these balls wherever they can find room near critical features. In the case of the fixture shown, that meant the balls were placed high up off the table. These references are so high that the remaining travel above them is too small to accommodate the probe's length. As a result, the feature can't be probed with the probe held vertically. Similar restrictions may also prevent the feature from being probed horizontally. Therefore, holding the probe at an angle may offer the only possible way to take advantage of probing throughout the envelope of the machine.
In those cases, prior to the ProbeDriver software, the plant did have another option. The plant's "Laser Tracker" is a portable device from Leica Geosystems that uses laser measurement to achieve wireless and "armless" inspection of large, complex workpieces on the shop floor or at the machine. Because so much of this plant's work involves parts that are difficult to move, the Laser Tracker is used here frequently. In fact, Mr. Brown says the principal shortcoming of the device relates to its effectiveness. It's often booked, he says, so it has to be reserved well in advance. Another problem is the expense; the plant bills use of the device at $150 per hour. According to Mr. Brown, inspecting the part held in the fixture shown would take about 4 hours. However, once it became possible for the plant to use the probe freely at various angles, the same part could then be inspected in 30 minutes through probing. Those 30 minutes do not have to be reserved in advance, and they do not even require an operator to carry out the measurements. To a significant degree, probing is a more efficient means of inspecting this work.
Self Inspection?
Wait a minute. While probing for setup may be one thing, inspecting with the probe is something else altogether. How can the same machine that did the cutting be trusted to inspect its own work?
Mr. Brown says ATK has been inspecting critical parts this way for more than 15 years.
The key is to use a certified machine tool. Independent inspection of the machine makes it possible to get away from independent inspection of the work. Periodically (that is, once every 6 or 12 months, plus after any crash), the plant certifies a machine tool's accuracy through laser inspection. Before every new cycle, the machine also confirms its own accuracy by probing a known reference within the work zone. Finally, the first part in any run is independently verified with the Laser Tracker, though that step may disappear in the future. Together, all of these steps provide more than enough basis to let the plant trust its machine tools to inspect their own work.
Existing Investment
To some, a function such as machine tool probing might seem to be too narrow and specific of a detail within the machining process to justify the use of special software. Mr. Brown says that view undervalues the importance of probing to his plant's process. The probe saves time and cost by speeding setup, and by eliminating much of the need for independent inspection.
There is also the investment the plant has already made. Many new machining centers come with a probe. Mr. Brown estimates that his facility currently has $100,000 worth of probes in-house. If any single piece of equipment costs that much (a machine tool, for example), then few would question the value of using software to let that investment deliver a better return, he says.
Related Content
Lean Approach to Automated Machine Tending Delivers Quicker Paths to Success
Almost any shop can automate at least some of its production, even in low-volume, high-mix applications. The key to getting started is finding the simplest solutions that fit your requirements. It helps to work with an automation partner that understands your needs.
Read More5 Tips for Running a Profitable Aerospace Shop
Aerospace machining is a demanding and competitive sector of manufacturing, but this shop demonstrates five ways to find aerospace success.
Read MoreCNC Machine Shop Honored for Automation, Machine Monitoring
From cobots to machine monitoring, this Top Shop honoree shows that machining technology is about more than the machine tool.
Read MoreAdditive/Subtractive Hybrid CNC Machine Tools Continue to Make Gains (Includes Video)
The hybrid machine tool is an idea that continues to advance. Two important developments of recent years expand the possibilities for this platform.
Read MoreRead Next
Release The Potential Of Your Machine Tool
Probing can improve OEE in many different ways throughout the machining cycle. (Sponsored Content)
Read MoreCAM Software For Probing
Software for creating probing routines off-line promises to make machine tool probing easier to use. As a few examples show, different software providers look at this off-line programming in different ways.
Read More5 Rules of Thumb for Buying CNC Machine Tools
Use these tips to carefully plan your machine tool purchases and to avoid regretting your decision later.
Read More


