Volumetric Compensation for Aerospace Applications
Präwest needed to improve machine tool accuracy. Etalon's LaseTracer-NC and KinematicsComp from Heidenhain enabled the shop to make dimensionally accurate workpieces without readjustments.
Share


In order to implement a sophisticated manufacturing strategy for five-axis milling of complex parts, Präwest Präzisionswerkstätten of Bremen, Germany, began grinding tools in house and building its own six-axis milling machines with parallel axes. However, even though these machines were well constructed, their geometrical accuracy was not meeting demands. By capturing the machine tools’ volumetric deviations with the LaserTracer-NG from Etalon AG (which has a North American subsidiary in Kirkland, Washington) and compensating them through the KinematicsComp software option in Heidenhain Corp.’s machine controls, Präwest can provide dimensionally accurate workpieces without any readjustments.
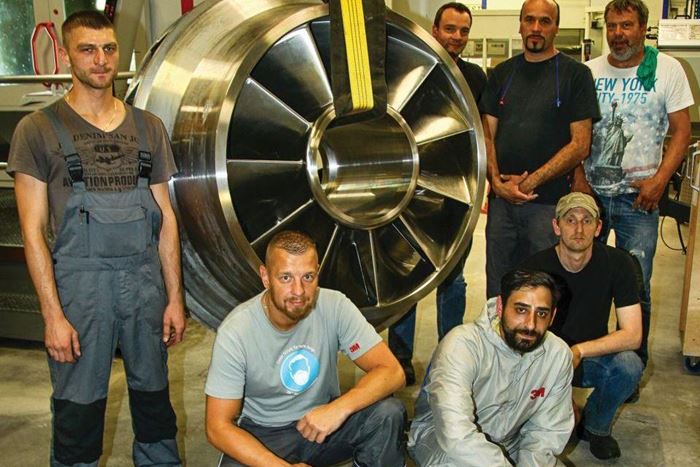
A contract manufacturer whose customers include MTU, Rolls-Royce and Mitsubishi Heavy Industries, Präwest produces impellers, blisks, turbine shovels and aerospace structural components. The company also produces workpieces for the oil and gas sector.
“We solely manufacture parts with complex characteristics,” says Gaylord Klammt, head of business area industry. “Everything the market considers exceptional would be a standard issue for us.” For example, the workpieces often are extremely big and heavy; include complicated geometries; are made from difficult-to-machine materials such as Inconel 718; or necessitate additional processing, such as chromate coating or heat treatment, even for a batch size of one. It is often necessary to apply several hundred tools, including milling tools with lengths ranging to 900 mm, as well as 60 programs or more to turn a single workpiece to the desired shape and dimensions, he says.
To optimize the production of these high-precision parts, Präwest built its own large, six-axis milling machines with parallel axes, but the company’s milling experts soon detected systematic geometry errors of the linear and rotary axes. These deviations may be acceptable on small machine tools with wide manufacturing tolerances, but for Präwest, systematic errors from different sources add up to an unacceptable total error, partly due to large movements in the six axes and partly due to the immense size of the tools.
“When machining big workpieces, you mill in different sectors and finally meet in the middle. Many parts require reversal and reclamping during manufacturing, which also leads to imprecision. When mismatch occurs, our staff has to rework the part or adjust the programming, which costs money and time,” Mr. Klammt says. Because it produces small batches and uses expensive materials, Präwest cannot test-run the NC programs. Instead, it needed to figure out how to produce dimensionally accurate parts that measure longer than 2 meters while meeting accuracy tolerances of ±0.05 mm (±0.002 inch) in six axes of movement.
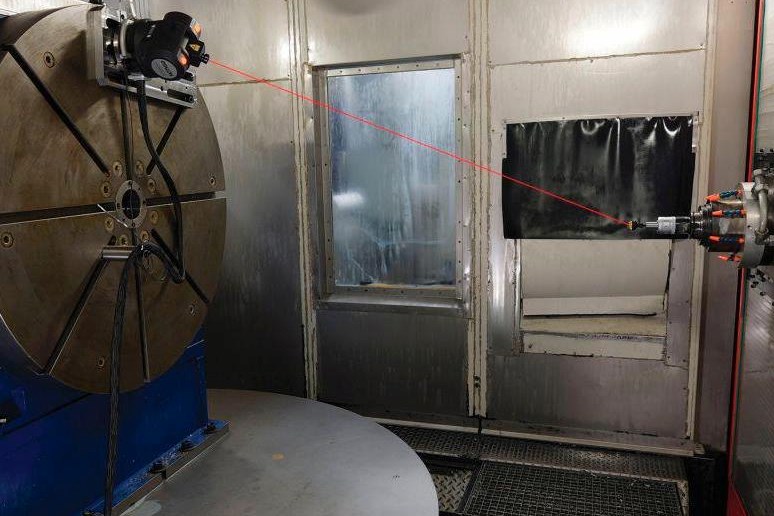
Präwest found the solution in Etalon’s self-tracking laser interferometer, which is specifically designed to increase the accuracy of machine tools by means of volumetric compensation. With Etalon’s technology, it is possible to calculate exact compensation values for spatial errors in all degrees of freedom. With micrometer accuracy, the system analyzes position, straightness and rotation errors (pitch, yaw and roll), and squareness between the axes in the whole working volume of the machine tool. Angular positioning deviations, axial and radial movements, and wobbling of the rotational axes are comprehensively recorded as well. Thus, the LaserTracer-NG is designed to differ from conventional laser interferometers that require elaborate aligning and generate a large amount of work to determine pitch, yaw and roll, the company says.
After acquiring measurement data, Etalon’s software calculates the volumetric compensation data. As it is interfaced with the machine controller, this data is automatically transferred to the machine.
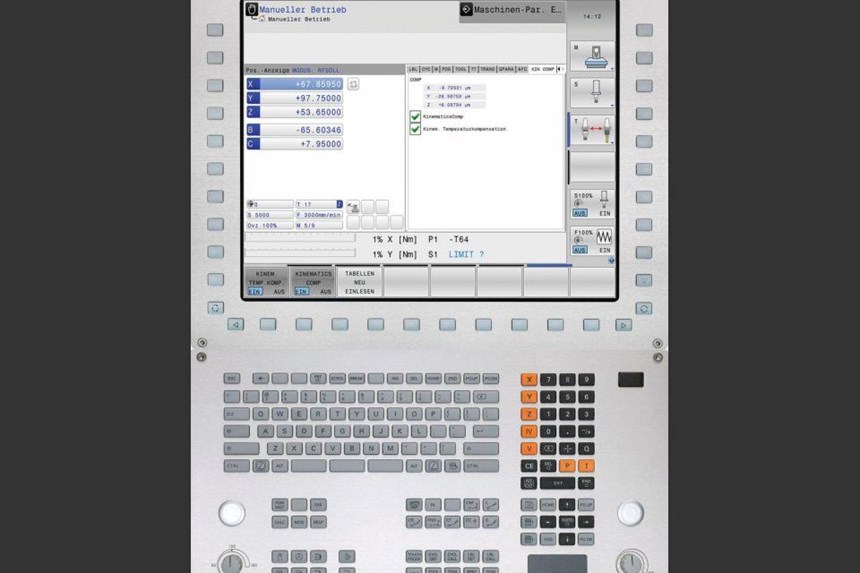
The KinematicsComp software option from Heidenhain (Schaumburg, Illinois), which is available for the company’s TNC 640 and iTNC 530 controls, corrects the kinematic description of the machine tool. “KinematicsComp makes it possible to store a detailed description of the machine errors in the control. Subsequently, it automatically compensates the position errors that result from static errors of the physical axes. It considers the positions of all rotary and linear axes as well as the current tool length,” Heidenhain’s Gero Günther says. “This procedure increases the precision of the tool center point in the whole working space.”
Mr. Klammt invited both Etalon and Heidenhain to conduct test measurements before implementing this new measurement method and was impressed by the results. “Suddenly, this milling machine started to produce with geometrical perfection. Furthermore, we were able to understand the weak points of the machine, which was a true breakthrough with respect to manufacturing quality, contour accuracy and process reliability. After the test measurement, we quickly decided to acquire a LaserTracer-NG system plus KinematicsComp,” he says.
The LaserTracer-NG high-resolution interferometer automatically follows a reflector and continuously measures the distance to it. The system’s center-of-rotation accuracy is realized by means of a reflective sphere with a form uncertainty of less than 0.1 micron. The beam guide ensures that this sphere can serve as reference for the interferometric displacement measurement, which is conducted with high dimensional precision to the tool center point (TCP), the company says. Consequently, mechanical deviations of the rotation and swivel axes are also acquired with high precision. Measuring uncertainty for spatial displacement (95 percent) amounts to 0.2 micron + 0.3 micron per meter.
According to Stephan Kunath, head of industrial machine tooling at Präwest, Etalon’s training helped turn the seemingly complex measurements into a routine for him. He says he can do the whole compensation of a large six-axis machine on his own in a very short period of time. First, he places the compact LaserTracer-NG in the machine several times without any particular fine alignment. Instead of a tool, the reflector is clamped in the spindle. Then, the measurement system is ready to start the automated measurement process, tracking the actual path of the machine in its entire working volume. The required NC programs are automatically generated by Etalon’s software, and the respective distances to the tool center point are determined interferometrically. Etalon’s system transfers the recorded data to the connected Trac-Cal measuring software, which automatically analyzes that data and transfers the volumetric compensation values to the Heidenhain iTNC 530 controller via KinematicsComp.
Präwest conducts volumetric compensation in predefined intervals and on demand. For instance, whenever deviations are discovered in preliminary stages of production that cannot result from any other processes, the company conducts volumetric compensation, Mr. Klammt says. Previously, iterative adjustments were part of the process. Today, the LaserTracer-NG and KinematicsComp make this superfluous, he says.
Performing volumetric compensation on milling machines has improved the geometric accuracy of the workpiece significantly, particularly when machining complex parts, Mr. Klammt says. “We are speaking about dimensions that would never have been possible with other methods.”
Thanks to the improved machining accuracy, Präwest is planning to begin prototype manufacturing for the aerospace industry. “Our customers long for the highest precision. Meanwhile, we want to keep up our profitability,” Mr. Klammt says. “Thanks to volumetric compensation, we are in the position to realize maximum quality in production with manageable effort, even in the case of extremely tight geometric tolerances. The technology helps us reliably uphold our reputation as a precision manufacturer.”
Related Content
Can AI Replace Programmers? Writers Face a Similar Question
The answer is the same in both cases. Artificial intelligence performs sophisticated tasks, but falls short of delivering on the fullness of what the work entails.
Read MoreERP Provides Smooth Pathway to Data Security
With the CMMC data security standards looming, machine shops serving the defense industry can turn to ERP to keep business moving.
Read MoreCan ChatGPT Create Usable G-Code Programs?
Since its debut in late 2022, ChatGPT has been used in many situations, from writing stories to writing code, including G-code. But is it useful to shops? We asked a CAM expert for his thoughts.
Read MoreOrthopedic Event Discusses Manufacturing Strategies
At the seminar, representatives from multiple companies discussed strategies for making orthopedic devices accurately and efficiently.
Read MoreRead Next
Setting Up the Building Blocks for a Digital Factory
Woodward Inc. spent over a year developing an API to connect machines to its digital factory. Caron Engineering’s MiConnect has cut most of this process while also granting the shop greater access to machine information.
Read More5 Rules of Thumb for Buying CNC Machine Tools
Use these tips to carefully plan your machine tool purchases and to avoid regretting your decision later.
Read MoreBuilding Out a Foundation for Student Machinists
Autodesk and Haas have teamed up to produce an introductory course for students that covers the basics of CAD, CAM and CNC while providing them with a portfolio part.
Read More



.jpg;maxWidth=300;quality=90)


