Traceability Without the Paper Trail
A digital system makes it faster and easier to find, sort and glean insights from measurement tool usage and calibration data.
If a customer asked which gage was used to inspect a particular feature of a particular part shipped weeks or even months ago, would you have an answer? What if the customer required that answer within an hour?
The potential of a scenario like this prompted Arundel Machine Tool, a contract machine shop in southern Maine, to rethink how it tracks measurement tool usage and calibration data. Bill Plamondon, quality management system director, says moving from a paper-based to a digital system ensures the answer to both customer questions will always be “yes.” Called Gagetrace, this system also provides deeper insight into data and the capability to adjust calibration schedules with the click of a button.
This isn’t to suggest that Arundel’s previous measuring tool traceability practices were sloppy. On the contrary, the shop’s work includes a niche of aerospace and defense parts so sensitive that visitors are likely to see customer and government inspectors working side-by-side with Arundel’s own. The company never would have gotten this far without being able to answer “yes” to the first question, Mr. Plamondon says. As for the second, the problems with the previous system had more to do with tools than process or philosophy. Paper databases can’t be searched in an instant, he points out. Even the most meticulous record-keeping practices do nothing to prevent difficulties with reading human handwriting. Finally, he says scanning barcodes is easier—and takes less time—than dealing with a system of paper stickers.
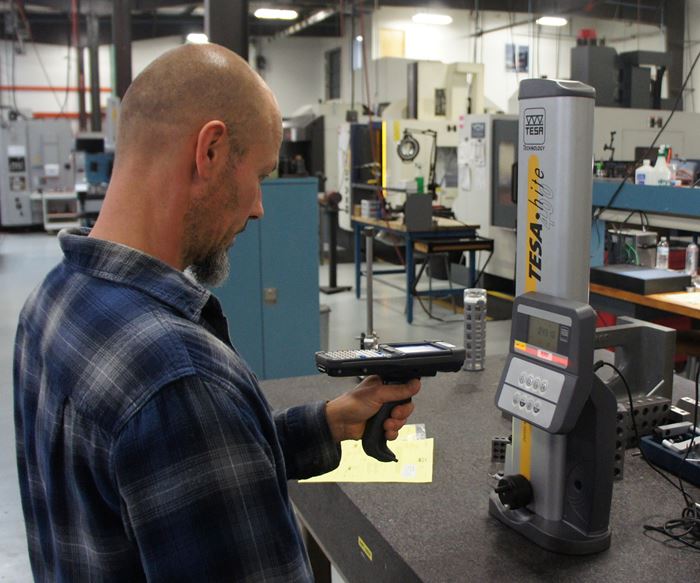
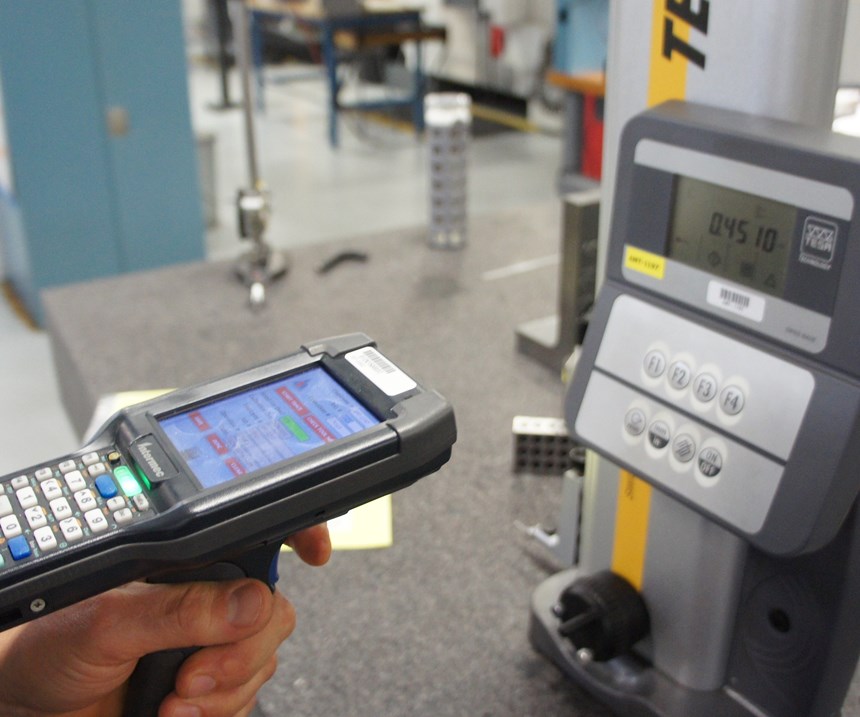
This scanning is accomplished via handheld units like those commonly seen in sectors ranging from retail to logistics. “Companies like Amazon use these for inventory, and in this sense at least, our measuring tools can be thought of as just another form of inventory,” says company President Marcel Bertrand about the inspiration for using scanners and barcodes. The scanners interface with custom software that tracks data including usage dates; identification numbers for devices, employees, jobs and operations; the number of devices available; device status (whether they’re ready for use); calibration due dates; and archived data for all of these inputs.
Whereas paper provides only historical data, this information is all in real time. This facilitates instant determination of a tool’s location, how many tools are available, which gages were used for which operations on which parts, and more. Beyond that, Mr. Plamondon says the system’s data filters make it easier to determine quickly which tools tend to be used more than others, citing the example of a thread-plug gage with a particularly ergonomic grip. Insights like this can inform future purchases, or expose the need for a change in technology or technique. He adds that the system has proven particularly advantageous when calibration schedules change, whether in response to particular customer or job requirements or to insights gleaned from the data (say, tightening the calibration schedule for a gage that’s used particularly heavily). After all, what once required replacing individual, dated stickers on each and every device now requires only a keystroke, even for multiple measuring tools.
Gagetrace can’t be purchased. Arundel opted to build the system from the ground up, leveraging the services of an outside developer for the custom software. Developing the system in house has provided a level of flexibility that likely would have been more difficult to obtain with an off-the-shelf system, Mr. Plamondon says. A prime example is the relatively common scenario of two machinists who need to use identical measuring devices at the same time. If only one is available, or if the machinists are working near one another, both can “check out” the same device at the same time.
Gagetrace is just one example of Arundel Machine Tool’s recent efforts to improve traceability and quality control, both of which are critical to serving customers in a new niche of function-critical work for nuclear submarines, airplanes, oil wells and more. This article provides more information on the company’s new CMM technology, and how it’s set itself up to compete in an exclusive niche of function- and safety-critical work.
Related Content
How to Evaluate Measurement Uncertainty
Manufacturing and measurement are closely coupled. An important consideration for the use of measurement results is the associated measurement uncertainty. This article describes common metrology terms and provides an example uncertainty analysis.
Read MoreHow to Calibrate Gages and Certify Calibration Programs
Tips for establishing and maintaining a regular gage calibration program.
Read More4 Ways to Establish Machine Accuracy
Understanding all the things that contribute to a machine’s full potential accuracy will inform what to prioritize when fine-tuning the machine.
Read MoreParts and Programs: Setup for Success
Tips for program and work setups that can simplify adjustments and troubleshooting.
Read MoreRead Next
Registration Now Open for the Precision Machining Technology Show (PMTS) 2025
The precision machining industry’s premier event returns to Cleveland, OH, April 1-3.
Read More5 Rules of Thumb for Buying CNC Machine Tools
Use these tips to carefully plan your machine tool purchases and to avoid regretting your decision later.
Read MoreThe Future of High Feed Milling in Modern Manufacturing
Achieve higher metal removal rates and enhanced predictability with ISCAR’s advanced high-feed milling tools — optimized for today’s competitive global market.
Read More


.jpg;maxWidth=300;quality=90)


