5 Tool Setting Techniques
Each tool setting technique has merit, and it depends on where you are as a shop and the type of work you do, as cost and efficiency all come into play.
Share


.png;maxWidth=45)
DMG MORI - Cincinnati
Featured Content
View More
Takumi USA
Featured Content
View More


Reader Question: There are so many options for setting tools, both in and out of the machine. Can you offer some thoughts on your favorite solution and why?
Miller’s Answer:
As far as techniques and equipment we can use to set tools, you’re right that there are several to choose from. You can set tools utilizing the machine table, often referred to as “touching off” tools. There are automatic solutions like contact and non-contact, which are integrated into the machine tool. Then there is presetting, which utilizes a dedicated piece of equipment outside of the machine. Of course, I have my favorite solution, but I think each one has merit, and it depends on where you are as a shop and the type of work you do. A startup with one machine and a production shop with a dozen should view these differently, as cost and efficiency all come into play. Let’s get into the merits and considerations of all before I give my personal preference.
Manual Tool Setting
Touching tools off the table is a technique we should all have available in a pinch; however, it’s not a strategy you should keep for long. This is a very simple and cost-conscious solution for a new shop or a machinist getting their footing in the industry, but other than its low cost (free), the problems are steep. First, it is somewhat subjective as it requires the operators feel for the shim or gage pin under the tool to be the final say in the tool’s length, which can present problems for consistency. It can be prone to error as it requires manual data entry, and it is very slow. It could take an hour or more to set tools for an entire magazine’s worth of tools, which impacts your ability to turn over jobs. There are nifty tools like on-table switches that can help speed this up and take some of the subjectivity out of the process, but these aren’t permanent to the machine, which means they may give slightly different readings as they are used from setup to setup.
Automatic Tool Setting
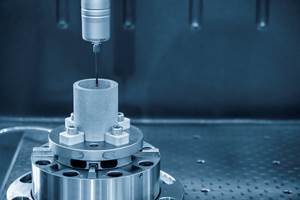
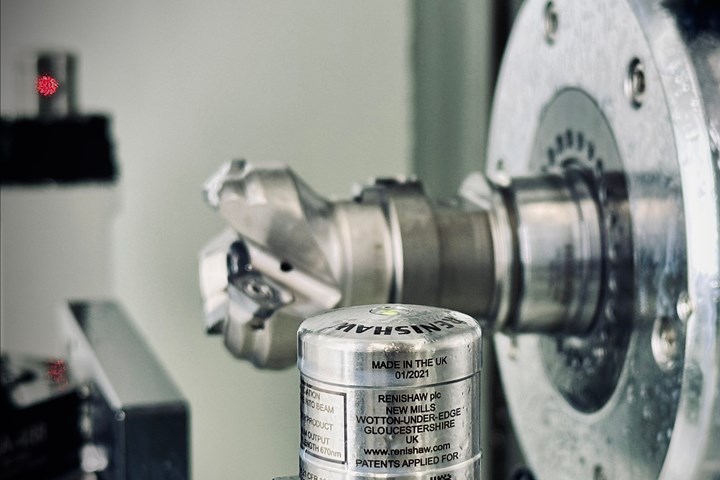
In-machine solutions for tool setting are the norm now and are available in contact and non-contact types. They operate in a similar manner by running custom macro programs that drive tools to the setter, and measure and report data automatically within the controller. They can be used for broken tool detection and can also measure tools in a warm machine to capture current spindle growth for the most accurate tool lengths. However, for both types, it’s important to note there is added cost, and tools can’t be measured while parts are being cut. The spindle can only do one job at a time, so setup time, while reduced, is still longer than setting the tools offline. As far as which to choose between contact and non-contact, there are pros and cons to each.
Contact Tool Setting
Contact tool setters can be faster than non-contact solutions and are great for fast broken tool detection. They are much simpler to implement and often can be removed from the machine if needed after setting your tools to increase space on the table for larger jobs; however, they can often be harsh on the most delicate end mills and drills, and they measure with a static spindle, which influences accuracy.
Non-Contact Tool Setting
Non-contact tool setters are basically the inverse. They are more expensive, fixed to the table, a little slower, more difficult to implement and sometimes suffer from erroneous coolant influence; however, once installed they are incredibly accurate. The biggest benefit is that they can measure tools at the service rpm, which can improve accuracy by accounting for taper suck in (tools pulling in further as rpm increases). They are also the best solution for small, delicate tooling.
Presetting
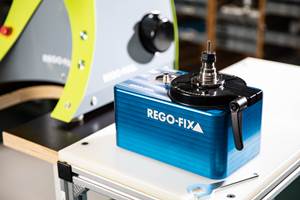
Presetting tools comes with a number of benefits if you can accept the added cost. The primary benefit is the ability to handle tool measurement duties outside of the machine, which means the next job can be prepped while a current job is running. Presetters also give a unique up-close view or silhouette of the cutting edge, which can alert you of worn tools before they get into the machine. Presetters are much better at measuring complex shapes of form tools vs other solutions which only focus on the tip of the tool. They can be upgraded to complement existing automation or ERP systems through CAM integration, barcode readers or RFID chips. For production-oriented shops, a presetter can also be programmed, which promotes better process control across multiple operators and shifts and acts as a preflight check before a bad tool is inserted in the process. It also has the benefit of enabling spare tooling to be setup and ready, so the reaction time between a broken tool and a fresh one in the machine is very quick.
I’ve seen shops utilize one, some or all these solutions in different ways and all have merit. My favorite solution is to have a presetter to enable faster setups and detailed pre-process inspection, and an in-machine non-contact solution for the most critical tools and blends. This is obviously the most expensive solution, so to be more reasonable, I think what’s most important is your shop doesn’t leave this part of the process behind as you invest in other areas. The solution that is best or cost effective for your shop now should evolve with your machines over time to compliment your overall shop goals.
Do you have a machining question? Ask the expert. John Miller leans on more than a decade of industry experience to answer machining questions from MMS readers. Submit your question online at mmsonline.com/MillersEdge.
Related Content
Five Common Mistakes Shops Make with ER Collets (And How to Prevent Them)
Collets play a crucial role in the machining process, so proper tool assembly and maintenance is important. Here are five potential pitfalls to avoid when using ER collets.
Read MoreOrthopedic Event Discusses Manufacturing Strategies
At the seminar, representatives from multiple companies discussed strategies for making orthopedic devices accurately and efficiently.
Read MoreParts and Programs: Setup for Success
Tips for program and work setups that can simplify adjustments and troubleshooting.
Read MoreCustom Workholding Principles to Live By
Workholding solutions can take on infinite forms and all would be correct to some degree. Follow these tips to help optimize custom workholding solutions.
Read MoreRead Next
Registration Now Open for the Precision Machining Technology Show (PMTS) 2025
The precision machining industry’s premier event returns to Cleveland, OH, April 1-3.
Read MoreSetting Up the Building Blocks for a Digital Factory
Woodward Inc. spent over a year developing an API to connect machines to its digital factory. Caron Engineering’s MiConnect has cut most of this process while also granting the shop greater access to machine information.
Read More5 Rules of Thumb for Buying CNC Machine Tools
Use these tips to carefully plan your machine tool purchases and to avoid regretting your decision later.
Read More




.jpg;maxWidth=300;quality=90)


