Today’s Overkill May Be Tomorrow’s Competitive Edge
In the process of significantly advancing on-machine probing capabilities, this shop has set itself up to achieve future goals as well.
Share


Dynamic Tool & Design has yet to realize the full capabilities of its new on-machine probes and software.
Although the future is always uncertain, Dynamic Tool & Design is a shop that knows where it wants to go, and it’s not afraid to invest in order to get there. At least, that’s the message I took from this plastic injection mold manufacturer’s recent addition of on-machine probing capabilities that exceed anything required on the floor right now.
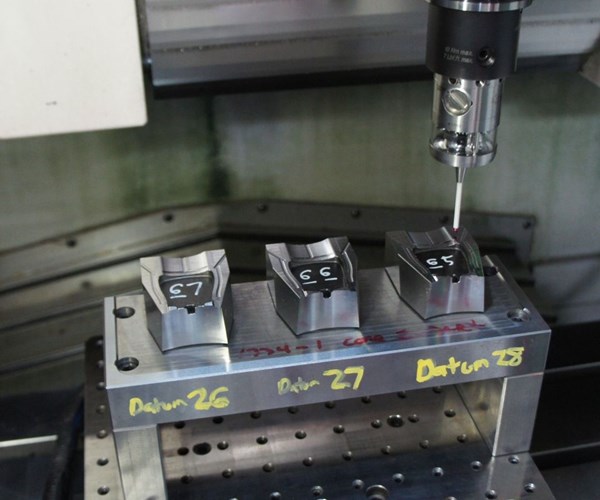
That investment consisted of new probes and software for hard milling machines, graphite milling machines and sinker EDMs. As detailed in this June-issue feature article, this technology was required to move beyond just “indicating” workpieces (i.e., “finding zero”) and into full 3D part measurements. In turn, capability for these measurements has reduced downtime on individual machines and boosted the shop’s overall throughput.
However, the article quotes John Kemeny, hard milling department supervisor, as saying that the PC-DMIS software driving the probes is “overkill to some extent.” Purchased along with the new probes from Hexagon Metrology, this is the same system used to program the shop’s CMM, and it’s no less powerful. In fact, only a portion of the software’s capability is required for in-process inspections that are more about avoiding errors and keeping the process moving than passing final judgment on mold components and electrodes. Although these inspections could also be performed with the shop’s previous on-machine metrology software, or perhaps another less costly and less capable system, the investment in PC-DMIS was about more than what’s needed today. Leadership was also thinking about how the process might look tomorrow.
Currently, the 13 automated machines targeted for new probes stand alone with their carousel-style robots. Unlike the shop’s previous software, PC-DMIS could potentially enable these physically isolated workstations to automatically share offsets and other data gleaned from in-process measurements via standardized pallets with radio-frequency identification (RFID) tags. This capability could potentially also ease a transition toward multi-process cells that incorporate multiple machines of different types, should the shop choose to go that route. The software can also accommodate five-axis motion, were the shop to ever invest in that type of machine. And whatever the future holds, using the same software for both floor inspections and final quality control helps ensure no discrepencies with measurements taken on the CMM.
First, of course, the rest of the 13 machines have to be fitted with probes (so far, only four have been equipped). Regardless, Dynamic Tool’s journey so far reveals a shop that’s anything but short-sighted when it comes to technology investment. After all, recognizing the benefits of on-machine verification in the first place can require an open mind and a willingness to challenge preconceived notions. Learn more in the article.
Related Content
-
Rethink Quality Control to Increase Productivity, Decrease Scrap
Verifying parts is essential to documenting quality, and there are a few best practices that can make the quality control process more efficient.
-
Orthopedic Event Discusses Manufacturing Strategies
At the seminar, representatives from multiple companies discussed strategies for making orthopedic devices accurately and efficiently.
-
The Link Between CNC Process Control and Powertrain Warranties
Ever since inventing the touch-trigger probe in 1972, Sir David McMurtry and his company Renishaw have been focused on achieving process control over its own manufacturing operations. That journey has had sweeping consequences for manufacturing at large.


.jpg;maxWidth=300;quality=90)


