The Practically Dedicated Flexible Cell
Machining centers make sense for this high volume process, even though the machines have continuously produced just one part for years.
Share


CNC machining centers can be changed over quickly. Produce one part number today, a different part number tomorrow. The same is not true of the typical dedicated, high productivity transfer line. Reconfigure it for the same part number change, and you may be in for weeks or months of downtime. That is why machining centers—particularly in an automated cell arrangement—provide an attractive alternative to the transfer line approach in applications where the production mix is subject to change.
But what changeover frequency makes machining centers the right choice?
Intuitively, this frequency seems like precisely the right measure. A transfer line's strength is not its flexibility, but its potential to realize a high metal removal rate. The line can be customized around the part, with workpieces moving from station to station quickly, and parallel cuts ganged into efficient simultaneous operations like multi-drill hole making.
Machining centers, on the other hand, are viewed as offering the flip side of this strength. They may be slower to process any given part, but they are far easier to change over from any one part to a different one. Indeed, if the cutting tools and fixturing can remain in place for both parts, then changeover means just calling up a different program at the CNC. That's why the choice of whether to use machining centers as opposed to a transfer line has a lot to do with how frequently changeover will occur.
However, machining centers are getting better. Falling prices have narrowed any cost premium for this technology. And at the same time, higher spindle speeds and feed rates make the machining center's productivity more and more competitive against any comparable transfer arrangement. High drilling penetration rates can allow a rapid series of drilling moves on a machining center to approach or even match the effectiveness of one pass with a multi-drill head. As a result, if there is any changeover frequency that makes machining centers attractive, that magic number is coming down.
Consider the production facility belonging to automotive supplier LucasVarity in Fowlerville, Michigan (originally a Kelsey-Hayes facility). This plant saw an important milestone this year. After five years in service, the 66 horizontal machining centers here are being changed over to a new part number for the very first time. Until this year, all of the machines had been dedicated to producing a single aluminum housing component for anti-lock braking systems, achieving a plant-wide rate of 2.5 million per year. Now, the plant has two housing part numbers in work at the same time. The mix is shifting, and ultimately all of the machining centers will be changed over for the new part.
So what changeover frequency makes machining centers the right choice?
For the Fowlerville operation, once every five years was enough.
A And B Of ABS
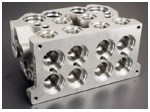
Size is the biggest difference between the two Fowlerville parts. The current design measures about 5.25 by 3.75 by 3 inches. The design the plant will be machining exclusively sometime next year—once the transition is complete—is lighter and more compact, measuring about 45 percent smaller by volume. In either case, the part looks like aluminum Swiss cheese. The vaguely block-shaped housing holds the pumps and pistons that drive one wheel's anti-lock brake. GM is the major customer buying the completed ABS assemblies, with a small percentage of the production also going to Isuzu.
Blank workpieces are cast to near-net shape, so the need to mill the form is minimal. Most of the machining is hole making. There are 26 holes among all six faces of the part—28 in the new model—ranging in diameter from 0.020 to 0.625 inch. Smaller holes intersect with and connect the larger ones. Among the holes' critical tolerances are ID finish requirements and true position location tolerances of 0.25 mm.
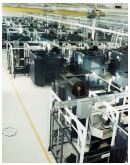
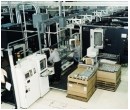
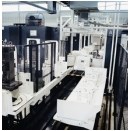
The machining centers are all Makino (Mason, Ohio) model A55 400-mm pallet machines. Eleven cells of six machines each are built around rail-guided vehicles, which deliver pallets back and forth between machines and operator load/unload stations. All of the machining centers feature a maximum spindle speed of 12,000 rpm. However, it is primarily the speed outside the cut—how quickly the machine can change to the next hole-making tool and speed back to the workpiece—which determines the efficiency of this process. Chip-to-chip tool change time on the A55 machines is 3.4 seconds.
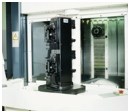
Each six-machine cell is manned by two operators at a time, and runs essentially around the clock. Parts are machined in two setups on the same hydraulic-actuated fixture. Each of the fixtures for the old part number holds four workpieces. New fixtures for the new, smaller part hold eight workpieces per loading, reducing the number of tool changes per workpiece. The machining cycles for both parts are comparable but not identical. The process for the original part goes like this:
In the "A load," three faces—the motor bore face and two pump faces—are milled flat in one pass apiece with a 4-inch diameter tool. PCD (polycrystalline diamond) inserts, which are run at about 10,000 sfm during these cuts, deliver tool life equivalent to five or six months of use in this process. The same tool also mills a pair of pads on a fourth face, on which the part will locate during the next loading.
Eight holes are then drilled in these four faces. Smaller holes are tapped, while the threads in two 0.625-inch diameter holes are machined through helical interpolation using a thread mill. Milling is the faster choice for threading these holes, given the reduced penetration rate that traditional tapping would impose (a function of the pitch of the thread).
In the machining cycle for the "B load," the remaining two faces are milled, after which the 18 holes in these faces are drilled, and in some cases reamed and/or tapped. The longest-duration cuts occur in this cycle. Two holes are drilled with a 0.020-inch-diameter carbide drill, and protecting this tiny tool against deflection demands a tiny chip load. The tool is run at top spindle speed, but fed at only 0.0003 inch per revolution to produce both of the 0.075-inch-deep holes.
The new part numbers undergo similar machining cycles. However, the number and locations of holes are changed, and the new fixturing results in the parts locating differently. Implementing these process adjustments on a hard-tooled transfer line would require radical hardware changes. But on the machining centers, the physical change from one part number to the other requires little more than just removing the old fixtures and bolting the new ones in place, a job which requires each cell to be down no longer than a single shift. Once this change had been made, an operator could just simply load the new program into the cell controller, establish the correct offset values, and then run.
Free To Fine-Tune
Of course, the changeover process applied to the ABS parts is more sophisticated than this. The first parts produced after the physical changeover of the cell are not production parts. Instead, they comprise a runoff of 30 units from each fixture position throughout the cell. This runoff is used to establish CPK to 1.33, or 1.67 on special features. Once this has been established, the plant can limit its quality assurance to CMM inspection of one random part from each fixture position per shift.
The plant is currently changing over the process at a rate governed by GM's timetable for phasing in the new ABS design. The production mix will gradually shift, as one cell after another is changed over, until sometime early next year when all of the cells are producing the new part.
The ability to make this transition with minimal impact on productivity overall is a key machining center advantage. However, even though this is the first true changeover, the flexibility of CNC machining has already served the plant in more subtle ways. It allowed the plant personnel to fine-tune the machining process after all of the equipment had been installed. Is any process perfect after the initial process engineering is done? This plant's process was closer than most; the company has a process engineering support group devoted solely to this function. Even so, the plant itself has two manufacturing engineers tasked with overseeing the process from day to day, and in time both men came to find small ways to make the machining cycle more efficient. Some of these changes were adjustments to speeds and feed rates to optimize tooling economies. Others were changes in the machining operations themselves. In either case, CNC machining allowed the process to be adjusted just by revising the code. Contrast this with a hard-tooled transfer line, where even minor changes can be much more expensive to implement. Once a transfer line is in place, the expense of making a change may leave the engineer who finds room for improvement no recourse but to shrug and chalk up the insight as a lesson for next time.
One example of fine-tuning the process involved a series of four holes in one face of the part. The holes have the same diameter at the lip but differ inside. While the two outer holes have straight walls, the inner holes feature a step about halfway in where the diameter decreases. In the machining process as it was originally designed, each of these two types of holes had its own distinct roughing and finishing tool. But as an alternative to this, after the process was already in place, the plant tried running the stepped roughing tool developed for the inner holes on all four holes in a row. This left a step in the outer holes, which the finishing tool had to remove. However, the performance of the straight-hole finishing tool was shown to be essentially unaffected by this. So the plant revised the process to eliminate the straight-hole rougher. The seemingly small change had a significant effect on productivity. At 2.5 million parts annually, eliminating 3.4 seconds of chip-to-chip time from a four-part machining cycle freed up additional machining capacity equivalent to nearly 600 hours per year.
Uptime Coverage
To LucasVarity the company, however, one further advantage of relying on machining centers may be the most compelling of all. That advantage is the machines' potential to do different work. Just the existence of this potential is reassuring. The company has other machining plants producing their own parts, and some of these plants use machining centers like the ones in Fowlerville. This makes the Fowlerville plant like a standing insurance policy for these other processes. If disaster struck at another plant, the workload could be prioritized and reallocated among the company's other machining centers, in Fowlerville and elsewhere. Fixtures and tooling could be moved to the Fowlerville machines, programs could be copied to these CNCs, and production of the stricken plant's parts could still go on.
That this insurance policy has never yet been cashed doesn't make it less valuable. The Fowlerville process has had one part changeover in five years. But it could change over much more frequently than that, if this were what circumstances demanded.
Read Next
Setting Up the Building Blocks for a Digital Factory
Woodward Inc. spent over a year developing an API to connect machines to its digital factory. Caron Engineering’s MiConnect has cut most of this process while also granting the shop greater access to machine information.
Read MoreRegistration Now Open for the Precision Machining Technology Show (PMTS) 2025
The precision machining industry’s premier event returns to Cleveland, OH, April 1-3.
Read More5 Rules of Thumb for Buying CNC Machine Tools
Use these tips to carefully plan your machine tool purchases and to avoid regretting your decision later.
Read More




.png;maxWidth=300;quality=90)


.png;maxWidth=970;quality=90)