Taking the Drag out of Automotive Machining Setups
Paired with the right cutting tools, workholding and software, multi-tasking and multi-axis equipment enables this race team to also bill itself as a full-fledged parts supplier.
Share


Roughly three and a half seconds, or maybe a hair more. That’s all it takes for a pair of dragsters to traverse a 1,000-foot Top Fuel circuit track, spewing flame and drowning out the din of cheering spectators as they blur past at speeds exceeding 330 mph.
In these moments, precisely how many onlookers fully appreciate the engineering that goes into these lightweight machines is anyone’s guess. And yet, three and a half seconds is all it takes for critical engine components to fail. That’s why the starting line isn’t really at the racetrack for National Hot Rod Association (NHRA) teams; it’s in the shop. In fact, keeping the cars running is demanding enough that the shop literally travels with the team during the 10-month race season, with the same kinds of trucks that house cars and crew also transporting mills, lathes and other equipment.
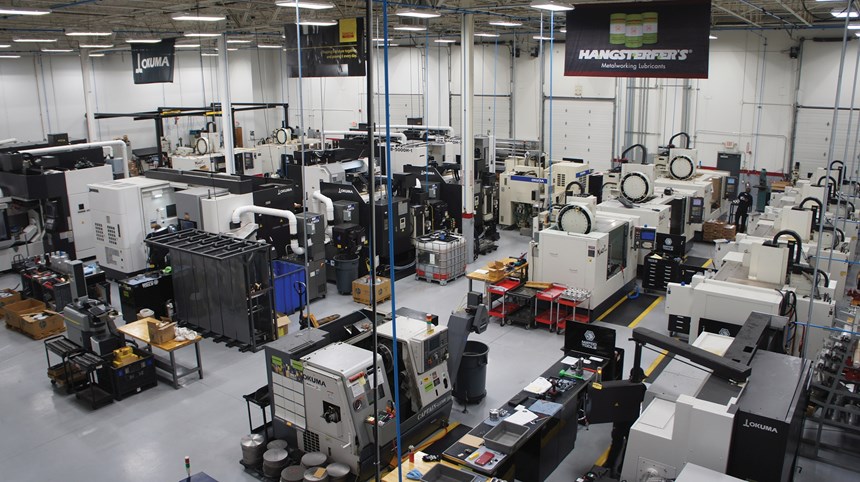
At more than 20 vehicles strong, the caravan of tractor trailers hauling Don Schumacher Racing (DSR) around the country is the largest in the NHRA. The home-base manufacturing operation in Brownsburg, Indiana, just outside Indianapolis, is more sizeable than most as well. Last year alone, DSR invested more than $7 million in new equipment and a 25,000-square-foot expansion, bringing the facility to a total of 145,000 square feet. At the time of this writing, engine blocks were the only significant components not produced in house, and plans were already in the works to start machining those parts, too. “We want to control our own technology and control our own costs,” says Tom Warga, one of 14 machinists and one of the lead strategists for improvements throughout the shop.
That goal is likely a familiar one to many North American manufacturing enterprises. Although winning titles is the primary aspiration of any race team, this 120-employee organization is a business like any other, and it faces similar pressures and challenges. Team owner and former driver Don “the Shoe” Schumacher certainly thinks this way, at least judging by his decision in 2013 to start selling parts to other teams as well. In keeping with Mr. Schumacher’s predictions (and contrary to the worries of some crew chiefs), selling itself as a parts supplier as well as a race team hasn’t detracted from DSR’s competitiveness, Mr. Warga says. (In fact, 2016 was the fourth year in which the team won two NHRA world championships in the same season.) Supplying parts does, however, provide extra revenue, not to mention a potential hedge against unexpected events off the strip.
As the volume and variety of work have grown, strategies for addressing the resulting pressures have also tracked closely with broader industry trends. These days, the steady hum of carbide on metal emerges from not just three-axis VMCs and lathes, but also five-axis, turn-mill and pallet-fed horizontal machining centers. From clamping to cutting tools to CAM software, processes are designed to maximize spindle access to the workpiece and minimize the need for manual intervention during the machining cycle.
Vertical to Horizontal
Of all the engine components under stress when a dragster rockets away from the “Christmas tree” light fixture that initiates a race, the connecting rod is among the most critical. The link between piston and crankshaft, these parts were among the first targets of efforts to control production and establish DSR as a supplier to other teams. As such, they were among the first components to influence the shop’s CNC technology expansion.
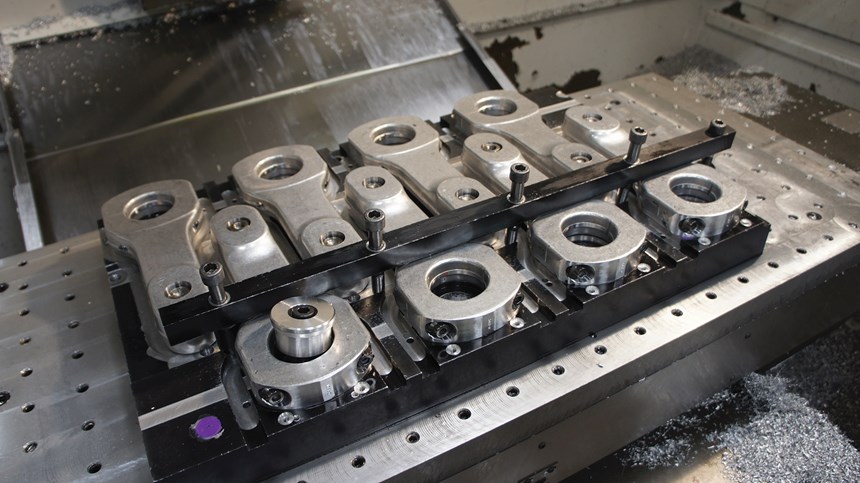
Initially, that expansion was largely a matter of adding more spindles, albeit newer, more capable spindles. The first wave of new machinery included three VMCs that remain dedicated to connecting-rod production to this day, although the process looks very different. “We were opening the door of the machine 23 times,” Mr. Warga recalls about initial efforts to ramp up connecting-rod production. With an operator flipping workpieces for each subsequent operation (face-milling, profiling, drilling, countersinking and marking, not to mention operations on a separate saw and drill press) the shop could produce only about 16 rods per day.
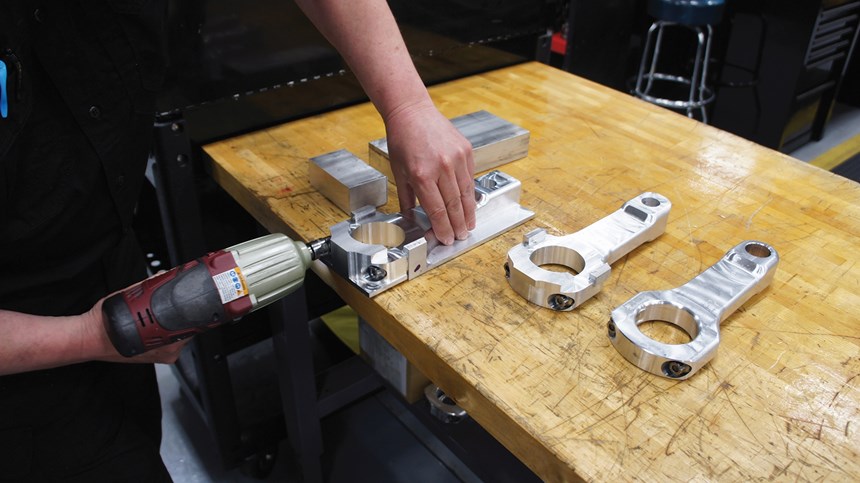
Ramping that number up to 40 didn’t require significant technology upgrades. It did, however, require thinking differently about how to make the most of the machines’ capabilities. As opposed to each machine running its own part, the three VMCs now operate more like an assembly line, with different-stage operations occurring simultaneously on parts held in multistation, custom fixtures, as pictured in the slideshow at the top of this article. Most hold 8 parts at a time. Exceptions include one four-station fixture, as well as a 16-station fixture for an operation in which an 0.008-inch-diameter-tip engraving cutter serrates the connecting ends of the two rod segments.
The latest evolution of the connecting rod machining process is based on the same thinking: to machine away as much raw material as possible without interruption. The difference, both here and elsewhere in the shop, is that newer equipment offers not just more raw machining capability, but also configurations that provide more options for achieving the same end.
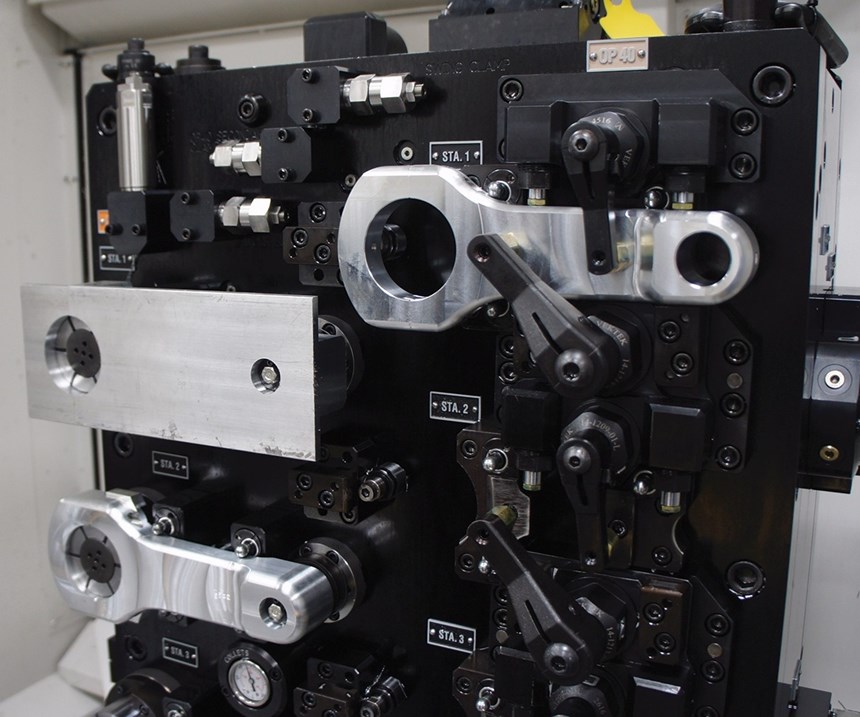
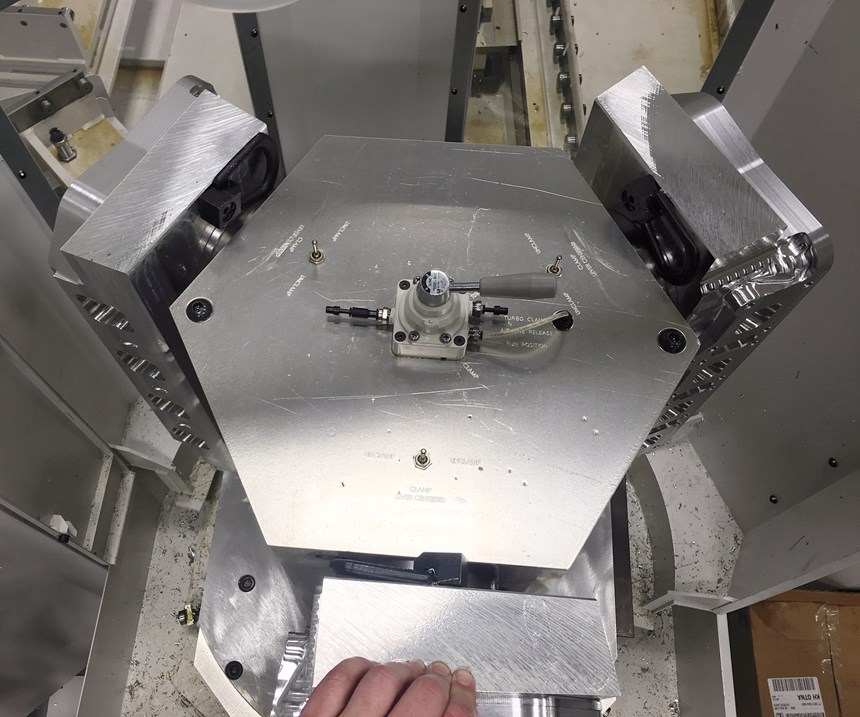
In this case, two Okuma MB-5000H HMCs offer the rigidity and precision to efficiently cut each rod from two billets rather than a near-net-shape forging. Rectangular billets simplify workholding, Mr. Warga says, and machining from two pieces eliminates the need for a separate sawing operation. Meanwhile, indexing tombstones feature custom fixtures on each face for various stages of production, and they provide access to more of each individual part. Rather than requiring an operator to transfer groups of parts from machine to machine, the HMC can move to the next set of operations on another set of parts by indexing the tombstone. With two tombstones per machine, personnel can perform all necessary reclamping on one set without interrupting operations on the other. With this system, a single operator can churn out as many as 50 rods per day.
Turning to Twin-Spindle Mill-Turning
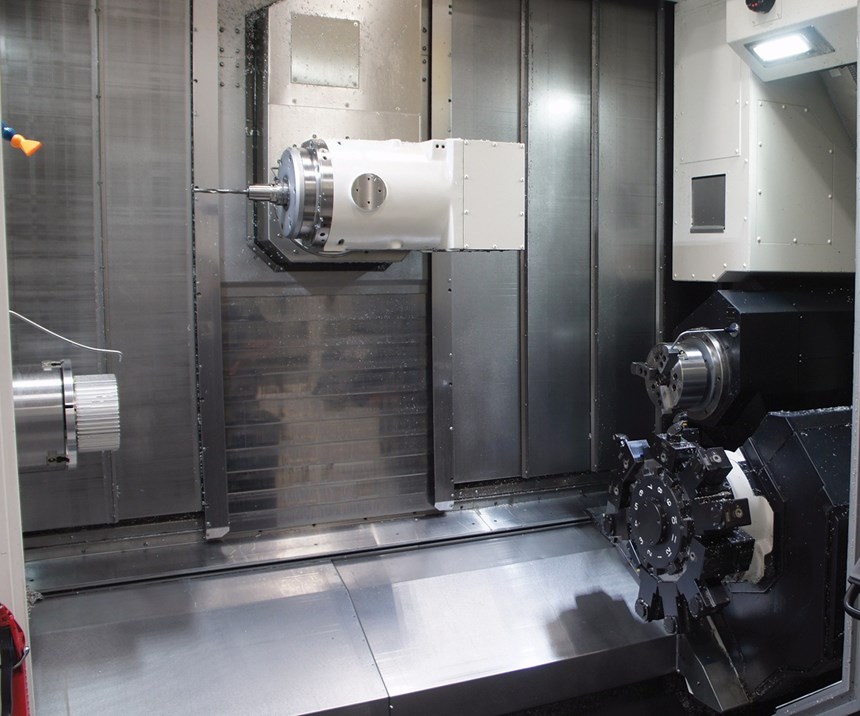
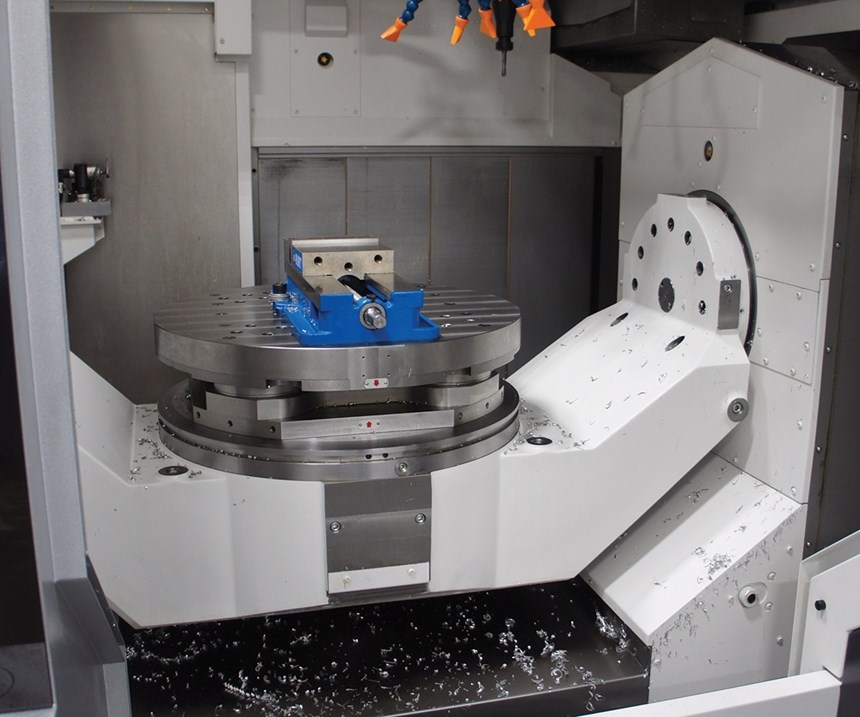
Some new machines have taken more getting used to than others. “It changes your whole outlook on how to build parts,” says machinist Mike Anderson about the shop’s new Okuma Multus U3000 turn-mill. Compared to the previous standard for turning—a ‘90s-era live-tool, Y-axis lathe—this machine features both main and subspindle part chucking; a 12,000 rpm, 30-hp (intermittent) dual-function milling spindle; a 120-position ATC; and lower 12-station tool turret.
Ensuring that such capability presents more opportunities for efficiencies than mistakes requires meticulous planning, Mr. Anderson says. He likens this process to a game of checkers, in which “every move you make sets up the next.” The game plays out not just in the programmer’s head, but also through virtual simulation in Mastercam CAM software. “What will that cut look like; how will the machine move; will that turret be out of the way for the next operation?” he asks rhetorically, adding that all changes must be reflected in offline programs and that there’s less room for on-the-floor adjustments. “You have to think in 3D,” Mr. Warga adds.
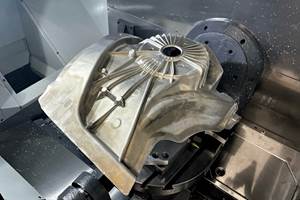
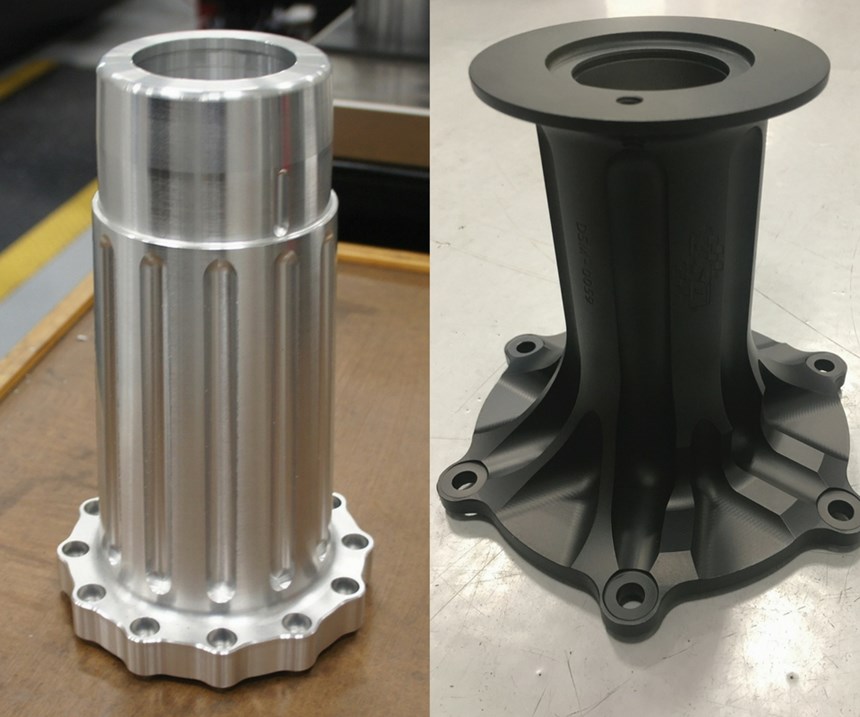
He says the first part to open the team’s eyes to these possibilities was the supercharger bearing housing pictured in the slideshow at the top of this article. Measuring 11.07 inches long and 8 inches in diameter and machined from 7075 billet aluminum, the component required nearly 8 hours of setup and run time on the older turning machine, he says. He adds that the toll on the operator performing setup and inspection was arguably even worse than the lengthy processing time. On Multus, however, the part came out complete only 40 minutes. Automatic transfer from spindle to subspindle both saves time and reduces the risk of stackup error, and the part is now processed in one setup instead of six.
“3D thinking” goes deeper than getting accustomed to subspindle hand-off. For example, why not engage head- and turret-mounted tools in the workpiece simultaneously? How might operations be streamlined, or part quality improved, by tilting the milling head for angled machining? DSR has done both on other supercharger components. On the bearing housing, for instance, pinch-turning halved roughing time. On blower pullies, one of which is visible in the spindle of the turn-mill pictured in the slideshow above, tilting a ballnose cutter at 45 degrees helps make the most of the 3/16-inch-diameter ballnose tool’s cutting edge. This has enabled cutting the scallops lining the part’s outer diameter in two 0.0725-inch passes, plus a 0.005-inch finish pass per scallop, rather than 10 passes at a cutting depth of only 0.015 inch. In fact, Mr. Warga says initial roughing and single-point-tool finishing of all scallops on a typical part now takes only about 30 minutes, compared to about 3.5 hours before.
The new machine has also reduced the need to interrupt the process for manual cutting tool swap-outs. For the fuel pump extension components pictured in the slideshow above, that’s not just because the new machine holds more cutters than the old lathe’s 12-station turret. Whereas the Multus’s ATC keeps tools out of the more spacious workzone when not in use, the previous machine required repeatedly removing and remounting the boring bar used to counterbore the deep centerhole. Otherwise, the tool would crash when a smaller cutter on the same turret engaged for subsequent operations.
Overall, processing on the turn-mill has reduced total machining time on the fuel pump extension from about 3.5 hours to about 40 minutes, Mr. Anderson says. On the blower pulley, machining time has been reduced even further, from more than six hours to roughly 40 minutes.
Five-Axis and Beyond
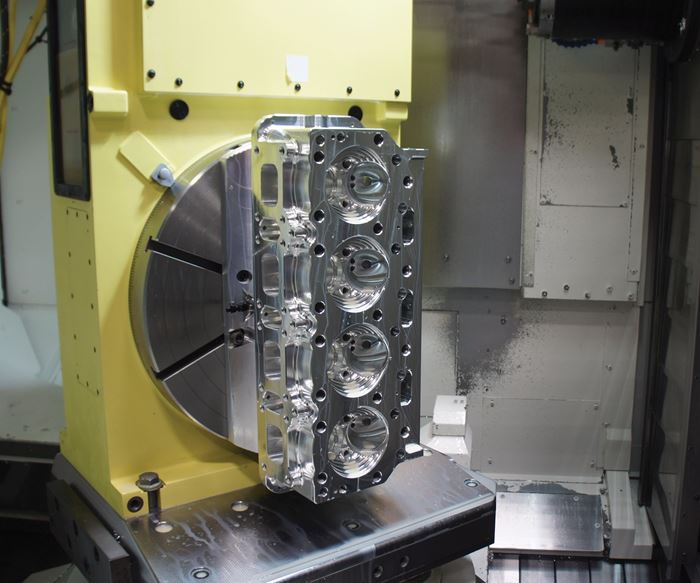
The shop’s most advanced milling machine is a five-axis Okuma MU-6300V that spends most of its time cutting cylinder heads. Unlike the castings common to commercial vehicles, these components start as 130- to 135-pound aluminum billets. With complex, contoured features on all sides, operations are complex. Tilting and spinning the part through various operations both consolidates setups and ensures quality by facilitating the use of shorter cutting tools than would be possible otherwise, Mr. Warga says.
However, DSR was milling these parts in five axes before it purchased the five-axis machining center. The first evolution of the process involved moving the parts away from five dedicated VMCs with rotary fourth axes (those five machines are now used for repair operations). The primary reason is that even with the fourth axis, the operator had to intervene nine different times for every part, whether to reposition the workpiece or the clamps themselves, Mr. Warga says. Moving the parts to a horizontal machine (in this case, an Okuma MA-600) enabled accessing more of each part by merely indexing the tombstone. Nonetheless, consolidating setups for complex operations like porting (machining the internal contours of intake and exhaust chambers) required another step: adding a fifth axis of motion in the form of a rotary table the face of one tombstone.
Producing cylinder heads on this palletized HMC system requires three significant operator interventions: initial setup (three tombstones with three workpieces each), flipping the parts for spindle access to features previously blocked by the tombstone, and finally, moving the parts to the rotary-table tombstone for finishing. In contrast, the five-axis machining center would be able to cut the part entirely uninterrupted if it weren’t for mid-process, off-machine operations like valve-seat installation. Nonetheless, Mr. Warga says there are plans to abandon cylinder head production on the HMC. Likewise, cylinder heads weren’t the only parts that the team had in mind when DSR purchased the five-axis machining center.
Despite its advantages for setup consolidation, the five-axis requires setting up one part after another while the spindle sits idle, he explains. The HMC may require more intervention overall, but it also offers capability to cycle through lengthy, unattended roughing routines on 18 parts at once. That’s a significant advantage at volumes of 130 parts per year at minimum. The five-axis machine, meanwhile, is free to cut other parts, like donuts and flywheels. When the time comes for finishing a cylinder head, moving the component to the five-axis doesn’t add any more time than moving it from roughing tombstone to rotary-table tombstone. It does, however, enable taking full advantage of the five-axis machine’s capabilities. “It just moves smoother, and you get really nice blends,” Mr. Anderson says about the MU-6300V.
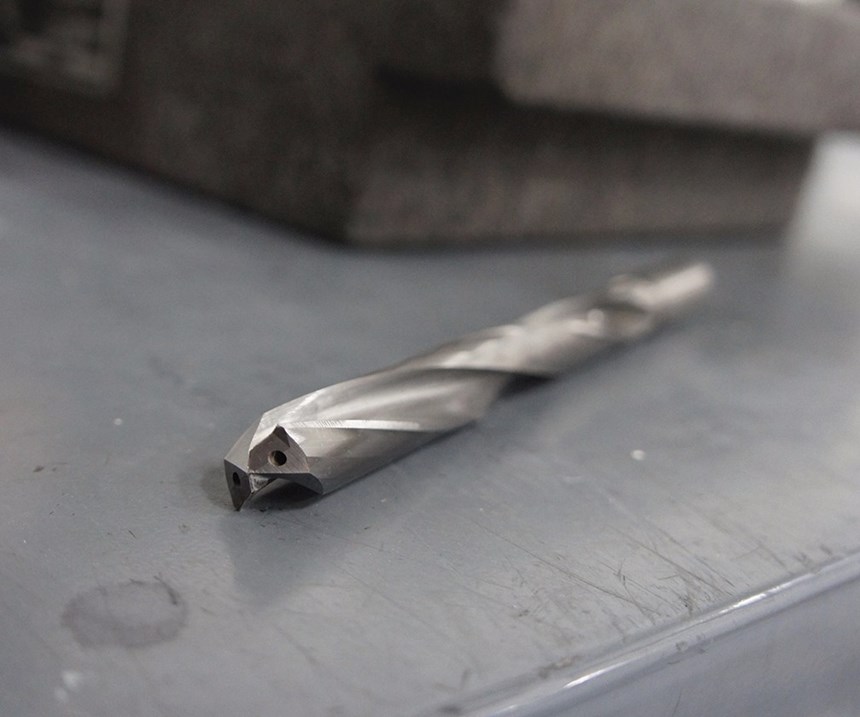
Overall, a cylinder head can be produced in about 13 total hours of cycle time (eight hours of which is lights-out roughing), versus 18 hours on the VMCs. Although improvements like these are rooted in new machine tool configurations and the “3D thinking” they facilitate, Mr. Warga emphasizes the importance of carefully considering every process input. CAM software simulation, for instance, is just as important on the five-axis machine as the turn-mill. The right cutting tool can go a long way as well, as was the case when machining the center hole of the supercharger bearing housing. In that operation, replacing a boring bar with an internally damped model from Sandvik Coromant’s Silent Tools line eliminated the need to balance out forces with a hose clamp.
As for workholding, Big Kaiser’s Unilock Ergo 138 zero-point chucks have made a significant difference in cylinder head finishing operations. On the older VMCs, operators had to “wrestle” the parts into position and attach various bolts and clamps, Mr. Anderson says. Instead, the shop now machines precision bores into the raw billets to accommodate the Ergo pull studs. As a result, clamping is faster, easier and more consistent. The MU-6300V five-axis and the MA-600 HMC’s rotary-table tombstone both employ this workholding. “You slap it on there, hit the air and it clamps it—there’s no indicating the parts or anything,” he says.
On-Site Support
These are just a few examples of process improvements at an organization that has changed a great deal in a relatively short period of time. At the root of this change is a drive to be taken seriously not only as a race team, but also as a manufacturing entity, and a modern, sophisticated one at that.
The word is spreading, too, particularly in the wake of long-term technical partner and tooling supplier Sandvik Coromant literally moving into the facility in February. Separated from DSR’s shop floor by glass windows and doors, the supplier’s new technical and training center is one of its three major locations in the U.S. It serves as a training, demonstration and process engineering site for the company’s automotive customers, often using DSR’s own projects and the experience of the racing organization’s technical team to illustrate important concepts.
Although he can’t speak for Sandvik and its customers, Mr. Warga says the crew at DSR couldn’t be happier with this development, noting that the tool supplier’s expertise has long been critical to on- and off-track success. “We’re eager to show them and their customers our growing pains, and they’ve already helped us through many of them,” he says.
Related Content
Prioritizing Workholding Density Versus Simplicity
Determining whether to use high-density fixtures or to simplify workholding requires a deeper look into the details of your parts and processes.
Read MoreFixturing Castings Made Simple Through Adhesive Workholding
When a casting proved too malleable for traditional gripping, Thomas/Euclid Industries adopted — and succeeded with — Blue Photon adhesive workholding.
Read MoreNavigating Large-Scale CNC Machining: Suburban Tool’s Niche Strategy to Stay Competitive
Facing increasing competition from lower-cost imports, Suburban Tool made a move toward large-scale, in-house machining. By identifying a niche in large, precision angle plates and tombstones, the company has strengthened its ability to control quality and protect its reputation.
Read MoreLean Approach to Automated Machine Tending Delivers Quicker Paths to Success
Almost any shop can automate at least some of its production, even in low-volume, high-mix applications. The key to getting started is finding the simplest solutions that fit your requirements. It helps to work with an automation partner that understands your needs.
Read MoreRead Next
Setting Up the Building Blocks for a Digital Factory
Woodward Inc. spent over a year developing an API to connect machines to its digital factory. Caron Engineering’s MiConnect has cut most of this process while also granting the shop greater access to machine information.
Read MoreRegistration Now Open for the Precision Machining Technology Show (PMTS) 2025
The precision machining industry’s premier event returns to Cleveland, OH, April 1-3.
Read MoreBuilding Out a Foundation for Student Machinists
Autodesk and Haas have teamed up to produce an introductory course for students that covers the basics of CAD, CAM and CNC while providing them with a portfolio part.
Read More



.jpg;maxWidth=300;quality=90)


