4 Success Factors for Hard Turning
A rigid machine and hard cutting edge are the beginning. Other considerations relate to system rigidity and keeping the cutting force steady.
Share


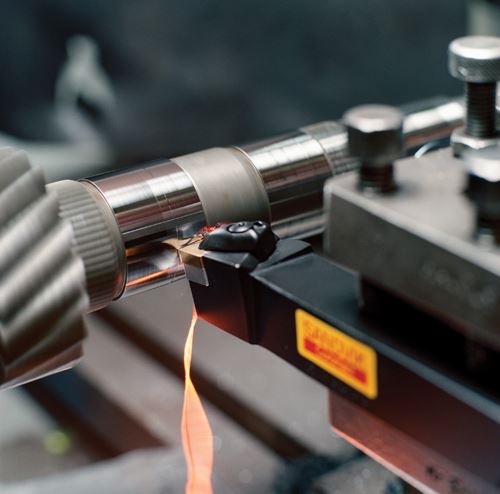
Cutting tool materials such as ceramics and PCBN make it possible to machine hard workpieces through turning rather than grinding. Workpieces on the order of 50 or 60 HRc can be—and frequently are—machined in the hardened state on a CNC turning center, with no grinding involved.
Not every part is a candidate for this. Grinding achieves tolerances superior to turning. In addition, the part’s surface requirements might make grinding a must. But in those cases in which hard turning can take the place of grinding, this substitution delivers multiple benefits. Productivity increases, not only because turning’s metal removal rate is higher, but also because setup time is likely to be less. Tool inventory is reduced, with a single turning tool possibly taking the place of a range of different grinding wheels. Plus, performing most or all of the part’s tight-tolerance work with a single turning machine makes it more likely that the plant can add a robot or other workhandling device to automate this process.
John Pusatera is a training specialist with cutting tool supplier Sandvik Coromant. The most basic factor is the machine tool, he says. Because ceramic and PCBN are relatively brittle materials, the machine needs to be rigid enough to control vibration and precise enough to protect the cutting edge from unplanned fluctuations in load. (Mr. Pusatera gave his presentation at Emag, a company that supplies machines engineered for hard turning.)
With the right process, he says hard turning can deliver accuracy as tight as ±0.0002 inch on diameter, surface finish of about 7 µin Ra on straight turning passes, finish of 11 µin Ra on arcs and tapers, and total roundness error of 0.0001 inch.
However, realizing this level of performance involves controlling various details of the process, including considerations that might seem small. Hard turning is more challenging than conventional turning, and the machine and the tooling are just the start. According to Mr. Pusatera, here are some of the other elements of an effective hard-turning process:
1. Green Machining
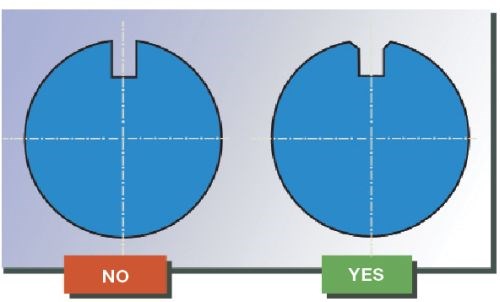
Machining the part in the green state (before the workpiece is hardened) presents significant opportunity to ensure the effectiveness of the later hard-turning operations. To minimize variations in cutting load, the green machining should aim to leave a consistent stock envelop all around the part. Also, keyway slots and holes should be chamfered in this green state. In the hardened state, such features create hard corners that can fracture a cutting edge. To avoid this danger, make these corners more gentle by rounding them off before hard turning begins.
2. Minimizing Deflection
Vibration during hard turning can result from either the part or the tool deflecting. Control both by following these rules of thumb:
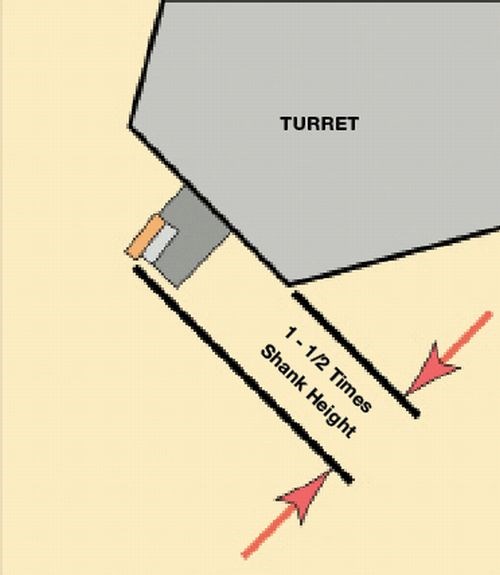
- The overhang of a turning tool should be no more than 1.5 times the shank height of the toolholder.
- For OD turning, an unsupported workpiece should extend from the chuck face a distance of no more than four times its diameter. If that part is supported by a tailstock, it can extend as far as eight times diameter.
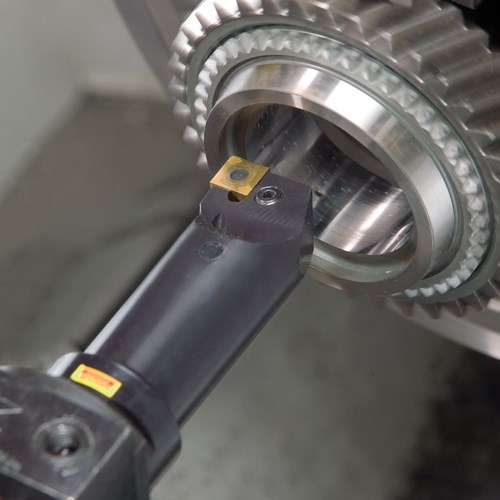
- In ID boring operations, a steel boring bar should have a length-to-diameter ratio of no more than 3:1. A carbide boring bar can be as long as 6:1.
Exceeding any of these limits risks vibration that can severely impair the life and effectiveness of the tool.
3. Rigid Clamping
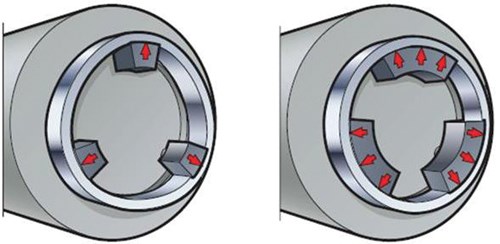
Even when the tool and workpiece dimensions are kept within the limits above, vibration can still occur if either is not held securely. For a workpiece held in chuck jaws, Mr. Pusatera recommends wide jaws that distribute clamping force around the largest possible portion of the part’s diameter. For the tool, he recommends a system that clamps all around the shank of the tool, not just at one spot the way setscrews do. Sandvik Coromant’s Capto system is an example of a toolholder interface that provides this rigid clamping.
4. Adopting a Two-Pass Strategy
The maximum possible depth of cut in hard turning—depending on the tool radius and other process factors—is likely to range from 0.008 to 0.020 inch for a tool with a positive rake angle. If the tool has a negative rake, the corresponding maximum depth ranges from 0.012 to 0.060 inch. Given that green-state machining is unlikely to leave more stock than this around the part, a single pass might be all that hard turning requires. Taking this one pass is the most productive approach for many hard-turning processes. However, for the tightest-tolerance applications, Mr. Pusatera recommends a two-pass strategy. The first cut is a “rough” hard turning pass to take most of the stock away. Then, the true finishing pass uses an insert dedicated to finishing to remove a remaining stock envelope as small as 0.002 to 0.004 inch. At the cost of a little extra cycle time, this two-pass strategy produces a stable and predictable hard-turning process that maximizes control over the shape and accuracy of the finished part, he says.
Read Next
Registration Now Open for the Precision Machining Technology Show (PMTS) 2025
The precision machining industry’s premier event returns to Cleveland, OH, April 1-3.
Read More5 Rules of Thumb for Buying CNC Machine Tools
Use these tips to carefully plan your machine tool purchases and to avoid regretting your decision later.
Read MoreSetting Up the Building Blocks for a Digital Factory
Woodward Inc. spent over a year developing an API to connect machines to its digital factory. Caron Engineering’s MiConnect has cut most of this process while also granting the shop greater access to machine information.
Read More



.jpg;maxWidth=300;quality=90)


