Scanning Technology Helps Generate New Business
Evden Enterprises (Ukiah, California),decided that purchasing a new coordinate measuring machine (CMM) was the logical next step in expanding their capabilities. They knew from past experience that staying ahead of the competition and generating new business meant having the right technology and equipment in place.
Share


Anticipating future customer needs and subsequently taking risks with capital expenditures can be very challenging for a company and requires great confidence, particularly during volatile economic times. Evden Enterprises (Ukiah, California),decided that purchasing a new coordinate measuring machine (CMM) was the logical next step in expanding their capabilities. They knew from past experience that staying ahead of the competition and generating new business meant having the right technology and equipment in place.
Since it was founded in 1980, Evden Enterprises has grown from four employees to 24. The company manufactures custom components, primarily for Fortune 500 companies in the mineral, mining and oil drilling industries. Using detailed customer specifications, the company transforms a variety of materials—including stainless steel, aluminum, brass and plastic—into precision parts used in applications as diverse as drilling equipment sampling systems and ophthalmology instruments.
Evden already owned an Eclipse CMM with a ST touch-trigger probe from Carl Zeiss IMT Corporation (Maple Grove, Minnesota) purchased in 1988.
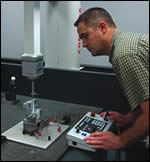
“In the past years, increasingly tighter tolerance requirements and more complex parts have become standard. We needed to measure parts with extremely small hole sizes and realized that in order to satisfy our customers’ needs, we had to move to the next level,“says Stephen McGrath, vice president of manufacturing. In 2002, Mr. McGrath decided to replace the Eclipse with a Zeiss Contura active scanning CMM using a Vastxt probe head. “I’ve already had a good experience with the accuracy and reliability of our Zeiss CMM, so I didn’t even bother looking at other manufacturers,”he says. “The scanning capability of the Contura and the programming flexibility of the Calypso software allow us to inspect multi-faceted parts. With the Vastxt, we can now perform the required roundness checks and inspect features smaller than 2 mm in diameter. We are also able to measure the complete part. Before, we were only able to measure the key features, and the rest would have to be checked in a cumbersome manual process.”
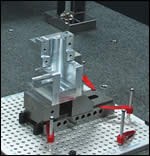
Evden performs in-process inspections and uses the Contura to check each individual operation. “There is no final inspection before the part goes out the door,” says Mr. McGrath. “We rely on all the different operations and steps to be accurate right on the spot.” Mr. McGrath wanted to meet targeted true-position tolerances down to 0.05 mm (0.002 inch). “With the scanning Vastxt probe head collecting thousands of data points in just a few minutes, we are able to achieve accurate and reliable results on extremely intricate parts, such as drilling equipment components used for excavating and evaluating core samples,” he says. “I can’t stress enough how important it is being able to analyze your parts and better the processes, essentially because you have a lot more data to work with.”
The Calypso CAD-based software included with the Contura CMM is said to allow operators to perform complex measurements in a very short time and to reduce programming time by 50 percent. After participating in a training class, Mr. McGrath trained some of his lead employees who, in turn, trained other operators—saving travel cost and valuable time away from work.
While other manufacturers experienced a decrease in production in recent years, Evden was able to maintain its output and has remained profitable even in a tough economy. “Customers are interested in how you’re keeping up with technology and if you are improving your processes,” Mr. McGrath says. “We have several larger ISO-certified companies that review us on an annual basis and that’s important to them. Purchasing the Contura opened the door to more orders. This shows that continuous improvement of processes and capabilities can lead to new business and increase profitability.”
Read Next
Setting Up the Building Blocks for a Digital Factory
Woodward Inc. spent over a year developing an API to connect machines to its digital factory. Caron Engineering’s MiConnect has cut most of this process while also granting the shop greater access to machine information.
Read MoreBuilding Out a Foundation for Student Machinists
Autodesk and Haas have teamed up to produce an introductory course for students that covers the basics of CAD, CAM and CNC while providing them with a portfolio part.
Read More5 Rules of Thumb for Buying CNC Machine Tools
Use these tips to carefully plan your machine tool purchases and to avoid regretting your decision later.
Read More


.jpg;maxWidth=300;quality=90)


