Scanning CMM Eliminates Bottleneck, Increasing Productivity
With a workforce of 1,300 people, this manufacturer provides drivetrain and customized manufacturing solutions for a range of markets, including automotive, snowmobile and ATV industries.
Share


Choosing the appropriate vehicle for navigating through a forest on unfamiliar terrain can be quite a challenge. For this task, it is probably best to use an all-terrain vehicle (ATV). Selecting the right technology for measuring complex parts is a different kind of challenge, but the features required to get the job done can be quite similar, as one company discovered.
Earlier this year, Team Industries Inc. (Bagley, Minnesota) was confronted with such a challenge. The company was looking for a solution to relieve a bottleneck that was caused by new projects and labor-intensive customer requirements. In addition, it wanted to optimize the inspection flow and process for an upcoming event.
With a workforce of 1,300 people, Team provides drivetrain and customized manufacturing solutions for a range of markets, including automotive, snowmobile and ATV industries. At its machine shop in Cambridge, one of seven facilities in Minnesota and North Carolina, the company primarily produces frame and drivetrain components for companies such as Honda, Polaris, John Deere and Eaton. The plant runs two 10-hour shifts and has a weekend crew.
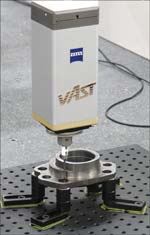
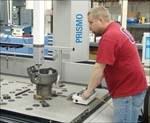
Before deciding on the Prismo Vast CMM from Carl Zeiss (Maple Grove, Minnesota), the company was using two Prismo STs for daily production checks and first article approval.
"The Prismo ST was no longer satisfactory for the bulk of the inspection work, so most of it was done on the Prismo Vast active scanning CMM," says Brent Harcey, quality manager at Team. "The Vast CMM would end up with a large backlog of work. In addition to the existing workload, many customers now require a 30-piece minimum capability study for each new product start-up. This means that one machine has to be dedicated to that task."
In July 2004, the company installed a Prismo with Vast Navigator technology. Vast Navigator uses scanning technology, which is designed to offer time savings and faster scanning speeds. Without this technology, the probe enters the measuring zone, touches the part, adjusts and then performs the scan. With the Navigator, this is done in one move, also known as helical scanning.
"It’s a smooth process. The landing, scanning and takeoff are all performed in one continuous motion," says Mr. Harcey.
Prior to using the Navigator, Team had set a default scanning speed that used about 40 to 50 percent of the CMM’s capability. With the self-adjusting scanning speed feature, the company says it is now taking advantage of the CMM’s full capabilities.
The company performs a gage repeatability and reproducibility (GR&R) study on each program it creates. However, there are instances in which certain features do not meet the company’s criteria for GR&R. With the Calypso software, the company can adjust those features individually without having to slow down the entire program.
"The editing capabilities allow us to write a program, test it, and locate and eliminate its weaknesses," explains Mr. Harcey. "Users can change the probing speed, location and point density. We are now able to attain programs that are more robust."
The company also expresses a need to increase capacity. "If a machine is being used 80 percent of the time, that doesn’t mean that the remaining 20 percent of time comes in one solid block that can be used for programming," says Mr. Harcey. "Open CMM time comes in fragments too small to call up a new project and start a program." With the Calypso Planner CAD-based software, his team is able to program off-line. According to the company, the flexibility of programming either online or off-line opens up capacity and enables the company to have the program ready when the product comes in the door.
October 2004 marked the initiation of the company’s lean manufacturing program. With setup reduction being a component of kaizen, Mr. Harcey had to review and improve the setup approval process. Productivity improvements have changed first article inspection requirements from four parts to 16 parts. With the Prismo Vast Navigator, Mr. Harcey was able to meet the new standard set by the kaizen event.
The new CMMs have become an integral part of the inspection process, the company says. They measure a series of parts, ranging from drive and axle shafts to housings. They can also handle heavier and longer probes (up to 800 mm), which allows Team to pursue additional projects. The company uses the machines to check tractor, clutch and transmission components, as well as large automotive carriers.
Read Next
5 Rules of Thumb for Buying CNC Machine Tools
Use these tips to carefully plan your machine tool purchases and to avoid regretting your decision later.
Read MoreRegistration Now Open for the Precision Machining Technology Show (PMTS) 2025
The precision machining industry’s premier event returns to Cleveland, OH, April 1-3.
Read MoreSetting Up the Building Blocks for a Digital Factory
Woodward Inc. spent over a year developing an API to connect machines to its digital factory. Caron Engineering’s MiConnect has cut most of this process while also granting the shop greater access to machine information.
Read More


