Real-Time Tool Monitoring
Machine operators have long dreamt of a process monitoring system that detects tool wear, and potentially catastrophic conditions and automatically compensates for changes in tool geometry after resharpening. Now that dream is a reality.
Share


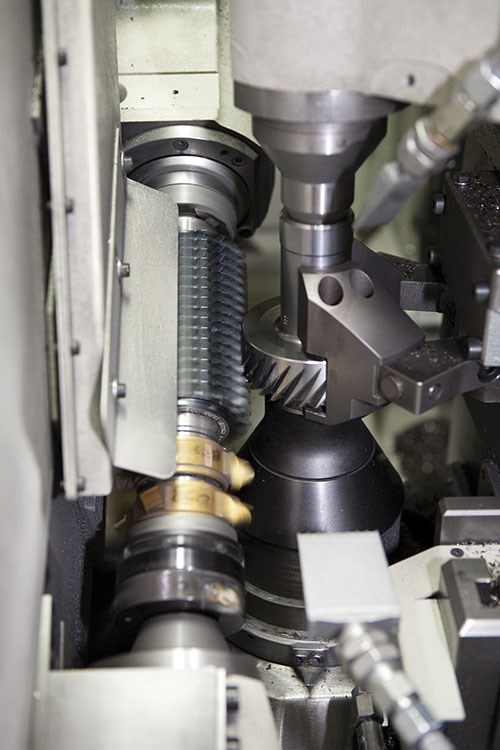
The last 10 years have seen a dramatic improvement in hobbing productivity, thanks to advances in machine design and tool performance. But the tradeoff for the machines and tools that have quadrupled productivity is that they come at a significantly greater cost than those they’ve replaced.
To maximize their return on these more costly tools, manufacturers need to optimize the process to get the greatest number of parts per resharpening. But more essentially, they have to control the process much more precisely to avoid breaking these expensive tools. The traditional “rules of thumb” and tool life guidelines published by tool manufacturers simply aren’t good enough anymore.
These traditional approaches use highly conservative safety margins, which negatively impact the productivity potential of the new generation of tools. The result is unnecessary tool change downtime, excessive tool maintenance costs and lost productivity measured in parts not made.
The obvious solution is a sophisticated process monitoring system that can detect and track tool wear; avoid false alarms generated by workpiece variations; and instantly respond to potentially catastrophic conditions like chip welding, broken or damaged teeth and peeling coatings. An ideal solution would also compensate automatically for the changes in tool geometry generated by each resharpening.
Digital Diagnostics
A number of attempts have been made to adapt standard process monitoring systems to hobbing operations, but none have been completely successful. Still, the need exists. So Artis (a Marposs company, Auburn Hills, Mich.), worked with a major transmission builder to develop a hobbing-specific monitoring system that would maximize output and tool life simultaneously.
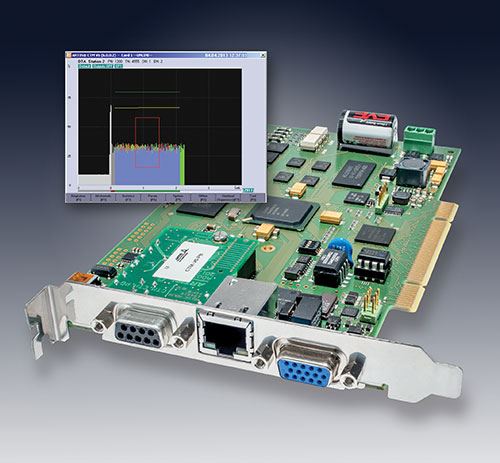
The resulting system uses sensorless monitoring of torque data and machine-mounted sensors to monitor spindle vibration, power consumption, and several other parameters. System software uses those inputs to create an exact signature of each cutting operation and generate a good tolerance band on each side of the signature. Subsequent operations are then compared with the master signature and allowed to continue as long as all of the monitored parameters fall within the tolerance band.
Signature analysis is a proven technology. What sets the Artis hobbing solution apart is the fact that the software is optimized to detect the exact anomalies produced by worn and damaged hobbing tools. The system is based on data collected on production machines that experienced normal wear, welded chips, peeling coatings and broken teeth, each of which generated a distinct signature captured and built into the software.
The availability of real-world data also enabled the developers to include algorithms to detect and compensate for tool diameter changes caused by resharpening. Since a modern hobbing tool may be resharpened up to 15 times, this capability is critical in a successful process monitoring solution. In practice, this means an optimum process signature for a resharpened tool can be calculated without remastering the tool, eliminating a substantial cause of hobbing machine downtime.
Unlike processes where absolute information such as “tool breakage” or “missing tool” is sufficient, gear hobbing requires continuous monitoring to ensure that tool wear is held strictly within specified tolerances. Artis has developed a new feature for the monitoring function to optimize the gear hobbing process. It is successfully in operation at ZF Friedrichshafen AG in Saarbrücken, in the company’s production of high-quality automatic gearboxes.
At Saarbrücken, ZF develops and manufactures six- and eight-speed automatic gearboxes for medium and luxury cars. The model 8 hp eight-speed automatic gearbox contains four sets of planetary gears and five shift elements for a total of 20 to 25 gears. With an annual production of 2 million gearboxes, the gear cutting machines are in continuous operation, and reliable processes are required.
Process Parameters
The process monitoring system uses the milling spindle torque measurement to obtain information about the condition of the tool. The torque curve for a known good tool is “taught” once and then compared with the actual machining process. The result is displayed as a curve with the area below the curve representing the acceptable value for the operation.
Tool breakage shows up as an anomalous “spike” in signal intensity. Normal wear can be tracked as well, and displayed for the operator. By setting experience-based limits on the tool’s “signature” it is possible to predict the remaining life of the tool. This reduces downtime, and enables maintenance and resharpening to be done based on actual tool condition rather than on a time- or part-based schedule.
Tool cost savings can add up to five-figure sums within a few months. The system is able to optimize cycle time by monitoring the load during the cut and maintaining the highest practical metal removal rates compatible with machine capabilities and desired tool life.
System Integration
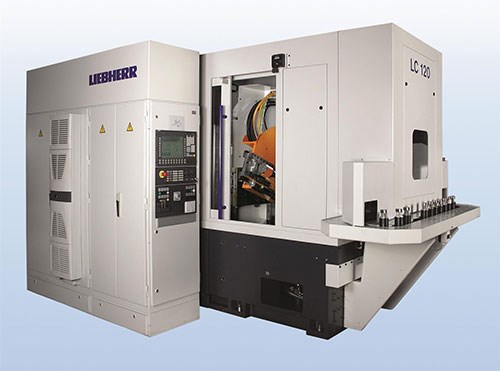
ZF uses Type LC gear-cutting machines from German manufacturer Liebherr-Verzahntechnik GmbH. Liebherr also produces universal machines for large workpieces and special machines for fine machining and has used Artis process monitoring systems on its machines for many years. The gear hobbing function is of particular interest for machines intended for workpiece diameters up to 500 mm.
Dr. Oliver Winkel, head of application technology and technology development for gear milling at Liebherr-Verzahntechnik, says, “The CTM system from Artis assists our customers to ensure the daily number of units of gearwheels required and, simultaneously, protects the valuable milling tools and machines. A breakage not only means unplanned tool costs and rejects, but also downtimes in the production and, in the worst case, costly damage to the gear hobbing machines. Briefly, the customer can reliably deploy the capabilities of the machine and tool.”
Dr. Winkel notes that Liebherr uses the Artis CTM V5 monitoring system (although CTM V6 is now available), and signal transmission is carried out without a sensor via digital performance data (or DTA, digital torque adapter) directly exported from the controller via a Profibus connection. “Up to the present,” he says, “the new features for gear hobbing have been successfully utilized on Liebherr milling machines with Siemens 840D SL controllers. The system also functions on older machines with Siemens 840D PL or other controllers. There is also an option for analog measurement of the effective power.”
The initial Liebherr test machine achieved a 17 percent increase in tool life without changing any process parameters, simply by eliminating unnecessary tool changes. ZF also used the test data to identify and optimize the tool coating, which produced a 60-percent increase in tool life. That almost certainly would not have happened had the data not been available.
A Productivity Breakthrough
The combination of better tools, more capable machines, and real-time process monitoring and control systems represents a real breakthrough in gear making productivity. With the automotive industry moving rapidly toward six- and even eight-speed transmissions, it’s a technology solution whose time has definitely come.
Related Content
Generating a Digital Twin in the CNC
New control technology captures critical data about a machining process and uses it to create a 3D graphical representation of the finished workpiece. This new type of digital twin helps relate machining results to machine performance, leading to better decisions on the shop floor.
Read MoreAutomated CAM Programming – Is Your Software Really Delivering?
A look at the latest automation tools in Autodesk Fusion 360 software and how forward-thinking machine shops and manufacturing departments are using them to slash delivery times and win more business.
Read MoreOrthopedic Event Discusses Manufacturing Strategies
At the seminar, representatives from multiple companies discussed strategies for making orthopedic devices accurately and efficiently.
Read MoreCan AI Replace Programmers? Writers Face a Similar Question
The answer is the same in both cases. Artificial intelligence performs sophisticated tasks, but falls short of delivering on the fullness of what the work entails.
Read MoreRead Next
Registration Now Open for the Precision Machining Technology Show (PMTS) 2025
The precision machining industry’s premier event returns to Cleveland, OH, April 1-3.
Read More5 Rules of Thumb for Buying CNC Machine Tools
Use these tips to carefully plan your machine tool purchases and to avoid regretting your decision later.
Read MoreSetting Up the Building Blocks for a Digital Factory
Woodward Inc. spent over a year developing an API to connect machines to its digital factory. Caron Engineering’s MiConnect has cut most of this process while also granting the shop greater access to machine information.
Read More
