Moving Forward in Reverse
This versatile shop leverages portable CMM technology to steadily grow the reverse engineering portion of its business.
Share


Takumi USA
Featured Content
View More
.png;maxWidth=45)
DMG MORI - Cincinnati
Featured Content
View More


Astro Machine Works has achieved record annual sales in each of the last five years. Eric Blow, company president, credits this in part to the shop’s diverse customer base as well as the breadth of manufacturing capabilities it has in-house.
Established in 1984, Astro Machine Works specializes in machining precision parts and building custom machinery for a wide range of applications. The 75-person shop offers value-added services that include machine repair and rebuilding; welding and metal fabrication; and panel wiring and control system design. Mr. Blow says this enables the company to be a virtual one-stop shop for as much or as little manufacturing resources as its customers need.
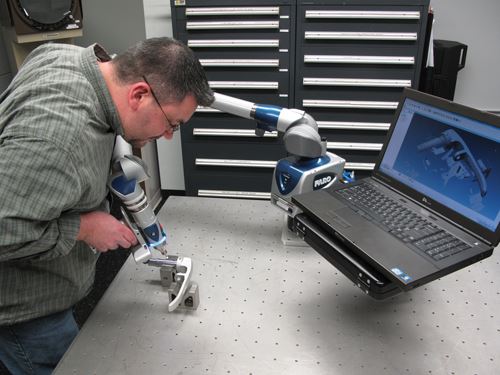
Astro Machine Works also offers reverse engineering services, a portion of its business that has grown steadily over the years. Initially, employees used conventional shop measurement devices to create hand drawings of parts to be recreated. Today, Astro Machine Works leverages portable CMM technology to speed and simplify part measurement so it can turn reverse engineering jobs faster and more accurately.
Brian Hess, company sales manager, shed light on how the company’s reverse engineering approach continues to evolve during a recent visit to the Ephrata, Pennsylvania shop.
Early On
An existing customer spurred Astro Machine Works to delve into reverse engineering in 1993. The customer wanted the shop to establish a replacement parts program for its European-made processing equipment. That’s because some parts had become obsolete and were no longer available from the OEM. Conversely, parts that were still available from the OEM were costly, and delivery times as long as 12 weeks led to long stretches of equipment downtime.
As the replacement parts program launched, the customer began providing new (when available) and used parts to reverse engineer and machine. The shop documented each component it recreated so it could quickly produce the part again whenever needed. Databases containing part numbers, drawings and other information for each component are kept by both the customer and the shop to facilitate future part orders.
The customer viewed the reverse engineering program as yet another helpful service offered by Astro Machine Works. Realizing that a number of other customers faced similar maintenance challenges, the shop established part replacement programs with them as well. Early on with these programs, Astro Machine Works used calipers, micrometers and other common measuring devices to reverse engineer parts. While it was able to reduce replacement part costs and lead times for customers using this approach, some complex components took as long as 40 hours to reverse engineer. It became clear that hand measurements and drawings limited the speed at which the shop could turn these projects. Plus, the parts the shop was encountering were becoming increasingly complex and challenging to measure.
To address this bottleneck, Astro Machine Works considered both stand-alone and portable CMMs that employees could use to measure part features. Appreciating the versatility of the portable designs, the shop decided to purchase a FaroArm from Faro Technologies (Lake Mary, Florida) in 2003. The FaroArm is a six-degree-of-freedom CMM that uses a touch probe of a known diameter to record points as the probe touches the surface of the feature being measured. Since the diameter of the probe is known, the CMM’s software records the position of the center of the probe and accurately compensates for its diameter in recording the measurement. In this fashion, the CMM takes points one at a time until it collects enough data for the software to determine lengths, diameters, angles and other geometric elements.
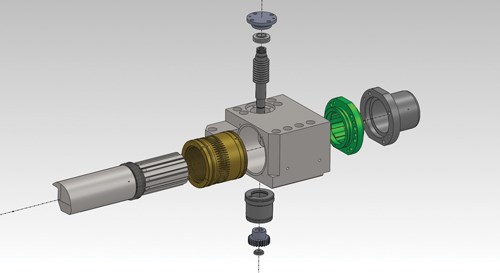
Using the FaroArm, Astro Machine Works employees can reverse engineer parts that previously took 40 hours in only eight hours. In addition, the portable CMM minimizes the chance for human error when taking and recording measurements of key part features. Another advantage is the ability to export measurement data into SolidWorks CAD software or Mastercam CAM software. This enables designers to create 3D models and part prints, and programmers to quickly create tool paths. As a result, newly reverse-engineered parts can now be delivered in a couple of weeks, oftentimes at a cost that’s 40 percent lower than the OEM would charge.
Challenges, Opportunities
Customers don’t always have new parts to submit to Astro Machine Works for reverse engineering. Instead, the shop sometimes has to work from used or worn parts that have been removed from a piece of equipment. In these cases, it’s important to communicate with the customer to make sure that the part is recreated to its original specifications. Grooves or flats might look like actual part features, but they could be a result of wear during operation.
Reverse engineering also opens the door to speeding and simplifying parts production by applying design for manufacturability concepts. One example Mr. Hess cites is an aluminum sleeve originally created from rolling and welding sheet aluminum. The sleeve required a window with an inward-bending tab. Overall roundness was important because the sleeve installs inside a mating component. The shop’s customer had tried to recreate the sleeve using the original manufacturing method, but it could not roll the sheet aluminum accurately enough to maintain consistent roundness. After reviewing the design, Astro Machine Works suggested making the part from aluminum tubing. The shop used one of its CNC turning centers to turn the tube’s OD and counter-bore either end to a point where the tab was to be located inside the sleeve. Next, it used wire EDM to create the tab window in the side of the sleeve. Although the manufacturing method was different, it produced the same effect as the bent tab in the original sheet metal component.
Latest Steps
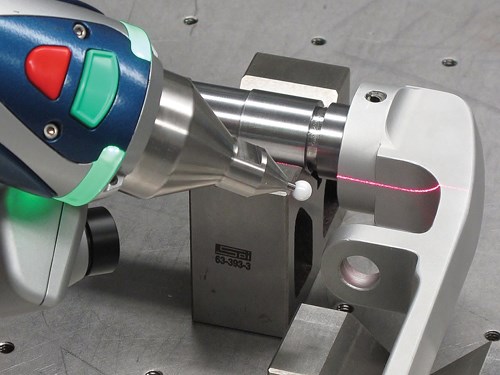
Astro Machine Works has reverse engineered and cataloged thousands of replacement parts for its customers. In fact, reverse engineering has grown to represent approximately 8 percent of the company’s annual sales. Early this year, Astro Machine Works decided to upgrade its reverse engineering measurement capabilities with a new portable CMM: Faro’s Edge arm, which offers laser scanning capability. Although the previous arm could measure complex geometries with only a touch probe, laser scanning enables the shop to collect many more data points in much less time. The Edge arm is particularly effective for measuring components that have irregular surfaces. The device emits a laser stripe that’s nearly 4 inches long, minimizing the number of scan passes that are required to reverse engineer a part.
Compared to the previous arm, Astro Machine Works is taking a different approach to integrating the Edge arm. Although at that time the shop had (and still has) a solid group of employees, it didn’t want to give everyone in the shop access to the original arm. Instead, only one person was trained to operate it. The shop believed this approach would reduce the chance of inadvertent changes to settings or parameters. In retrospect, this may have limited its progress implementing the new technology. Now that the new laser-equipped arm has been delivered, the shop plans to train as many as 12 employees to properly use the device to better take advantage of a talented workforce.
Adding Additive
In addition to the new portable CMM, Astro Machine Works has integrated a wealth of other new machining technologies, including a five-axis machining center, a turn-mill machine, a large-scale turning center and a wire EDM unit. In fact, the shop has added 15 new machines in just the last two years. The next advanced bit of technology the shop is likely to bring in-house is 3D printing. An additive manufacturing machine will enable proving out their reverse engineering work by “printing” plastic prototypes prior to machining actual production parts.
Sidebar: Side Measurement Benefits
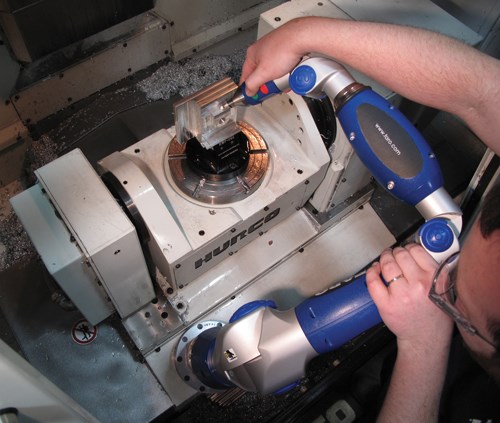
Although the original FaroArm was purchased primarily for reverse engineering work, Astro Machine Works has realized side benefits from its portable CMM. One example is the arm’s role in manufacturing a custom piece of equipment that had a 16-foot-long rail system. The height of the rail system could not vary by more than a few thousandths of an inch from end to end. To ensure this accuracy was maintained during assembly, the shop mounted the arm on a tripod and used it to measure the rail components as they were installed. Similarly, the arm has also been attached to the framework of equipment to enable assemblers to check flatness, parallelism or stack-up dimensions as components are added. This wouldn’t be possible had the shop gone with a stand-alone CMM.
Astro Machine Works has also used the arm to inspect machined workpieces. In fact, the new Faro Edge arm with laser scanner will enable the shop to inspect some parts more effectively. By overlapping laser scan data on top of a 3D CAD model, the device’s software will show where and by how much the machined part is out of tolerance.
Related Content
Choosing the Correct Gage Type for Groove Inspection
Grooves play a critical functional role for seal rings and retainer rings, so good gaging practices are a must.
Read MoreThe Many Ways of Measuring Thickness
While it may seem to be a straightforward check, there are many approaches to measuring thickness that are determined by the requirements of the part.
Read MoreRethink Quality Control to Increase Productivity, Decrease Scrap
Verifying parts is essential to documenting quality, and there are a few best practices that can make the quality control process more efficient.
Read MoreOrthopedic Event Discusses Manufacturing Strategies
At the seminar, representatives from multiple companies discussed strategies for making orthopedic devices accurately and efficiently.
Read MoreRead Next
Building Out a Foundation for Student Machinists
Autodesk and Haas have teamed up to produce an introductory course for students that covers the basics of CAD, CAM and CNC while providing them with a portfolio part.
Read MoreRegistration Now Open for the Precision Machining Technology Show (PMTS) 2025
The precision machining industry’s premier event returns to Cleveland, OH, April 1-3.
Read More5 Rules of Thumb for Buying CNC Machine Tools
Use these tips to carefully plan your machine tool purchases and to avoid regretting your decision later.
Read More


.png;maxWidth=150)


.jpg;maxWidth=300;quality=90)


