Mitutoyo Looks Ahead
Mitutoyo America’s 50th anniversary celebration at its new headquarters facility revealed much about what has made the company successful thus far and where it’s going from here.
Share


Mitutoyo America’s open house event last week marked a new beginning for the metrology sales, service and support organization, both literally and figuratively. The company moved into its new corporate headquarters in Aurora, Illinois just in time for its 50th anniversary, an occasion it commemorated with two days of facility tours, new product introductions and seminars, and a gala celebration for customers, distributors and other guests.
While the anniversary provided an opportunity to reflect on the company’s past, tours of the new headquarters revealed a great deal about its future commitments, particularly in education and customer service. Departments previously housed in separate buildings have been consolidated into the single, 159,000-square-foot facility to improve teamwork and communication. The new M3 solution center—the eighth in the U.S.—provides interactive product demonstrations and application assistance, while various laboratories enhance the Mitutoyo Institute of Metrology’s training curriculum with hands-on exposure to metrology instruments and software. An on-site repair facility services all the company’s precision measuring tools and instruments. Additionally, moving the ADLA-acccredited calibration lab from its previous location in Elk Grove Village, Illinois provides the opportunity to expand capacity and to improve temperature and vibration control.
The official title of the event, “Building the Foundation for the Next 50,” also applied to the technology displayed in the facility’s showroom. Here are three things that caught my eye:

* Dust-resistant Calipers. The company got its start with micrometers and calipers in Japan in 1934, and it continues to refine its designs today. One recent example is the AOS Digimatic Caliper, the latest iteration of what one company representative said is its most popular caliper. The device an electromagnetic inductive sensor, which, unlike electrostatic equipment, can read the scale despite the presence of dust, dirt, water and oil. The unit also features a redesigned IC chip that more than doubles battery life. It is scheduled for broad release this spring.

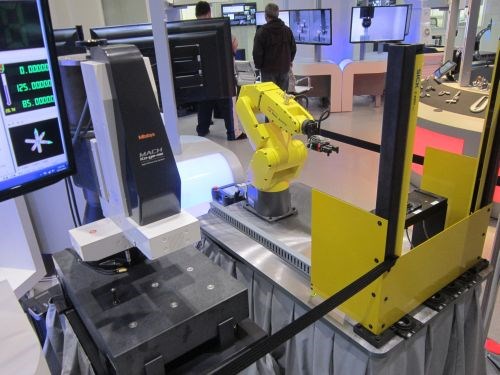
*Robot-integrated CMM. Company representatives noted that the Mitutoyo Solutions Group is increasingly helping customers integrate metrology systems with shop-floor automation. This demonstration of a robot-tended MACH Ko-Ga-Me CMM is just one example. Designed for production runs of small parts, compact, 3D measuring system is a fully functional CMM that doesn’t require a master, and it is among the newer additions to the company’s product offering. Sealed linear guides, temperature compensation via sensors that monitor the part and the ambient environment are among the features that make it practical for shopfloor use, as is the fact that it doesn’t rely on traditional air bearings that require a clean environment.

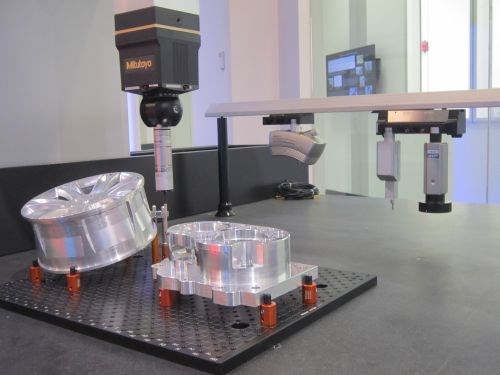
*Multiple sensors, single platform. Automation wasn’t the only trend in evidence at the open house. Manufacturers also increasingly seek to combine different operations on one platform. This demonstration showcased one of Mitutoyo’s Crysta-Apex CMMs switching between a touch probe, scanning probe, laser probe, vision probe, and, perhaps most notably, the company’s SurfTest surface finish probe. This probe-changing capability enables users to avoid multiple setups and use the same system to perform different measurements on different parts.


.jpg;maxWidth=970;quality=90)