Innocent Until Proven Guilty
When something goes wrong with a machining process, it can be easy to misplace blame.
Share


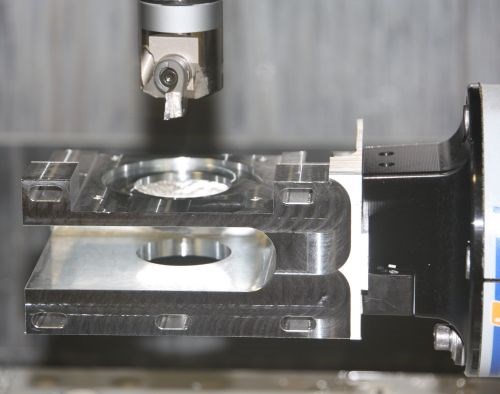
One of N.C.E.’s Kaiser series 310 EWN finish-boring heads goes to work on a medical industry motor mount in 6061-T6 aluminum. The 73.1-mm-diameter bore is held to a tolerance of +0.015/-0 mm.
When out-of-tolerance bores started relegating valuable parts to the scrap heap, personnel at N.C. Engineering naturally faulted the one thing in the process that had changed: the machine tool. Even more frustrating than the scrapped parts was the fact that a new machine representing and investment of hundreds of thousands of dollars had to be relegated to low-tolerance parts, which wasn't exactly what the company had in mind.
However, on closer examination, it turned out that the boring head the shop had been using simply wasn't rigid enough to withstand the force of the tool-change cycle, an understandable oversight given that the machine was the company's first 50-taper. This article describes how a new boring head from Big Kaiser Precision Tooling got the machine back on-target.
This story could just as easily involved a cutting tool, workholding device or any other piece of equipment. Regardless, the lesson remains the same: When a new production resource doesn't work out as planned, it's often worth delving a little deeper to find the real problem.
Related Content
-
Orthopedic Event Discusses Manufacturing Strategies
At the seminar, representatives from multiple companies discussed strategies for making orthopedic devices accurately and efficiently.
-
Finding the Right Tools for a Turning Shop
Xcelicut is a startup shop that has grown thanks to the right machines, cutting tools, grants and other resources.
-
How to Mitigate Chatter to Boost Machining Rates
There are usually better solutions to chatter than just reducing the feed rate. Through vibration analysis, the chatter problem can be solved, enabling much higher metal removal rates, better quality and longer tool life.


.jpg;maxWidth=300;quality=90)


