How To Succeed At Failure
Your cutting tool’s failure mode may be telling you what to change about the process. Not every failure mode is the same, and one mode is preferable to all the others.
Share


Cutting tools fail in different ways. The same cutting edge used in two different processes may succumb to two different types of failure. Cutting tool suppliers study these failure modes, but is information about the failure mode really relevant to production? That is, given that the tool user is most interested in knowing when the tool is going to fail, is it also worthwhile for that user to determine just how the tool is failing?
Robert Sullivan and Don Yordy of Ingersoll Cutting Tools (Rockford, Illinois) both say yes. Knowing the failure mode for a particular tool in a given process is indeed useful. Mr. Sullivan is the manager of coating technologies for Ingersoll Cutting Tools, and Mr. Yordy is the manager of the company’s technical center.
They say that one benefit of recognizing the failure mode relates to diagnosis. Certain wear types suggest certain problems, indicating how the tool or process might be changed to improve not just tool life but also cutting performance.
Another benefit relates to consistency. Tools fail through different fundamental mechanisms. They include abrasion, heat, mechanical impacts and chemical interaction. These mechanisms lead to the variety of failure modes that are covered in this article. However, one mechanism and its related failure mode are preferable to all others. That failure mode is abrasive wear. This wear type indicates a stable and reliable process, and the gradualness and predictability of abrasive wear can often be leveraged to improve the process’s effectiveness.
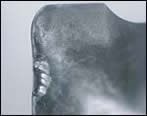
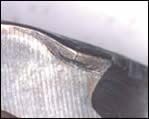
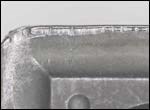
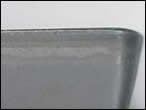
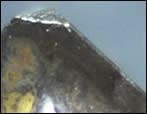
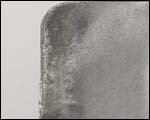
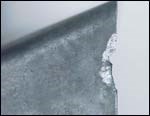
Determining the failure mode does not have to be difficult, Mr. Sullivan and Mr. Yordy say—just pull the tool. Specifically, pull it at about 30 percent and 70 percent of the tool life you currently expect. Examine the cutting edge at these stages, comparing the wear you see with the photos in this article and the failure mode descriptions below.
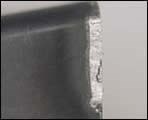
Abrasive Wear
Again, abrasive wear is the ideal mode of failure. Abrasive wear is caused by the workpiece material rubbing across the primary clearance surface of the tool. For a particular insert number from a particular manufacturer in a given process, abrasive wear tends to be repeatable, and therefore predictable.
Abrasive wear also tends to telegraph its progress. This is another reason why abrasive wear is preferred. Some clue in the cut will generally make it clear that the abrasive wear is increasing. The clue may be visual, taking the form of burrs on the part or a change in the machined finish. Or it may be audible, such as a gradual change in the sound of the cut. Clues such as these can make it easy to determine when the insert needs to be changed.
Because abrasive wear is the ideal wear type, there is little about the process that should be changed when this wear is encountered. However, certain grades and coatings do offer higher resistance to wear, particularly at higher speeds. If the tool is wearing abrasively, switching to one of these grades or coatings may extend the life.
Cratering
In general, the problem known as cratering could refer to any wear that is caused by the workpiece material interacting
with the insert’s rake face. The most well-known cratering involves a chemical reaction between a steel workpiece and a carbide tool, in which carbon out of the rake face dissolves into the chip. However, cratering might also be caused by the abrasive action of the chip across the rake face, as when cast iron is cut at high speeds.
The danger of cratering is that the cutting edge often remains intact. The tool can keep cutting relatively well until it fails unexpectedly and catastrophically.
The possible solutions involve protecting the rake face. They include:
- Reduce the speed to reduce the cutting edge temperature.
- Reduce the feed rate to reduce the stress on the insert.
- Select a coated grade to protect the rake face.
- Change geometry to reduce the force that is directed to the rake face.
Notching
Notching occurs because something about the surface of the workpiece creates a more difficult cutting condition than what the rest of the tool is experiencing at the full depth of cut. The reason for the difference in cutting conditions at the surface may relate to a workpiece’s surface scale, or it may relate to cold-forming stresses or work hardening. It may also relate to something seemingly more innocuous—for example, paint. Paint on a workpiece surface is prone to have a quenching effect on the cutting edge that obviously isn’t present deeper into the part.
Potential solutions may relate to whether the notching is caused by chipping or abrasive wear. Depending on this wear type, switching to an insert grade with either higher mechanical shock resistance or higher wear resistance might do.
Other potential solutions involve increasing the lead angle, for greater shearing action and a thinner chip, or increasing the hone size to increase the edge strength.
Yet another potential solution does not involve a change to the tool. Try varying the depth of cut between passes. A varying depth allows the wear to be concentrated along different parts of the edge.
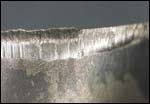
Thermal Cracking
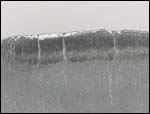
Most machine tool users associate thermal cracking with coolant. When the coolant covers the cutting edge inconsistently, the edge temperature may fluctuate. This causes the insert to expand and contract, leading to cracking of the edge.
However, thermal cracking can also set in without coolant. For example, dry milling can involve temperature fluctuations sufficient for fatigue cracking, as the edge moves in and out of the material. In this non-coolant thermal cracking, the cracks in the insert are straight and parallel. By contrast, in thermal cracking involving coolant, the temperature fluctuation is more random, and the resulting non-parallel cracks are prone to produce chipping.
Potential solutions for thermal cracking include these:
- Reduce the speed to reduce the cutting edge temperature.
- Turn the coolant off to reduce the extent of change between high and low temperatures.
- Select a grade with higher thermal shock resistance.
- Select a coated grade. In particular, a PVD coating can make it more difficult for cracks to get started, because a coating applied in this way offers a compressive stress to the insert’s surface.
Chipping And Fracturing
Like thermal cracking, chipping or fracturing is not “wear” per se. This failure mode involves pieces of the cutting edge breaking away because the edge is too fragile to withstand the impact it receives. Either the impact or the edge needs to be addressed.
Potential solutions include:
- Select a grade with higher mechanical shock resistance—that is, higher toughness.
- Increase the lead angle to produce a thinner chip and greater shearing action.
- Improve system rigidity. This might involve improving the stability of the setup or improving how well the machine is maintained.
- Increase the hone size for increased edge strength.
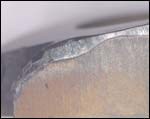
Built-Up Edge
In a way, built-up edge can be a satisfying problem to solve. The solution can involve increasing the speed, which may result in higher productivity.
Built-up edge occurs because the workpiece material becomes welded to the tool. The chip gets hot enough to become sticky, but then it cools fast enough to adhere to the insert. The potential solutions involve preventing the chip from becoming so hot, or else increasing the heat so that the chip doesn’t cool until after it has left the tool.
To prevent the chip from getting hot enough to weld, try applying coolant. Other possible solutions include using a more positive radial or axial rake to decrease the force, or selecting a coated grade. The coating can both decrease friction and decrease the likelihood of a reaction between the tool and work.
The opposite approach, getting the chip hotter, is where the speed comes in. Increasing the speed and/or the feed rate may succeed at putting enough extra heat into the chip to prevent the built-up edge from sticking.
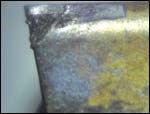
Deformation
Deformation involves a softening and warping of the insert under the heat and pressure of the cut.
Deforming a material as hard as carbide may seem strange, but the occurrence of deformation is actually on the rise. There was a time when carbide’s heat resistance was so much better than machine tools’ capabilities that there was practically no danger of deformation under the conditions the machines could apply. Machine tool performance has since advanced, and the highest performing machine tools today can apply tools aggressively enough to deform the tool, under conditions stable enough that the carbide does not fail by fracturing.
When deformation is a danger, the possible solutions include:
- Reduce the speed to reduce the heat.
- Reduce the feed rate to reduce the pressure on the tool.
- Select a grade with higher thermal or wear resistance.
- Reduce hone size or change to a more positive geometry to reduce the stress and heat on the cutting edge.
- Select a coated grade. Specifically, use titanium aluminum nitride or an aluminum oxide coating, either of which can be effective at insulating the tool from extreme heat in the cut.
Related Content
The Future of High Feed Milling in Modern Manufacturing
Achieve higher metal removal rates and enhanced predictability with ISCAR’s advanced high-feed milling tools — optimized for today’s competitive global market.
Read MoreGWS Tool Group End Mill Provides Dynamic Milling
Eastec 2023: The Hurrimill AT4 all-terrain end mill features radial-end gashing, which enables drilling, steep ramping and aggressive helical entry.
Read MoreKennametal's Expanded Tooling Portfolio Improves Performance
The company has launch eight new products that expand on and support existing platforms across multiple applications.
Read MoreTungaloy Drills, Milling Inserts Provide Enhanced Stability
Tungaloy has expanded its DrillForceMeister and TecMill lines with new drill bodies and milling inserts.
Read MoreRead Next
Upgrade Your Cutting Tool Mindset
A handful of timely observations may boost the productivity of your thinking about cutting tools.
Read More5 Rules of Thumb for Buying CNC Machine Tools
Use these tips to carefully plan your machine tool purchases and to avoid regretting your decision later.
Read MoreSetting Up the Building Blocks for a Digital Factory
Woodward Inc. spent over a year developing an API to connect machines to its digital factory. Caron Engineering’s MiConnect has cut most of this process while also granting the shop greater access to machine information.
Read More




.jpg;maxWidth=300;quality=90)


