Gage Improves Thread Inspection
When Superbolt, Inc., had requests from more and more of its customers to inspect its threads to System 23 (MIL-S-8879A-23) specifications, this producer of Stud/Bolt Tensioners realized it needed to find a new method to control the quality of the company threads.
Share


When Superbolt, Inc. (Carnegie, Pennsylvania) had requests from more and more of its customers to inspect its threads to System 23 (MIL-S-8879A-23) specifications, this producer of Stud/Bolt Tensioners realized it needed to find a new method to control the quality of the company’s threads.
“We evaluated a thread inspection system made by one manufacturer before buying because that company was recommended to us. But because we have such a variety of thread sizes to inspect, that company’s system was cost prohibitive for us,” says Mike Restall, production manager at Superbolt. “With the wide variety of threads we manufacture, we found that Gagemaker (Houston, Texas) Functional Thread Roll Inspection gages were more economical and allowed us to quickly produce threads without buying commercial ring and plug gages.” According to Mr. Restall, the company has experienced a 20 percent time savings in thread inspection with the thread roll gages, especially in first piece throughput.
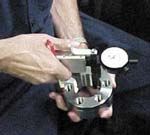
Gagemaker, a manufacturer of precision dimensional inspection equipment, designed the Functional Thread Roll gages to inspect “thread element variation.” Focusing on the need to report precise dimensional measurements, rather than the comparative fit of ring and plug gages, the thread roll gages have indicators to display exact diameter readings.
“The gage system was not very difficult to implement and was well accepted by the employees, since it saves time during the manufacturing process and takes the guesswork out of inspection,” says Mr. Restall. Since the gage is easy to set up and operate, training time is minimal. In fact, Superbolt also provides the gage to machine shops that manufacture big columns for their torque nuts.
Another advantage of the gage is that it allows quicker turnaround of special threads. Mr. Restall adds, “Since we don’t need to purchase inspection gages for every thread size, we keep unthreaded products on the shelf and we can produce threaded product almost immediately.”
Superbolt continues to find new uses for the gage. For example, by substituting cylindrical rolls for the thread rolls, it also checks bores and minor diameters of internal parts. Gagemaker’s Functional Thread Roll Inspection System has provided Superbolt with a variety of inspection solutions and a method to produce higher quality threads that meet its customers’ needs.
Since the range of threads Superbolt manufactures spans from ½ inch to 30 inches, using ring and plug gages required gages for each thread size and type. With the Functional Thread Roll Inspection system, one adjustable gage measures a range of diameters, and gages are available for ranges of diameters from 5/8 inch through 24 inches.
Gagemaker’s functional gages, which are available in two models for inspecting internal or external thread forms, use precision ground thread rolls. To achieve accuracy, the thread rolls are ground in matched sets. Each set of thread rolls measures a specific thread type for a range of diameters.
Before inspecting a part, the thread roll gages must be preset to a nominal predetermined dimension. However, these gages do not require ground threaded setting masters, but they can be preset using gage blocks, micrometers or Gagemaker’s MIC TRAC measurement center. Superbolt has a 12-inch MIC TRAC in the tool room used by manufacturing and a 36-inch MIC TRAC in the quality lab making gage setting easily accessible to all employees using the thread roll gages.
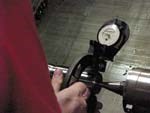
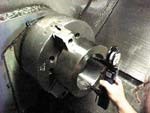
Once the gage is set, inspectors at Superbolt insert the gage into the thread form and take an indicator reading. The gage inspects the effects of all thread elements and reports deviations in functional diameters in just seconds. This information is critical for Superbolt’s inspection of crosshead nuts and piston nuts on compressors, which require System 23 specifications. Also, the use of GO/NOT GO gaging techniques and excessive wear on parts or gages is eliminated.
Another feature of the thread roll gage is the exact threading offset data it provides to machinists. “We use the gages at the machine and in quality for final inspection,” says Mr. Restall. “Since we started using the gages, we have been able to pinpoint problems in tooling and machines, which in turn helps us to improve the quality of our threads.”
Related Content
Help Operators Understand Sizing Adjustments
Even when CNCs are equipped with automatic post-process gaging systems, there are always a few important adjustments that must be done manually. Don’t take operators understanding these adjustments for granted.
Read MoreThe Link Between CNC Process Control and Powertrain Warranties
Ever since inventing the touch-trigger probe in 1972, Sir David McMurtry and his company Renishaw have been focused on achieving process control over its own manufacturing operations. That journey has had sweeping consequences for manufacturing at large.
Read MoreParts and Programs: Setup for Success
Tips for program and work setups that can simplify adjustments and troubleshooting.
Read MoreTurning Fixed-Body Plug Gages Inside Out
Fixed-body mechanical plug gages provide fast, high-performance measurement for tight-tolerance holes.
Read MoreRead Next
Setting Up the Building Blocks for a Digital Factory
Woodward Inc. spent over a year developing an API to connect machines to its digital factory. Caron Engineering’s MiConnect has cut most of this process while also granting the shop greater access to machine information.
Read MoreRegistration Now Open for the Precision Machining Technology Show (PMTS) 2025
The precision machining industry’s premier event returns to Cleveland, OH, April 1-3.
Read More5 Rules of Thumb for Buying CNC Machine Tools
Use these tips to carefully plan your machine tool purchases and to avoid regretting your decision later.
Read More


