How to Correct for Cosine Error
A small shopfloor network lays the groundwork for large-scale, low-cost DNC throughout a major manufacturing facility.
Share


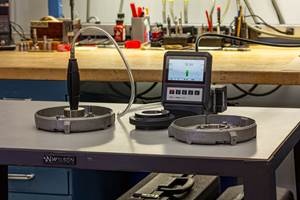
The lever-type test indicator is among the basic tools for comparative measurement. Extremely versatile and capable of high accuracy, mechanical test indicators (and their close cousin, the electronic lever-type gage head) are commonly used with height stands for both dimensional and geometry measurements, and in many machine setup tasks. Although they are generally easy to use, test indicator measurements are subject to a common source of error called cosine error.
Cosine error occurs when the contact arm is not set in the proper relationship to the part. As shown in Figure 1, the arm should be set parallel to the part surface, so that contact tip movement is essentially perpendicular to the part, as the part dimension varies. This is usually easy to arrange, because the arm is held in place by a friction clutch, and can be readily adjusted even if the body of the test indicator is at an angle to the part (Figure 2). But when the arm is at an angle to the part (Figure 3), the contact tip is also displaced across the part surface as the dimension varies, increasing the apparent deviation from nominal, as registered by the indicator. The steeper the angle, the greater the cosine error.
There are circumstances, however, where it is not possible to set the contact arm parallel to the workpiece because of some interference. When this is the case, two options are available.
A special contact with an involute tip (shaped somewhat like a football) automatically corrects for cosine errors up to 20 degrees from parallel. This is often the easiest solution to the problem. Where the angle is greater than 20 degrees, or where the angle is less than 20 degrees but an involute-tipped contact is unavailable or inconvenient to use, a couple of simple formulas may be applied to calculate and correct for cosine error.
Cosine Error Correction = 3D displayed measurement x cosine (angle)
Difference = 3D displayed measurement AD Cosine Error Correction
Cosine Error Correction is a simple, one-step formula to calculate the part's actual deviation from nominal — in other words, the correct measurement. The Difference formula calculates the error itself.
Depending upon the tolerances involved and the critical nature of the measurement, the angle of the contact arm to the part may be estimated by eye, or with a protractor. (Generally speaking, if they look parallel, it's close enough.) Remember that, if you're using the formulas, you must use a standard contact with a ball-shaped tip, not an involute tip. Let's run through an example.
The part spec is 1.000 inch +0.009inch. The contact arm is at 30 degrees to the part. The indicator reads +0.010 inch.
Cosine Error Correction = 0.010 inch x cosine 30
degrees = 0.010 inch x 0.866 = 0.00866 inch
Difference = displayed measurement - cosign error correction
The gage reading is off by 0.00134 inch, and the actual deviation from nominal is 0.00866 inch, not 0.010 inch as displayed. In other words, the part is within tolerance, even though the gage says it's out of tolerance. In this case, failure to recognize and correct for cosine error would result in rejecting a good part.
In general, it's easier to rely on an involute tip to correct for errors at low angles, and save the formula for instances where it's not possible to orient the contact arm within 20 degrees of parallel to the part. But whichever method is used, make sure that cosine error is understood and corrected.
Related Content
6 Variations That Kill Productivity
The act of qualifying CNC programs is largely related to eliminating variations, which can be a daunting task when you consider how many things can change from one time a job is run to the next.
Read More4 Commonly Misapplied CNC Features
Misapplication of these important CNC features will result in wasted time, wasted or duplicated effort and/or wasted material.
Read MoreRethink Quality Control to Increase Productivity, Decrease Scrap
Verifying parts is essential to documenting quality, and there are a few best practices that can make the quality control process more efficient.
Read MoreHow to Choose the Correct Measuring Tool for Any Application
There are many options to choose from when deciding on a dimensional measurement tool. Consider these application-based factors when selecting a measurement solution.
Read MoreRead Next
Setting Up the Building Blocks for a Digital Factory
Woodward Inc. spent over a year developing an API to connect machines to its digital factory. Caron Engineering’s MiConnect has cut most of this process while also granting the shop greater access to machine information.
Read MoreBuilding Out a Foundation for Student Machinists
Autodesk and Haas have teamed up to produce an introductory course for students that covers the basics of CAD, CAM and CNC while providing them with a portfolio part.
Read More5 Rules of Thumb for Buying CNC Machine Tools
Use these tips to carefully plan your machine tool purchases and to avoid regretting your decision later.
Read More


